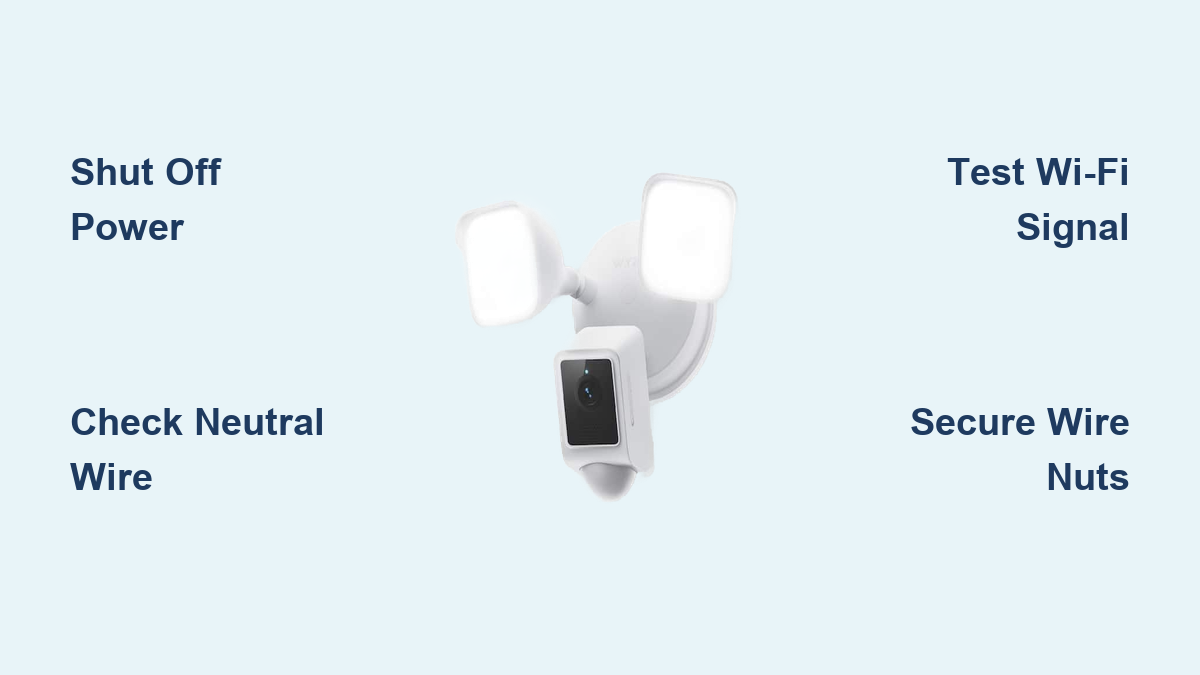

Installing a Wyze Floodlight transforms your home’s exterior into a smart security hub with HD video, motion detection, and powerful lighting in one weatherproof unit. Whether you’re replacing an old fixture or wiring a brand new location, proper Wyze floodlight installation ensures safe operation, reliable connectivity, and optimal coverage. This guide covers every step for the original Wyze Cam Floodlight, v2, and Pro models, helping you avoid common pitfalls and complete the job in about 30 minutes.
You’ll learn how to verify your electrical setup, connect wiring safely, pair the device to the Wyze app, and troubleshoot issues if something goes wrong. Every instruction is based on official Wyze procedures for accurate, model-specific results.
Shut Off Power and Verify Electrical Safety
Before touching any wires, safety comes first. Working on a live circuit can cause serious injury or damage your equipment.
Turn Off the Circuit Breaker
Locate your home’s electrical panel and switch off the breaker that controls the junction box where you’ll install the floodlight. Never rely on a wall switch alone, because switches can be wired in ways that leave the junction box energized.
Confirm Power Is Off
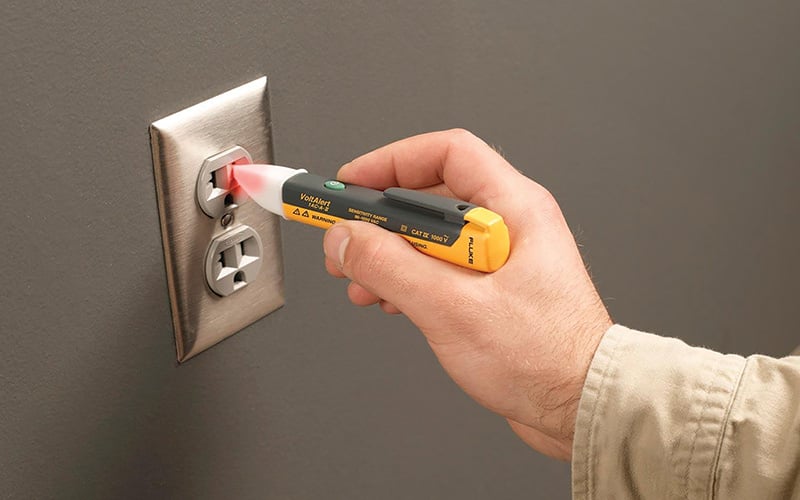
Use a non-contact voltage tester to check the wires inside the junction box. If the tester detects current, return to the panel and shut off the correct breaker. Repeat until the tester confirms zero voltage.
Check Local Electrical Codes
Some jurisdictions require permits or mandate professional installation. Contact your local building authority before starting. If your area requires a licensed electrician for this work, hire one rather than proceeding yourself.
Confirm You Have the Required Wiring
The Wyze Floodlight cannot operate without specific electrical infrastructure. Verifying this early prevents wasted effort.
You Need a Junction Box and Neutral Wire
All three Wyze Floodlight models require:
– An existing junction box mounted at the location
– A neutral wire (typically white) in the circuit
If your junction box lacks a neutral wire, the device is incompatible. Stop the installation and consult a licensed electrician to upgrade your wiring.
Verify Mounting Height
The junction box should sit at least 10 feet above the ground. This height provides optimal lighting coverage and keeps the camera out of easy reach.
Gather Tools and Identify Your Model
Different models include different accessories. Knowing what you have prevents mid-installation surprises.
Original and v2 Tool Requirements
These models ship without tools. You need to supply:
– A Phillips screwdriver
– A ladder if the junction box is high
Wyze Cam Floodlight Pro Tool Requirements
The Pro includes a Phillips screwdriver in the box. You may still need a ladder depending on mounting height.
Check Your Package Contents
Every model includes:
– Mounting bracket
– Hook for hanging the unit during wiring
– Rubber stopper for weatherproofing
– Floodlight screw
– Ground wire screw
– Two wire nuts
– Six bracket screws in assorted sizes
The Pro model specifies screw lengths: #6 (3/4 inch), #8 (3/4 inch), and #10 (1/2 inch).
Begin Setup in the Wyze App
The app guides the entire installation. Start here before climbing any ladders.
Launch Installation Mode
Open the Wyze app and follow this path:
1. Tap the + icon to add a device
2. Select Cameras
3. Choose Floodlight Camera
4. Pick your model: original, v2, or Pro
A High Voltage Warning appears. Read it and tap Got it!
Choose Your Installation Scenario
The app offers two paths:
– Replacing an existing floodlight: Select this if removing an old fixture. The app reminds you to shut off power and remove the old unit.
– New installation: Select this if no previous fixture exists. The app asks whether you have a junction box. If you answer no, the process stops and directs you to an electrician.
After confirming your junction box, verify it sits at least 10 feet high.
Test Your Wi-Fi Signal Strength
Weak signals cause pairing failures. Test before mounting anything.
Run the Signal Check
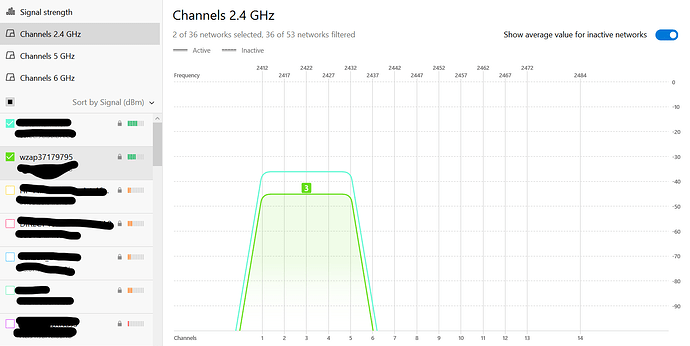
Navigate to Check Your Wi-Fi Signal Strength in the app. The floodlight only connects to 2.4 GHz networks, not 5 GHz.
Interpret Results
Acceptable results show signal present. Unacceptable results include out of range, poor connection, or weak signal. If your signal fails, place a Wi-Fi extender nearby or contact your ISP before continuing.
Once the signal passes, tap Continue Setup and then Start Installation.
Mount the Bracket to the Junction Box
With power confirmed off, begin the physical installation.
Align and Secure the Bracket
Place the mounting bracket over the junction box. Align the screw holes on the bracket with the holes on the box. Insert the appropriate bracket screws based on fit:
– Try #6, #8, or #10 screws as needed
– Use the included screwdriver for the Pro model
Tighten until the bracket sits flush and stable against the surface.
Ground the Floodlight
Grounding protects against electrical faults and is essential for safe operation.
Attach the Ground Wire
Locate the ground wire from the junction box. This wire is typically green or bare copper. Use the provided ground wire screw to attach it to the middle of the mounting bracket. Tighten firmly to ensure a solid connection.
Hang the Floodlight for Easy Wiring
The included hook keeps the heavy unit suspended while you work.
Use the Hook Accessory
Hang the Wyze Floodlight on the mounting bracket using the hook. This frees both hands for wiring and prevents the unit from dangling by its wires, which could damage connections.
Connect the Neutral Wires
The neutral wire completes the circuit and powers the device.
Match and Secure the White Wires
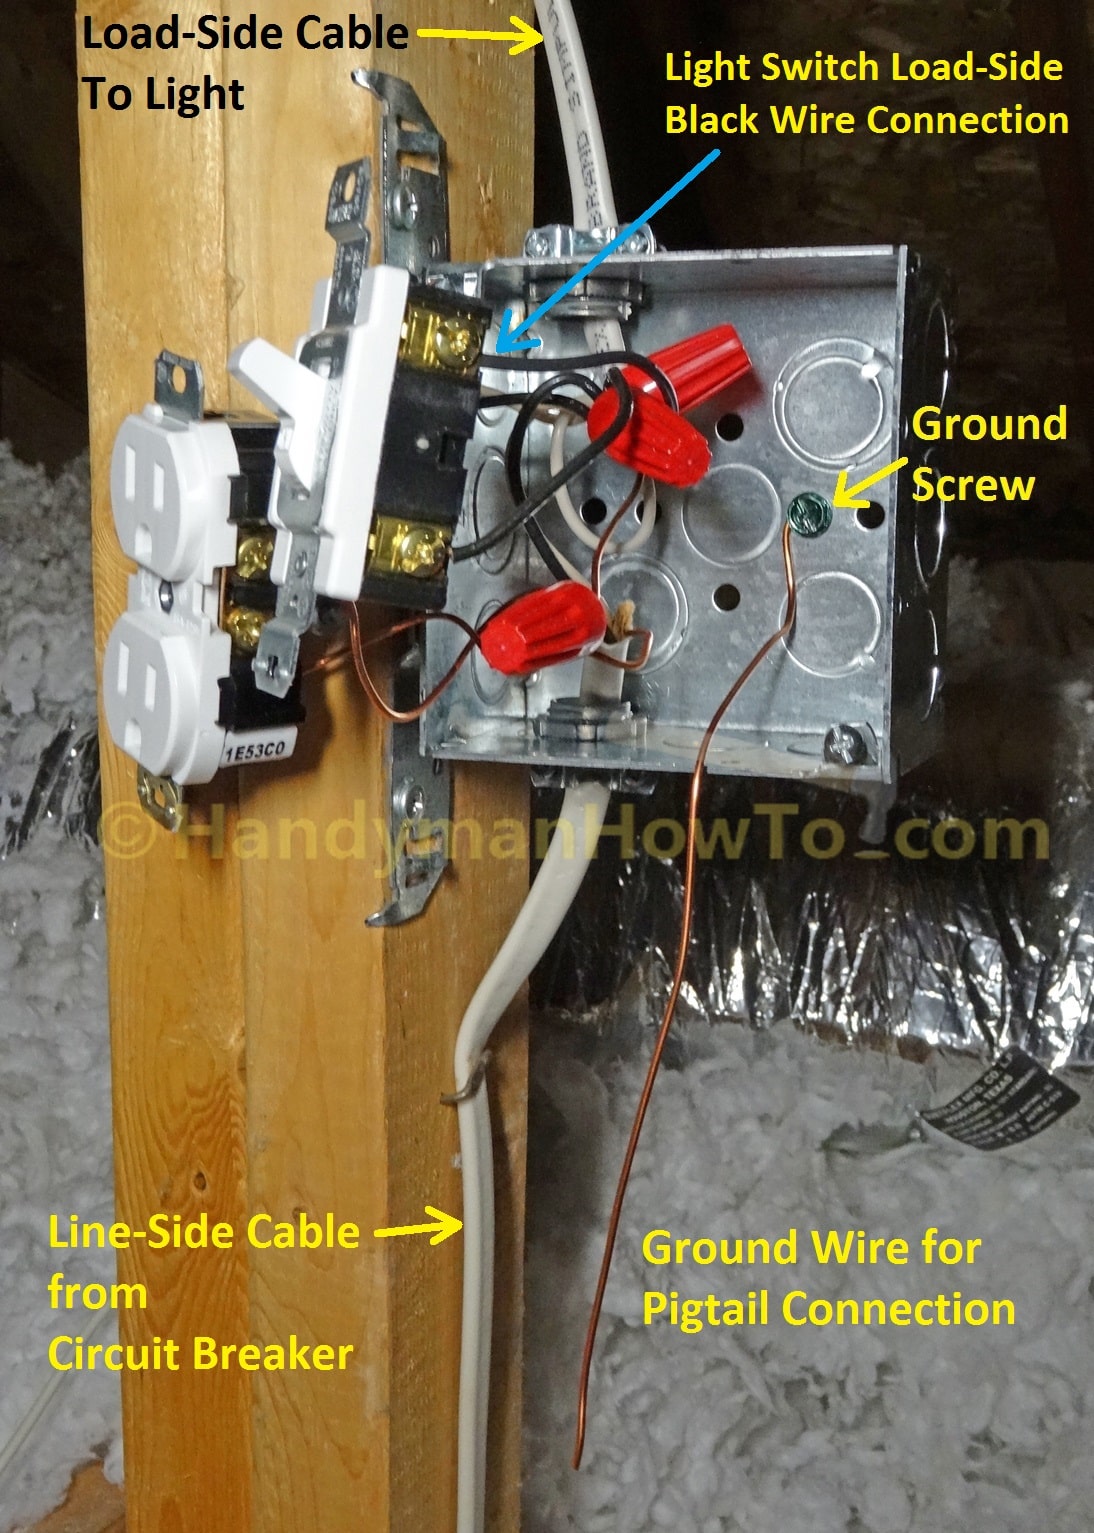
- Hold the exposed copper ends of the white wire from the floodlight and the white wire from the junction box together
- Place a wire nut over the joined ends
- Twist the wire nut clockwise 5 to 10 full turns
- Gently tug both wires to confirm they hold firm
- Check that no bare copper shows below the nut
If either wire slips out, redo the connection. Loose neutrals cause intermittent power or total failure.
Connect the Hot Wires
The hot wire carries power from the breaker to the floodlight.
Match and Secure the Black Wires
- Pair the black wire from the floodlight with the black wire from the junction box
- Cap them with the second wire nut
- Twist clockwise 5 to 10 times
- Pull-test for firmness
- Confirm no exposed copper remains visible
Tuck Wires and Avoid Pinching
Careless wire management can cause shorts or overheating.
Push Wires Into the Junction Box
Carefully fold the connected wires back into the junction box. Verify that no wires are pinched between the mounting bracket and the floodlight base. Pinched wires create fire hazards and equipment damage.
Lock the Floodlight in Place
With wiring complete, secure the unit to the bracket.
Insert the Floodlight Screw
Align the floodlight with the bracket holes. Insert the floodlight screw, labeled “Long” on the Pro model. Tighten fully to lock the device in position.
Seal With the Rubber Stopper
Place the rubber stopper over the screw head. This step prevents moisture intrusion and corrosion, extending the life of your installation.
Adjust Camera and Light Angles
Position the components before finalizing setup.
Tilt for Optimal Coverage
Manually adjust:
– The camera lens for the best field of view
– The floodlight heads to illuminate driveways, doorways, or dark zones
Adjustment is easier before any final tightening, so take time to set the angles correctly now.
Restore Power and Check Status Lights
Bring the system online.
Turn On the Breaker
Return to the electrical panel and flip the breaker back on. Wait a few seconds for the device to initialize.
Observe the Status Light
Behavior varies by model:
– Original and v2: The status light should flash red
– Pro: The light starts solid red, then changes to flashing purple when ready
If no light appears, press and hold the SETUP button on the side of the camera for 3 seconds to reboot. If still unresponsive, hold for 10 seconds to force a reset.
Complete App Pairing and Configuration
Return to the Wyze app to finish setup.
Confirm the Flashing Light
Check the box confirming the light is flashing red (or purple for Pro). Tap Next and wait for the voice prompt announcing “Ready to connect.”
If you hear the prompt, tap Next. If silent, hold the SETUP button for 10 seconds and retry.
Grant Location Access
Allow location permissions in the app. This enables the Dusk to Dawn feature by syncing with your local sunrise and sunset times.
Connect to 2.4 GHz Wi-Fi
Select your 2.4 GHz network. Enter the password carefully and use the eye icon to verify each character. Wait while the device connects. If pairing fails, ensure your phone is on the same network, reboot your router, and retry after the voice prompt repeats.
Name Your Device
Assign a name like “Front Porch” or “Backyard Light.” Tap Finish to complete setup.
Explore Post-Setup Options
Customize your experience after installation.
Try Cam Plus Features
You may see a prompt for a Cam Plus free trial. Tap Continue to enable advanced AI detection or skip if you prefer.
Review Automation Suggestions
The app displays a “Things to Try” checklist:
– Create a device group
– Share access with family members
– Set motion-triggered automations
Complete tasks or tap Skip then Done to exit.
Troubleshoot Common Installation Issues

Quick fixes for frequent problems.
No Power After Installation
Check whether the breaker is on, verify wire nut connections with a tug test, and confirm a neutral wire exists. If the device still fails to respond, press the SETUP button to reboot.
Wi-Fi Connection Fails
Switch to a 2.4 GHz network if you’re on 5 GHz. Install a Wi-Fi extender for weak signals. Use the eye icon to verify your password. Temporarily move your router closer during setup if possible.
Light Flashes but Won’t Pair
Hold the SETUP button until the red light flashes rapidly. Wait for the voice prompt and retry the app connection immediately. This resets pairing mode.
Maintain Long-Term Performance
Protect your investment with simple upkeep.
Keep the Mounting Screw Protected
Always ensure the rubber stopper covers the screw head. This prevents rust and water damage over time.
Clean Lens and Light Covers
Tilt the camera down and wipe the lens with a microfiber cloth. Clean the light covers to maintain brightness and image clarity.
Update Firmware Regularly
Wyze pushes updates automatically through the app. Enable notifications so you never miss an important security patch or feature enhancement.
Frequently Asked Questions About Wyze Floodlight Installation
Can I install a Wyze Floodlight without a neutral wire?
No. All Wyze Floodlight models require a neutral wire to complete the circuit. If your junction box lacks one, stop the installation and hire a licensed electrician to upgrade your wiring.
Does the Wyze Floodlight work with 5 GHz Wi-Fi?
No. The floodlight only supports 2.4 GHz networks during initial pairing. Make sure your phone is connected to a 2.4 GHz network before attempting setup.
How long does Wyze floodlight installation take?
Most users complete the process in about 30 minutes when they have an existing junction box and neutral wire. New installations or troubleshooting may take longer.
What mounting height is recommended?
The junction box should sit at least 10 feet above the ground. This height provides optimal lighting coverage and keeps the camera out of easy reach.
Why is my floodlight not connecting to Wi-Fi?
Common causes include using a 5 GHz network, weak signal strength, or an incorrect password. Switch to 2.4 GHz, install an extender if needed, and verify your password using the eye icon.
What does the status light color mean?
On original and v2 models, a flashing red light indicates pairing mode. On the Pro model, the light starts solid red and changes to flashing purple when ready for setup.
Key Takeaways for a Successful Wyze Floodlight Installation
A reliable Wyze floodlight installation depends on three essentials: safety, correct wiring, and strong Wi-Fi. Always shut off power at the breaker before touching wires, verify your junction box has a neutral wire, and test your 2.4 GHz signal before mounting the unit.
Follow the app-guided steps in order, use the included hook to hang the device during wiring, and twist wire nuts 5 to 10 times for secure connections. After mounting, seal the screw with the rubber stopper and adjust your camera and light angles before completing software setup.
Your Wyze Floodlight is now ready to deter intruders, illuminate dark areas, and record events around the clock. If you encounter issues beyond basic troubleshooting, contact Wyze support or a licensed electrician for professional assistance.