You flip the switch expecting your outdoor space to light up, but nothing happens. No flicker, no dim glow, just darkness. A halogen flood light not working can leave your home vulnerable, your driveway pitch black, and your security compromised. Whether it’s a backyard fixture or a motion-activated security light, the silence is frustrating.
The good news is that most halogen flood light failures come from a handful of common culprits. A burnt-out bulb, corroded socket, tripped breaker, or failed motion sensor account for the vast majority of issues. With the right diagnostic approach, you can identify and fix the problem in under 30 minutes without calling an electrician.
This guide walks you through a complete troubleshooting process. You will learn how to safely inspect every component, test voltage with a multimeter, identify hidden failures like relay burnout, and decide whether to repair or upgrade to LED. By the end, you will have the confidence to restore your light and prevent future outages.
Safety First: Avoid Burns and Electrical Shocks
Before touching any part of your flood light, you need to follow critical safety rules. Halogen bulbs operate at temperatures up to 1000°F, hot enough to cause instant burns. Even after switching off the power, let the fixture cool for at least 15 to 20 minutes before handling.
Always turn off power at the circuit breaker, not just the wall switch. Use a non-contact voltage tester to confirm no electricity is flowing to the fixture. This single step prevents accidental electrocution when handling wires or sockets.
Wear insulated gloves and use tools rated for electrical work. If you feel uncertain about any step, stop and consult a licensed electrician. Never touch a halogen bulb with bare hands. Skin oils leave residue that creates hot spots when heated, leading to premature failure or even shattering. Always handle bulbs with clean gloves or a soft cloth.
Check the Bulb: Rule Out the Simplest Cause
Inspect for Filament Damage
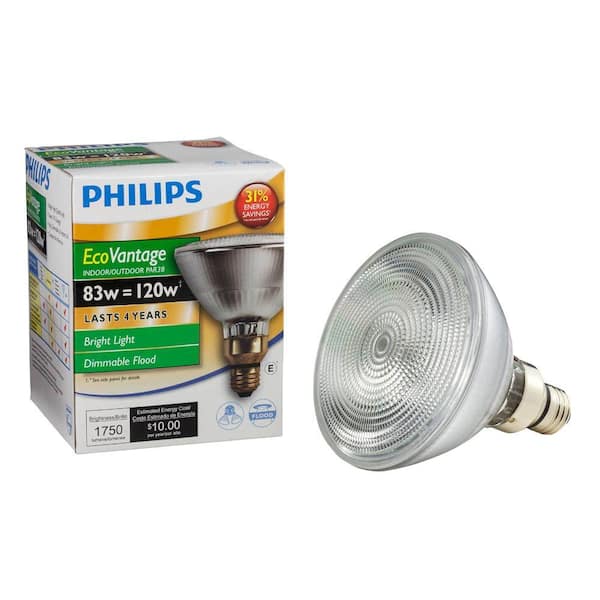
The most common reason a halogen flood light fails is a burnt-out bulb. Start here even if the bulb looks fine on the outside.
Remove the bulb carefully using gloves or a clean cloth. Hold it up to a light source and look inside the glass envelope. A broken, sagging, or missing filament means the bulb is dead.
Also check for blackening on the glass. Dark spots indicate the bulb has burned out or is nearing end-of-life. Some halogen bulbs fail gradually, dimming before dying completely.
Test with a Known Good Bulb
Even if your bulb appears intact, replace it with a new, working unit of the same wattage and base type (such as MR16 or PAR38). New bulbs can occasionally be defective right out of the box.
For multi-bulb fixtures, test each socket individually. If one new bulb works but another does not, the issue may be socket-specific rather than a general power failure.
Cross-Test Between Fixtures
If you have a second working flood light, swap bulbs between them. If the suspected bad bulb lights up in the good fixture, your original fixture has a deeper problem. If the known good bulb fails in the non-working fixture, the issue lies in the fixture itself, not the bulb.
This simple cross-test isolates whether the fault is in the bulb or the system.
Examine the Socket: Heat Destroys Connections
Look for Corrosion and Burning
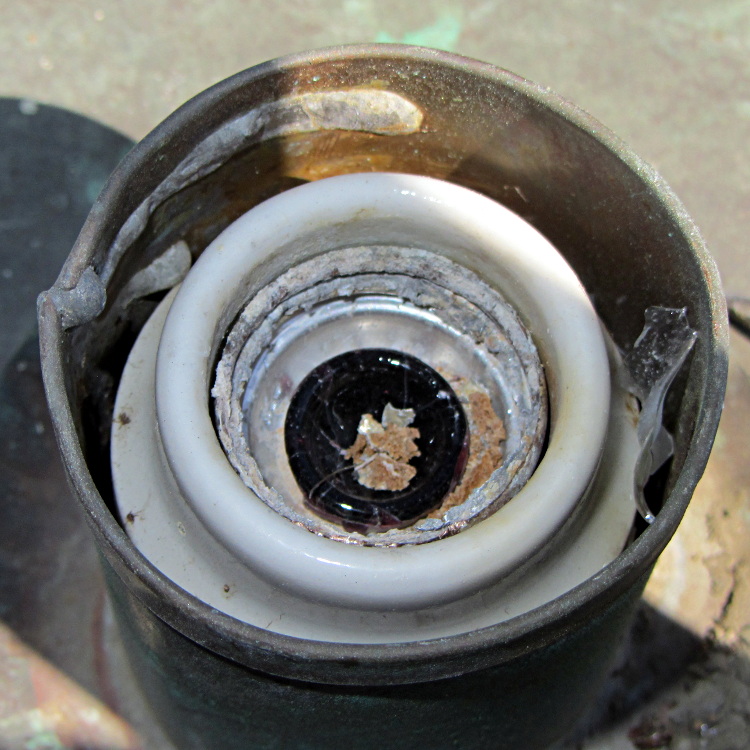
Halogen sockets endure extreme heat, which leads to oxidation, blackened contacts, and melted plastic. With power off, remove the bulb and inspect the socket thoroughly.
Shiny brass contacts should be bright and springy. If they are black, crusty, or pitted, corrosion is blocking electrical flow.
Use a flashlight to check the center tab and side contacts. A collapsed or loose center tab will not make proper contact with the bulb base.
Clean and Adjust Contacts
If contacts are corroded, gently scrape them with a small screwdriver or contact cleaner tool until shiny metal appears. Avoid excessive force, as damaging the socket worsens the problem.
For spring-loaded contacts, use needle-nose pliers to gently squeeze them inward. This restores tension and ensures a tight grip on the bulb.
Do not forget to clean the bulb base too. Dirt or residue can interfere with conductivity even if the socket is clean.
Replace Damaged Sockets
If the socket is cracked, melted, or the contacts are warped beyond repair, replace the entire socket. These parts are inexpensive and widely available at hardware stores.
Turn off power, disconnect wires, and wire in the new socket using wire nuts or screw terminals. Match wire colors (black to black, white to white) and secure connections tightly.
Test Voltage: Confirm Power Delivery

Use a Multimeter to Check Output
A dark light does not always mean no power is reaching the fixture. Use a multimeter to test for voltage at the socket.
Set your meter to AC voltage (V~). With power on, insert probes into the socket:
– One probe to the center contact
– One to the threaded side or neutral terminal
For standard 120V halogen lights, you should read close to 120 volts. For low-voltage systems like track lighting, expect around 12V.
If you get zero volts, power is not reaching the socket. Move upstream to check switches, sensors, and transformers.
Check Under Load for Hidden Issues
A socket may show voltage when idle but drop significantly when a bulb is installed. This indicates a high-resistance connection or a failing component.
To test under load:
1. Install a working bulb
2. Turn on the light
3. Measure voltage across the socket while the bulb is in place
If voltage drops below 80% of expected (for example, below 96V on a 120V system), there is insufficient current to power the bulb. The issue could be a loose wire, failing transformer, or degraded relay.
Diagnose the Transformer (Low-Voltage Systems)

Verify Input and Output Voltage
Many halogen flood lights, especially track or landscape lights, run on 12V via a step-down transformer.
First, confirm 120V input to the transformer. If missing, check the breaker or upstream switch.
Then test the output. A healthy transformer delivers approximately 12V AC. Significantly higher (around 18V) or lower (around 6V) readings mean the transformer is failing.
Inspect Wiring and Terminals
Loose, corroded, or burnt connections at the transformer terminals can mimic failure. Tighten screws and clean contacts with electrical contact cleaner.
Look for discoloration or bulging, which are signs of internal overheating or short circuits.
Replace, Don’t Repair
Halogen transformers cannot be repaired. If faulty, replace the unit. However, finding an exact match for older models can be difficult.
In many cases, replacing the entire fixture with an LED equivalent is more practical and cost-effective.
Evaluate Control Devices: Sensors and Switches
Motion Sensor Not Turning On Lights
Here is a key diagnostic clue: if the sensor’s LED flashes when motion is detected but the lights do not turn on, the motion detection circuit works, but the internal relay has failed.
Relays switch high-current loads like halogen bulbs. Over time, heat and electrical stress cause them to burn out. The sensor “sees” motion but cannot power the lights.
Try bypassing the sensor temporarily:
1. Disconnect the sensor wires
2. Connect the hot wire directly to the light
3. Turn on power
If the light works, the sensor is the culprit. Replace the sensor module if possible. Otherwise, consider upgrading to a modern LED-compatible motion sensor or a full fixture replacement.
Test the Photocell for Day/Night Failure
Photocells turn lights on at dusk and off at dawn. If your flood light stays on all day or will not turn on at night, the photocell may be faulty.
Test it by covering the sensor with tape or your hand at night. The light should activate within seconds. If it does not, the photocell is bad.
During the day, uncover it. The light should turn off. If it stays on, the sensor is stuck.
Replacement photocells are inexpensive and easy to install. Match the voltage and base type.
Inspect Wiring and Circuit Breaker
Reset Tripped Breakers
Go to your electrical panel and check for tripped breakers. A flood light on a shared circuit may have tripped due to overload.
Flip the breaker fully off, then back on. Do not just toggle it, because many breakers need a full reset to restore function.
If it trips again immediately, there is a short circuit or ground fault. Stop and call an electrician.
Check Fuses (Older Systems)
Some outdoor circuits use fuses instead of breakers. Inspect for blown fuses by looking for a broken filament inside the glass.
Replace only with the same amperage rating to avoid fire risk.
Examine Connections and Junction Boxes
Loose wires in junction boxes, fixture bases, or conduit connections cause intermittent or complete failure.
With power off, open the fixture and inspect:
– Wire nuts: Are they tight? Are wires exposed?
– Terminals: Are screws secure?
– Insulation: Is it cracked or brittle?
Reconnect loose wires using wire nuts or lever connectors. Replace damaged cables entirely.
Analyze Common Failure Patterns
Light Flickers or Stutters
Flickering often points to:
– Loose bulb or socket contact
– Corroded wiring connection
– Failing transformer in low-voltage systems
– Incompatible dimmer or timer
Tighten the bulb first. If that does not help, check socket tension and test for stable voltage under load.
Avoid using halogen dimmers with LED retrofits, as this causes flickering and premature failure.
Light Stays On All the Time
Causes include:
– Faulty photocell not detecting daylight
– Stuck relay in motion sensor
– Wiring short where hot wire touches neutral
– Timer set to “On” continuously
Bypass the sensor or photocell to isolate the issue. If the light turns off when bypassed, the control device is faulty.
Only One Bulb Works in Dual Fixtures
If your flood light has two bulbs and only one lights up:
– Check the non-working bulb first
– Inspect its socket for damage
– Test voltage at that specific socket
Some fixtures have independent circuits per bulb. A single socket or wiring fault can affect just one side.
Maintenance Tips to Prevent Future Failures
Clean Fixtures Quarterly
Dirt, spider webs, and debris block light output and interfere with sensors. Clean lenses and sensor windows with a soft cloth and mild soap.
Use a can of compressed air to blow out dust from sockets and vents.
Trim Nearby Vegetation
Overhanging branches shade photocells, tricking them into thinking it is always night. They also increase moisture and physical damage risk.
Keep plants at least 18 inches away from fixtures.
Inspect Seals and Gaskets
Outdoor halogen lights must stay watertight. Check rubber gaskets and housing seals for cracks or brittleness.
Replace damaged seals to prevent water ingress and corrosion.
Repair vs. Replace: When to Upgrade
Repair If:
- The bulb is burnt out (replace it)
- The socket is corroded (clean or replace)
- A wire is loose (tighten or splice)
- The photocell or sensor is faulty (replace the module)
These fixes are fast, cheap, and restore function.
Replace If:
- The transformer is dead (hard to match, costly to replace)
- The motion sensor relay failed (common in older units)
- The socket or housing is melted (safety hazard)
- Bulbs burn out frequently (sign of deeper electrical issue)
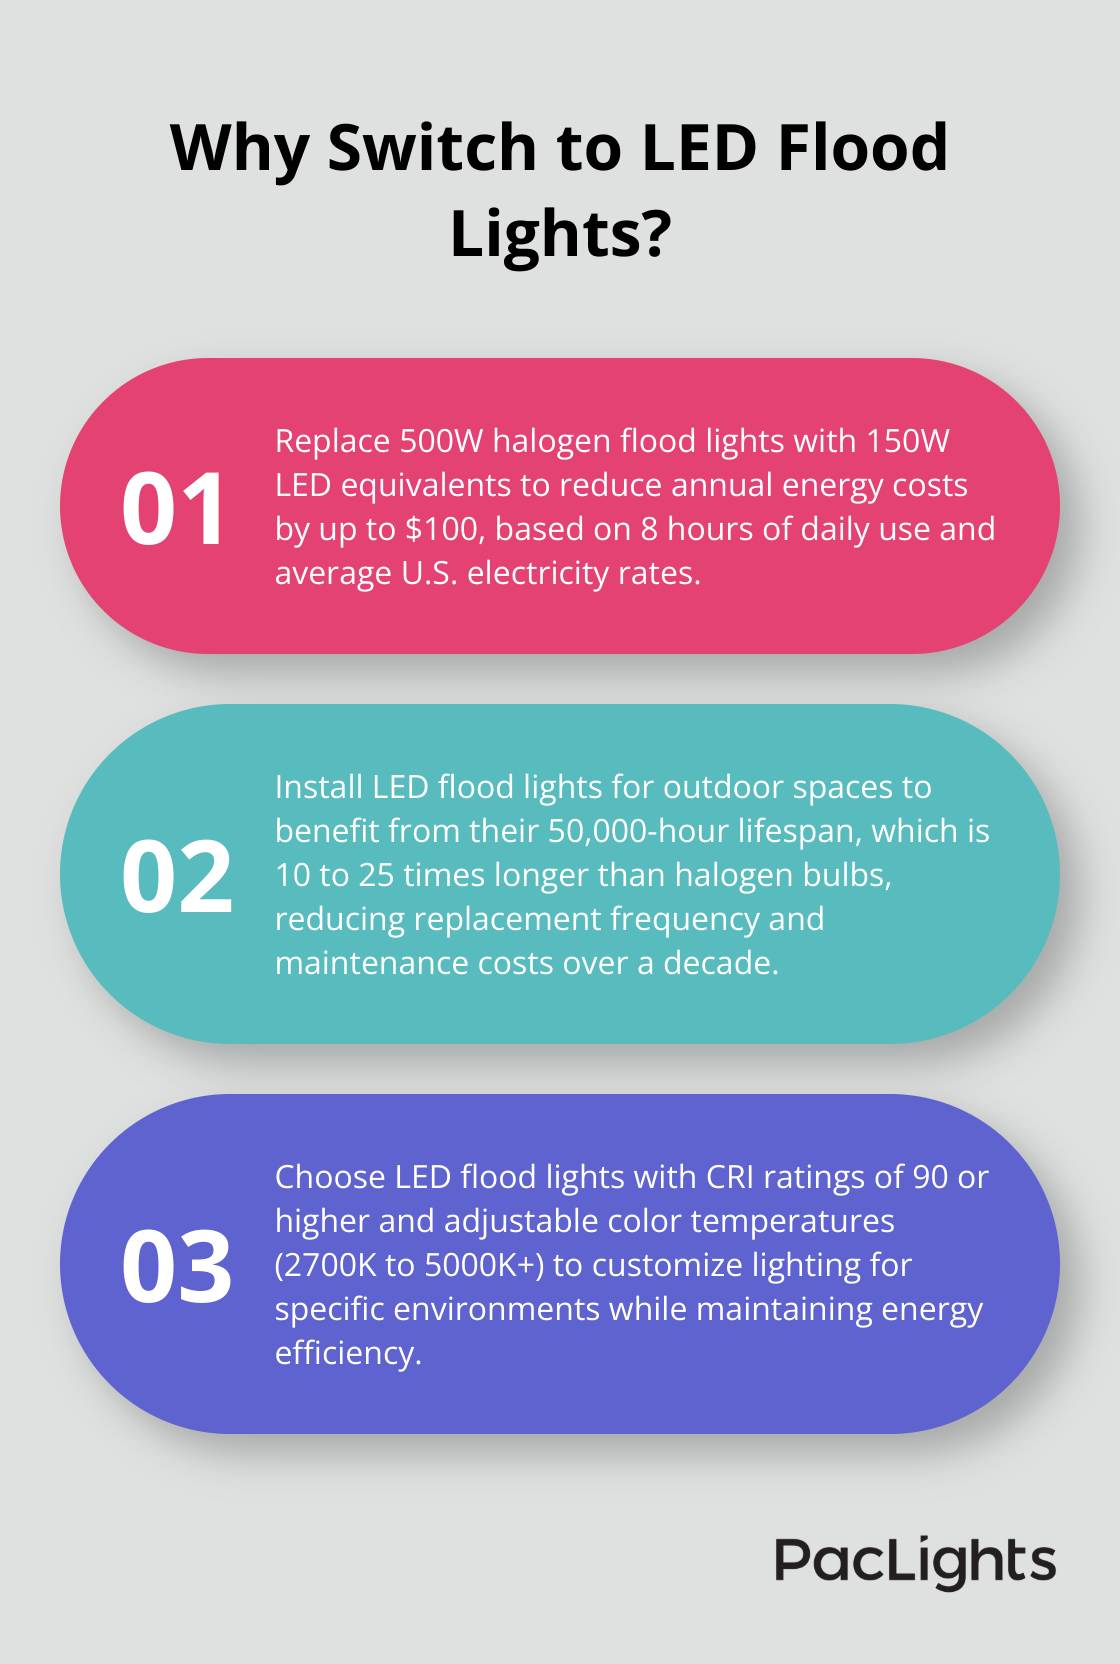
Consider this: upgrading to LED saves money long-term.
A typical dual 100W halogen flood light uses 200W. An equivalent LED uses 26W.
At $0.13/kWh, running it 1 hour per day saves $8.25 per year. Over 10 years, that is $82.50 in electricity alone, plus you will replace bulbs once instead of 12 or more times.
Modern LED flood lights are weatherproof, instant-on, and often come with smart sensors and app control.
Final Fix Checklist
- Power off at breaker
- Let fixture cool
- Wear gloves, use voltage tester
- Replace bulb with known good one
- Inspect and clean socket
- Test voltage at socket (with and without load)
- Check transformer output (if low-voltage)
- Bypass motion sensor or photocell to test
- Inspect wiring and connections
- Reset breaker or replace fuse
- Clean lens and sensor
- Decide: repair, replace, or upgrade to LED
Frequently Asked Questions About Halogen Flood Lights
Why does my halogen flood light stop working after a short time?
Halogen bulbs have an average lifespan of about 2,000 hours. Frequent burnouts often indicate deeper issues like socket corrosion, voltage fluctuations, or improper handling. Oils from bare skin contact can also cause premature failure.
Can a halogen flood light be repaired, or should I replace it?
It depends on the failure. Bulbs, sockets, and photocells are easily replaceable. However, transformers and internal motion sensor relays generally cannot be repaired. For older fixtures with failed transformers, full replacement is often the most practical option.
How do I know if my motion sensor is bad?
If the sensor’s indicator LED flashes when motion is detected but the lights do not turn on, the internal relay has likely failed. You can confirm by bypassing the sensor and connecting the hot wire directly to the light. If the light works, the sensor is the problem.
Is it worth upgrading from halogen to LED flood lights?
Yes. LED flood lights use significantly less energy (around 26W versus 200W for dual halogen fixtures), last up to 25,000 hours versus 2,000 hours, and run much cooler. Over time, the energy savings and reduced bulb replacements more than offset the higher upfront cost.
Why does my halogen flood light flicker?
Flickering usually results from loose bulb contacts, corroded socket connections, or failing transformers in low-voltage systems. Tighten the bulb first, then inspect the socket for blackened or loose contacts. If the problem persists, test voltage under load.
How hot does a halogen flood light get?
Halogen bulbs can reach temperatures up to 1,000°F during operation. Always allow the fixture to cool for at least 15 to 20 minutes before handling, and never touch the bulb with bare hands, as skin oils create hot spots that can cause shattering.
Key Takeaways for Fixing Your Halogen Flood Light
A halogen flood light not working is usually fixable in minutes once you know where to look. Start with the simplest checks: the bulb, then the socket, then the power supply. Use a multimeter to verify what is really happening rather than guessing. Pay special attention to motion sensors with flashing LEDs but no light output, because that almost always means a failed relay.
If repairs keep failing or the fixture is more than a few years old, consider upgrading to LED. You will save money on electricity, eliminate frequent bulb replacements, and gain access to modern features like smart controls and better weather resistance. Do not stay in the dark. With this guide, you have the tools to restore light and security fast.