
If your Blink flood lights aren’t turning on, you’re not alone. Whether you own the battery-powered Blink Outdoor Floodlight Mount or the hardwired Blink Wired Floodlight Camera, a non-responsive unit can leave you frustrated, especially when you rely on it for nighttime security. The good news is that most issues trace back to simple oversights like leftover battery pull-tabs, outdated firmware, or a missing ground wire. This guide walks you through precise, model-specific fixes so you can stop guessing and start solving.
You will learn how to identify your exact model, diagnose power failures, perform the right reset, and adjust settings that often masquerade as hardware problems.
Identify Your Blink Floodlight Model

Before touching anything, confirm which device you have. The fix path changes dramatically between the two versions.
Battery-Powered Floodlight Mount
This accessory clips onto a compatible Blink Outdoor camera and draws power from the camera’s battery pack. It has no built-in camera sensor of its own.
- Legacy Mount: Works only with the Blink Outdoor (3rd Gen) camera.
- Newer Mount: Compatible with Outdoor 4 and Outdoor 2K+ models.
- Power Source: Pulls power through the camera’s battery compartment.
Wired Floodlight Camera
This is a standalone unit with an integrated camera and LED floodlights. It connects directly to your home’s electrical wiring.
- Requires Hardwiring: Must connect to black (hot), white (neutral), and green or bare-copper (ground) wires.
- Ground Wire Mandatory: Without a ground connection, the unit will not power on at all.
Knowing your model prevents wasted time on steps that don’t apply to your hardware.
Fix Battery Floodlight Mount Not Powering On
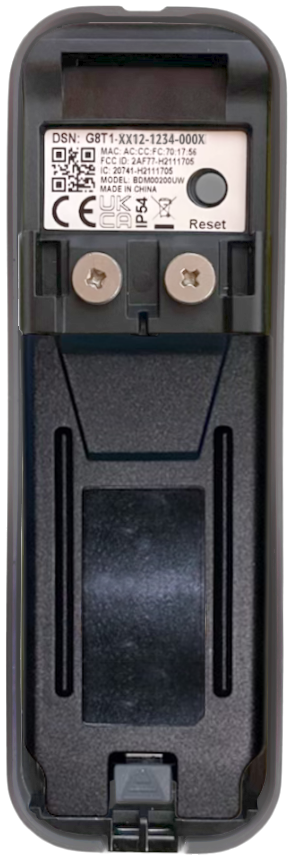
If your mount stays dark after installation, work through these checks in order.
Remove the Battery Pull-Tabs
The single most common cause of a dead mount is shipping pull-tabs still sitting inside the battery compartment.
- Open the battery compartment on your Blink Outdoor camera.
- Look for white plastic tabs inside the battery slots.
- Pull them out completely to allow battery contact.
- Close the cover firmly until you hear it seal.
Visual Confirmation: Once sealed correctly, the floodlight LEDs should blink once brightly. If they don’t, the cover isn’t fully closed or the batteries aren’t making contact.
Verify the Correct Installation Sequence
For 3rd Gen cameras, the order of steps matters. Getting it wrong can prevent the floodlight from receiving power.
- Remove the camera’s back cover entirely.
- Peel off the small USB port cover on the camera body.
- Reattach the back cover (without the USB flap in place).
- Plug the floodlight’s micro-USB cable firmly into the exposed port.
- Confirm a tight seal on all sides to keep moisture out.
A loose micro-USB connection often mimics a dead battery or faulty unit.
Confirm Firmware Version 10.47 or Higher
Your camera must run firmware v10.47 or above for the floodlight to function. Anything older will block activation.
Check Your Firmware in the Blink App:
- Open the Blink app and select your camera.
- Tap the More (…) icon on the device thumbnail.
- Go to Device Settings, then General Settings.
- Scroll to find the firmware version number.
If the version is below 10.47:
– Keep the camera powered and connected to Wi-Fi.
– Wait at least 24 hours for the automatic update from Blink servers.
– Do not reset or re-pair the device during this window.
Diagnose Blink Wired Floodlight Not Powering Up
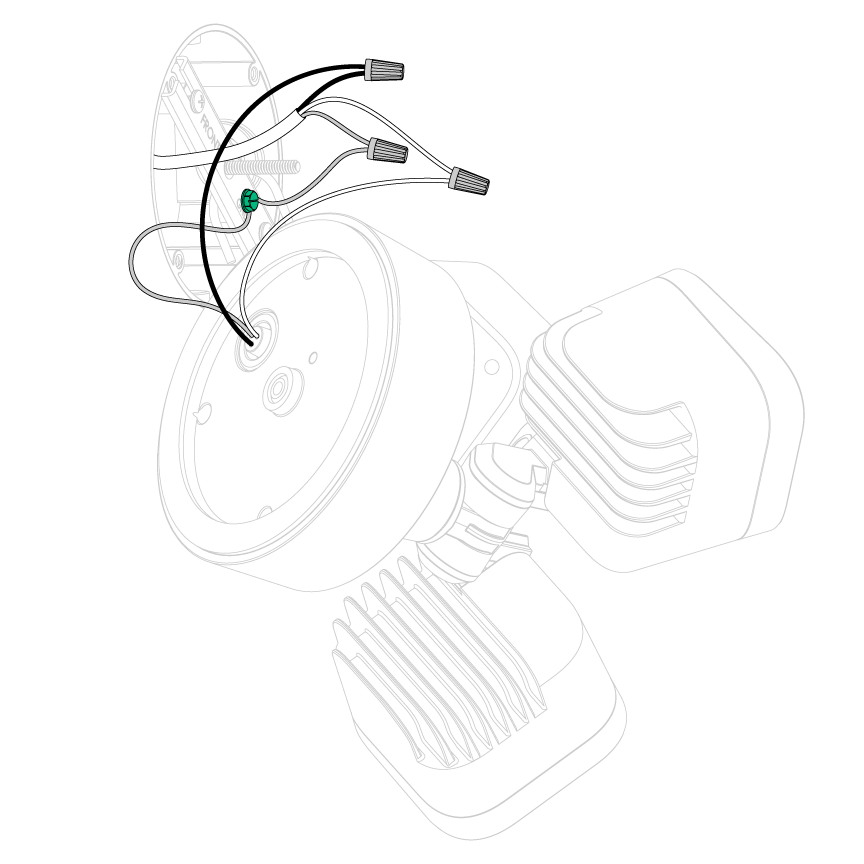
No lights and no startup sequence usually points to a power supply issue.
Ensure the Ground Wire Is Connected
The number one reason the wired model fails to turn on is a missing or loose ground wire. The device literally will not operate without it.
- Connect the green or bare-copper ground wire securely to the grounding screw.
- Even if black and white wires are correct, no ground means no power.
- Double-check the junction box to confirm the ground is fastened tightly.
Pro Tip: If you’re unsure about any wiring step, hire a licensed electrician. Always turn off the breaker before handling household wires.
Test Power at the Breaker
Confirm electricity is actually reaching the unit before assuming the device is defective.
- Switch off the relevant circuit breaker.
- Inspect all wiring connections inside the junction box.
- Restore power and check whether other devices on the same circuit work.
- Confirm the correct breaker is switched on.
If power is confirmed but the camera shows no LED activity, suspect a wiring fault or a defective unit.
Look for Setup Mode LEDs
When powered correctly, the camera displays a specific LED pattern near the lens.
- Normal Setup Mode: Solid green LED with a flashing blue LED.
- No Lights: Power or ground issue.
- Only Red Flash: Factory reset in progress.
- Flashing Blue Only: Wi-Fi pairing problem.
If you don’t see the expected green and blue pattern, recheck your wiring and breaker before moving on.
Reset Blink Floodlight Camera Properly
When the device won’t respond or connect, the right reset method depends on your goal.
Short Press Reset for Minor Glitches
Use this when the app can’t detect the camera, the connection keeps dropping, or lights aren’t syncing.
- Press and release the reset button on top of the camera.
- Wait for the solid green and flashing blue LEDs to appear.
- Try adding the device again in the Blink app.
This refreshes the network state without erasing your saved Wi-Fi credentials.
Long Press Reset for Factory Reset
Use this when moving to a new Wi-Fi network, after relocation, or when the app refuses to recognize the device.
- Press and hold the reset button on top of the camera.
- Keep holding until a red LED flashes.
- Release the button and wait for the setup pattern to return.
- Re-enter your Wi-Fi name and password during setup.
Warning: This erases all network data. You will need to reconfigure Wi-Fi from scratch.
Because the reset button sits on top of the unit, it’s hard to reach once mounted. A non-conductive tool like a plastic straw can help.
Fix Floodlights Triggering at the Wrong Times
Lights turning on randomly or not activating when expected usually comes down to settings, not hardware.
Check the System Arm Status
Your system must be Armed to record motion clips and send alerts.
- Disarmed Mode: Lights may still turn on, but no video is saved.
- Armed Mode: Lights activate, clips record, and notifications send (if enabled).
If you expect clips but see none, check that the system is Armed in the Blink app.
Adjust Motion Detection Settings
Open Camera Settings, then Motion Detection, and review your active mode:
- All Motion: Records every movement and sends alerts.
- Person Detection: Records and alerts only for people.
- Nothing: Saves no recordings but still sends motion alerts.
Many users think their lights are broken when they’ve accidentally selected “Nothing.” The lights still work, but no clips are saved.
Disable Unwanted Light Activation
Floodlights turning on while the system is Disarmed is by design, but you can stop it.
- Open Camera Settings.
- Tap Floodlight Settings.
- Toggle Motion Activation to OFF.
Now the lights won’t trigger until you want them to.
Optimize Placement for Better Detection

Poor positioning causes missed events and false triggers. A few adjustments can make a big difference.
Follow the Orientation Arrow
An arrow on the back label shows the correct “up” direction for your mounting style.
- Wall or Eave Mount: Arrow points straight up so lights sit above the camera.
- Ceiling Mount: Arrow points toward the nearest wall.
Correct orientation prevents the floodlights from washing out the camera’s view.
Position for Side-to-Side Motion
Best detection happens when movement crosses the frame horizontally rather than walking directly toward the lens.
- Avoid pointing the camera down a long driveway where people approach head-on.
- Aim for walkways where motion travels across the field of view.
Proper placement reduces false alerts and improves person detection accuracy.
Resolve App and Connectivity Issues
Even a perfectly installed unit won’t work if the app or account has problems.
Update the Blink App and Phone OS
Outdated software breaks communication between your phone and the device.
- Check your app store for the latest Blink app version.
- Make sure your phone’s operating system is current.
Many users revive “dead” devices simply by updating the app.
Re-Link Your Amazon Account
Blink requires an active Amazon account link for subscription features to work.
If cloud clips aren’t saving or person detection is grayed out:
1. Open the Blink app and go to More > Account Settings > Amazon Account.
2. Tap Unlink, then Link again.
3. Log in to Amazon when prompted.
This refreshes permissions and restores service access.
Reconnect Alexa or IFTTT
Automation failures often look like hardware problems.
For Alexa:
1. Open the Alexa app and go to Skills & Games.
2. Search for Blink, disable the skill, then re-enable it.
3. Re-link your accounts and sync devices.
For IFTTT:
– Automations are managed inside the IFTTT app, not Blink.
– Check applets for errors or expired connections.
A failed automation doesn’t mean your lights are broken. It just means the trigger didn’t fire.
Prevent Future Blink Floodlight Problems
A little routine maintenance keeps your system reliable.
Schedule Monthly System Checks
Once a month, walk through these quick tests:
– Arm and disarm the system to confirm response.
– Trigger motion manually by walking past the camera.
– Verify the lights turn on and a clip saves.
– Check the app for any pending firmware updates.
Clean Contacts and Seals
For the battery mount:
– Wipe the micro-USB port and cable connector with a dry cloth.
– Make sure no dirt or corrosion blocks the connection.
– Re-seal tightly after cleaning.
For the wired model:
– Inspect the junction box for moisture or corrosion.
– Confirm the ground wire remains secure.
Keep Firmware Updated
Blink pushes updates automatically, but only if the camera stays online, the app is current, and the device has power. Leave your camera connected for 24 hours after noticing a new update is available.
When to Contact Blink Support
Try all the steps above first. If problems persist, reach out to Blink Support when:
– Firmware won’t update after 48 hours online.
– The wired camera has power but shows no LEDs.
– Reset procedures fail repeatedly.
– A used unit won’t pair with your account.
Have your serial number (on the QR label), camera model, and firmware version ready, along with a description of the steps you’ve already tried.
Frequently Asked Questions About Blink Flood Lights Not Working
Why won’t my Blink flood lights turn on at all?
The most common causes are leftover battery pull-tabs in the mount model or a missing ground wire in the wired model. Confirm both before troubleshooting further.
Do Blink flood lights need a ground wire?
Yes. The Blink Wired Floodlight Camera requires a green or bare-copper ground wire to operate. Without it, the unit will not power on, even if the hot and neutral wires are connected correctly.
What firmware does Blink floodlight need?
The Blink Outdoor (3rd Gen) camera must run firmware version 10.47 or higher for the floodlight mount to function. Lower versions block floodlight activation entirely.
How do I reset my Blink floodlight camera?
Press and release the reset button on top of the camera for a short reset, or hold it until a red LED flashes for a factory reset. The long press erases Wi-Fi credentials, so you’ll need to reconnect.
Why are my Blink flood lights turning on but not recording clips?
Your system is likely Disarmed, or the motion detection mode is set to “Nothing.” Arm the system and check the motion detection settings to restore recording.
Can I use the Blink floodlight mount with any Blink camera?
No. The legacy mount works only with the Blink Outdoor (3rd Gen). The newer mount is required for Outdoor 4 and Outdoor 2K+ models.
Key Takeaways for Restoring Your Blink Flood Lights
Most “Blink flood lights not working” problems come down to a handful of simple fixes. Start by confirming your model, then check the physical setup: remove battery pull-tabs, verify the micro-USB seal, or confirm the ground wire is connected. Update your firmware to version 10.47 or higher, and make sure the Blink app and phone OS are current. If lights trigger at the wrong times, review your arm status and motion detection mode in the app. With the right diagnosis, you can restore full functionality in minutes and keep your system reliable for the long run.