
A dark driveway, a suspicious noise outside, and a flood light that refuses to turn on. Sound familiar? Many homeowners face this frustrating moment, assuming the fixture is broken when the real issue is often a tripped breaker, a dirty sensor, or an unconfigured smart app. Learning how to turn on flood lights correctly means understanding your specific fixture type and the activation steps it requires.
This guide covers everything from basic switch operation and motion sensor setup to smart app pairing and troubleshooting stubborn failures. You will learn how to verify power delivery, configure sensor settings, install new fixtures safely, and keep your flood lights working reliably for years.
Verify the Power Source Before Anything Else

Before blaming the fixture, confirm that electricity is actually reaching it.
Test the Outlet and Circuit Breaker
Plug a working device like a phone charger into the outdoor outlet to confirm it has power. For hardwired units, head to your circuit breaker panel and ensure the correct switch is flipped to ON. If a breaker has tripped, reset it firmly until you hear a click, then test the light again.
Check GFCI Protection
Outdoor circuits are often protected by GFCI outlets, which trip easily when moisture is detected. Locate any outdoor or garage GFCI outlets and press the “Reset” button. A tripped GFCI is one of the most common reasons flood lights stop working.
Inspect the Wall Switch and Power Cord
Flip the wall switch several times to rule out a sticky or worn mechanism. For plug-in models, examine the entire cord for cuts, frays, or bent prongs. A damaged cord interrupts power flow and must be replaced before the light will respond.
Install or Replace Your Flood Light Correctly
A flood light will not turn on if installation was done improperly, even when power is present.
Mount at the Correct Height
For optimal coverage and security, mount the fixture at least 9 feet above ground level. This height reduces tampering risk and ensures the sensor or beam covers a wide area. Use a ladder to mark your mounting spot with tape or a pen before drilling.
Follow Proper Wiring Color Codes
After turning off power at the breaker and confirming with a voltage tester:
1. Connect black to black (hot wires)
2. Connect white to white (neutral)
3. Connect ground to ground (copper or green)
Secure each connection with a wire nut, tuck the wires neatly into the junction box, and mount the fixture base with the provided screws.
Seal Against Moisture Intrusion
Apply silicone caulk around the fixture base and where the wall plate meets the wall. Water intrusion can short-circuit the entire system, so a tight seal is essential for long-term reliability.
Activate Different Flood Light Types
The method to turn on flood lights varies depending on whether your unit is manual, motion-activated, or smart-enabled.
Flip the Switch for Manual Models
Basic flood lights connected to a standard wall switch turn on immediately when the switch is flipped to ON. If nothing happens, return to the power source checks outlined above.
Trigger Motion Sensor Flood Lights
Motion-activated lights do not stay on continuously. They respond only when movement is detected within range.
Wait for Darkness or Simulate It
Most motion sensors include a photocell that disables activation during daylight. Test the light at night, or cover the sensor lens with your hand to simulate darkness. Then walk through the detection zone to trigger illumination.
Adjust Sensitivity and Timer Dials
If the light does not respond:
– Set the sensitivity dial to high
– Set the timer dial to 3–5 minutes
– Wait at least 10 seconds after restoring power for the sensor to initialize
Some models flash once when powered on, confirming the sensor is active and ready.
Control Smart Flood Lights via Mobile Apps
Smart flood lights (Wi-Fi or Zigbee-enabled) are turned on through apps like Tuya, Kasa, or Aqara.
Pair the Device in the App
- Install the bulb or fixture with power off
- Restore power and wait for the light to blink rapidly
- Open the app, select “Add Device,” and follow on-screen pairing steps
- Once paired, tap the virtual switch to turn the light on remotely
Pro Tip: Smart lights often remain responsive even when the wall switch is off, as long as the circuit breaker is on. If the app shows the device as offline, check your Wi-Fi signal strength near the fixture.
Troubleshoot Common Activation Failures
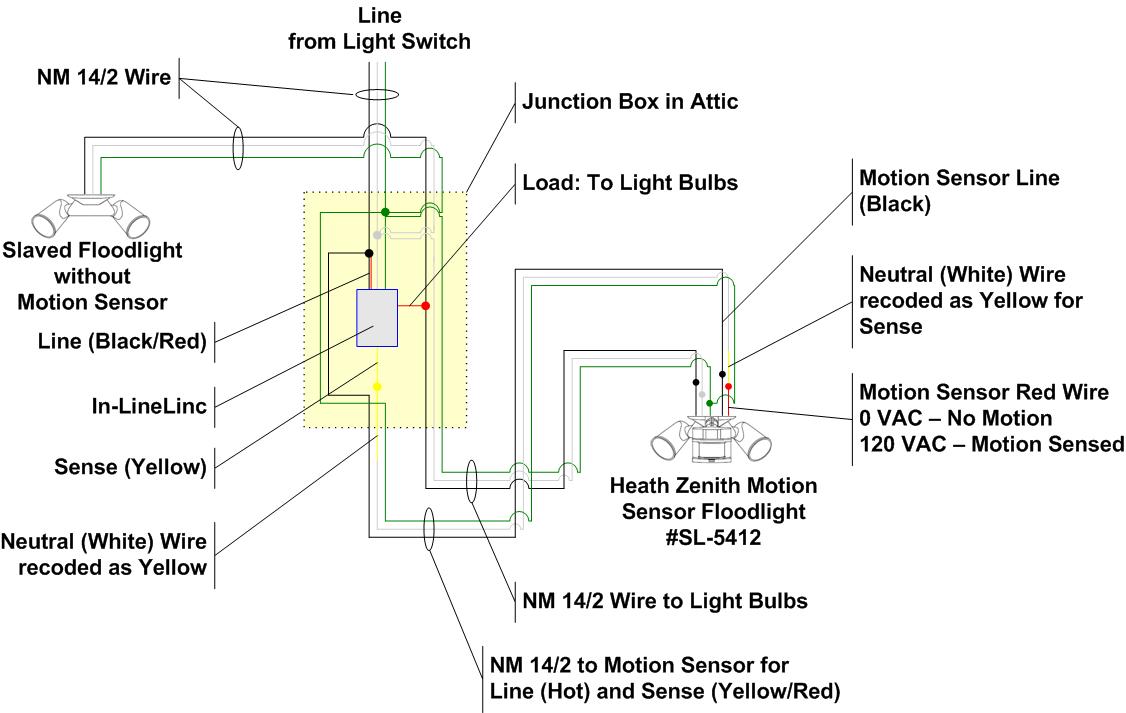
When a flood light still refuses to turn on, a systematic diagnostic approach helps identify the root cause.
Diagnose No Power Response
If flipping the switch produces no reaction at all, the issue lies upstream in the power delivery system.
Test Voltage at the Fixture
With power on, hold a non-contact voltage tester near the wires inside the junction box. No signal means the problem is upstream, possibly a faulty switch, tripped GFCI, or broken wire run.
Confirm Physical Connections
Loose black, white, or ground wires are a frequent culprit. Open the junction box and verify every wire nut is tight and properly seated.
Fix Motion Sensor Not Triggering
When the light has power but will not activate on motion, focus on the sensor itself.
Clean the Sensor Lens
Dirt, spider webs, pollen, or paint can block the sensor’s field of view. Wipe the lens gently with a soft microfiber cloth to restore full sensitivity.
Reposition the Sensor Angle
Aim the sensor toward high-traffic areas like walkways, driveways, or entry doors. Avoid pointing it at trees, roads, or busy streets where false triggers or obstructions may occur.
Reset the Sensor
Turn power off at the breaker for 30 seconds, then restore it. This forces the sensor to reinitialize. Wait 10 seconds before testing motion detection again.
Address Flickering or Dim Output
Flickering indicates deeper electrical issues that require closer inspection.
Inspect the Driver Board
LED flood lights rely on driver boards to regulate current. Symptoms of driver failure include:
– Intermittent flashing
– Uneven brightness across the beam
– Complete failure despite confirmed power
Use a multimeter to test the driver’s output voltage. If readings do not match the manufacturer’s specifications, replace the driver with an identical model.
Examine LED Beads for Damage
Look through the lens for dark spots or dead zones on the LED array. Individual bead failure may require soldering replacements, or you may need to swap the entire LED module if it is integrated.
Prevent Overheating and Premature Failure
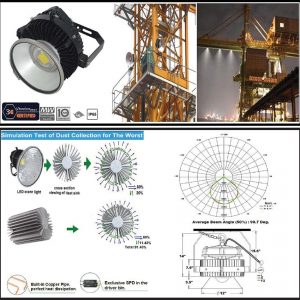
Heat buildup is one of the leading causes of flood light failure, especially in LED models.
Keep Heat Sinks Clear of Dust
Aluminum heat sinks dissipate heat away from internal components. Over time, dust and debris clog the fins and reduce cooling efficiency. Turn off power and blow out dust with compressed air every few months.
Ensure Proper Airflow Around the Fixture
Install the flood light in a well-ventilated area. Avoid enclosing it under tight eaves or inside covers that block natural airflow. In hot climates, consider models with built-in cooling fans.
Avoid Overloading the Circuit
When adding a new flood light to an existing circuit, calculate the total connected wattage. The combined load should stay under 80% of the circuit’s capacity (for example, under 1,440W on a 15-amp, 120V circuit). Overloaded circuits trip breakers and degrade components over time.
Perform Routine Maintenance for Long-Term Reliability

Consistent upkeep keeps your flood lights turning on when you need them most.
Clean the Lens and Sensor Monthly
Wipe the lens and sensor window with a damp cloth once a month. Remove cobwebs, pollen, and grime that interfere with motion detection and light output.
Conduct an Annual Inspection
Once per year:
– Tighten all mounting screws
– Recheck wire connections inside the junction box
– Test GFCI outlets for proper trip and reset function
– Reapply silicone caulk if seals show cracks or gaps
Replace Worn Components Early
Do not wait for total failure. If you notice flickering, delayed response, or gradual dimming, replace the driver or LED module proactively. Quality LED flood lights last 25,000 to 50,000 hours, but only with proper care.
Quick Reference Troubleshooting Table
| Problem | What to Check | Solution |
|---|---|---|
| Light won’t turn on | Power source, breaker, switch | Reset breaker, test outlet, replace faulty switch |
| No motion detection | Sensor lens, sensitivity dial | Clean lens, adjust settings, reposition angle |
| Only works at night | Photocell (dusk-to-dawn sensor) | Normal behavior; disable via switch if needed |
| Flickering output | Driver board, loose wires | Replace driver, tighten all connections |
| Smart light offline | Wi-Fi signal, app status | Restart router, re-pair device in app |
| Fixture feels hot | Heat sink, airflow, enclosure | Clean fins, ensure ventilation, add cooling fan |
| Water inside fixture | Sealant, gasket, mounting angle | Re-caulk perimeter, replace gasket |
Frequently Asked Questions About Turning On Flood Lights
Why won’t my flood light turn on even though the switch is on?
The most common reasons are a tripped breaker, a tripped GFCI outlet, or loose wire connections inside the junction box. Test the outlet with another device, reset the GFCI, and verify all wire nuts are tight.
How do I turn on a motion sensor flood light during the day?
Most motion sensors have a photocell that prevents daytime activation. Cover the sensor lens with dark tape or your hand to simulate darkness, then walk through the detection zone. Some models also have a “test” mode that overrides the photocell.
Do smart flood lights work without a wall switch?
Yes, smart flood lights can be controlled entirely through a mobile app, provided the circuit breaker remains on. However, if someone flips the wall switch off, the light loses power and cannot respond to app commands.
How long do LED flood lights typically last?
Quality LED flood lights last between 25,000 and 50,000 hours depending on usage, heat management, and maintenance. Keeping heat sinks clean and avoiding circuit overload significantly extends lifespan.
Can I install a flood light myself, or do I need an electrician?
If you are replacing an existing fixture with identical wiring, most homeowners can handle the installation safely by following color-coded wiring standards. For new installations requiring new cable runs or panel work, consulting a licensed electrician is strongly recommended.
What causes a flood light to flicker on and off?
Flickering usually points to a failing driver board, loose wire connections, or overheating. Test the driver’s output voltage with a multimeter, tighten all wire nuts, and clean the heat sink to restore stable operation.
Key Takeaways for Turning On Flood Lights Successfully
Turning on flood lights reliably comes down to three core principles: verify power delivery, match the activation method to your fixture type, and maintain the system regularly. Most failures stem from overlooked details like tripped GFCIs, dirty sensor lenses, or loose wire nuts rather than the fixture itself.
Start by confirming power at the source, then configure your specific light type, whether manual, motion-activated, or smart-enabled. Schedule a quick monthly cleaning and an annual inspection to catch small issues before they leave you in the dark. With these habits in place, your flood lights will turn on exactly when you need them.