
Flood lights are one of the smartest upgrades you can make to your home’s exterior, delivering both stronger security and better nighttime visibility. Knowing how to set up flood lights the right way means your fixtures will perform reliably for years without flickering, moisture damage, or safety risks. With LED models lasting 30,000 to 50,000 hours and using about 25% less energy than older bulbs, the payoff is well worth the effort.
This guide covers everything you need, from planning placement and checking your electrical circuit to wiring connections, configuring sensors, and solving common problems. Whether you’re swapping out an old fixture or installing one in a new spot, you’ll get clear, actionable steps to do the job safely and correctly.
Plan Your Flood Light Placement
Choose the Right Mounting Height
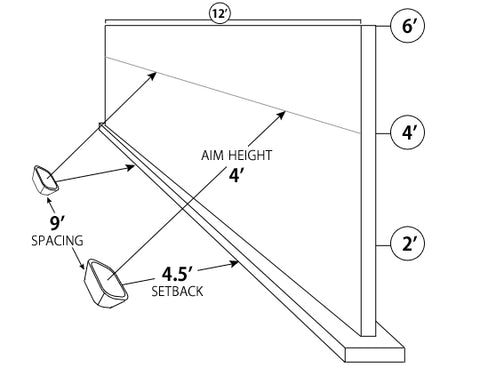
Mount your flood lights between 9 and 12 feet high for the best mix of coverage and safety. At this range, the beam spreads evenly without creating harsh glare. Lights placed below 8 feet tend to blind visitors and cast awkward shadows, while mounts above 12 feet lose ground-level brightness even though they cover more area.
For walkways or entry steps, aim for 9 to 10 feet. For driveways or large backyard zones, go with 11 to 12 feet. Always make sure you can safely reach the fixture with a ladder for future cleaning or angle tweaks.
Aim for Maximum Coverage
Start with a 30° to 45° downward angle to keep light focused on the ground rather than spilling into windows or the sky. A 45° tilt is a good starting point you can fine-tune after testing. Avoid aiming directly at reflective surfaces like glass, metal siding, or white walls, since these amplify glare and hurt visibility.
Target zones worth lighting include:
– Front and side doors
– Garage entrances
– Dark yard corners
– Walkways and driveways
– Sheds or detached structures
Avoid Light Spill and Neighbor Issues
Flood lights should brighten your property, not your neighbor’s bedroom. To prevent complaints and wasted light:
– Use visors or adjustable shields to direct beams downward
– Position fixtures so they don’t face neighboring homes
– Pick narrower beam angles around 60° for focused areas or wider 100° beams for broad coverage
– Test the light at night and adjust the aim to minimize spill
Check Electrical Requirements First

Confirm Circuit Capacity
Before installing, make sure your electrical circuit can handle the added load. Most outdoor flood lights run on 120-volt AC and draw between 20 and 100 watts depending on the model.
To avoid overloading:
– Add up all devices on the same circuit, including outlets, lights, and garage openers
– Stay under 80% of the circuit’s total capacity (for example, 1440 watts max on a 15-amp circuit)
– If the circuit is near capacity, consider running a dedicated line, ideally handled by a licensed electrician
Overloaded circuits lead to flickering, tripped breakers, or overheated wires.
Verify GFCI Protection
All outdoor circuits must have GFCI (Ground-Fault Circuit Interrupter) protection. A GFCI cuts power instantly if it detects current leakage from moisture, preventing shocks.
Check if your outdoor outlet or breaker is labeled “GFCI.” If not, you’ll need:
– A GFCI outlet wired before the light, or
– A GFCI breaker in the main panel
Never skip this step. It’s required by the National Electrical Code and is critical for safety.
Gather Tools and Materials
Essential Tools for Installation
You’ll need:
– Non-contact voltage tester to confirm power is off
– Sturdy ladder rated for your height and weight
– Screwdrivers (Phillips and flathead)
– Wire strippers for trimming damaged wires
– Drill with bits for masonry or wood mounting
– Level to align the bracket
– Caulk gun for sealing
– Tool belt to keep your hands free on the ladder
Required Materials
Make sure you have:
– Outdoor-rated LED flood light (wet-location listed)
– Dielectric grease-filled wire connectors (weatherproof)
– Exterior-grade silicone caulk (UV and water resistant)
– Corrosion-resistant screws and anchors (stainless steel or coated)
– Masking tape for labeling wires
Avoid standard wire nuts or indoor-rated parts since they degrade quickly outdoors.
Replace an Existing Flood Light
Turn Off Power and Remove Old Fixture
- Switch off the circuit breaker at the main panel. Don’t rely on the wall switch alone.
- Test the wires with a non-contact voltage tester to confirm no power is present.
- Unscrew the old fixture from its mounting bracket.
- Take a photo of the wiring before disconnecting anything.
- Label wires with masking tape if colors are faded or unclear.
- Disconnect wires by twisting off wire nuts, then gently pull apart black, white, and ground wires.
- Inspect the junction box for rust, cracks, or loose screws. Replace it if damaged.
- Check wire ends and trim any frayed or corroded insulation with wire strippers.
Install the New Mounting Bracket
- Attach the universal bracket to the junction box using included screws.
- Use anchors if mounting on brick, stucco, or concrete.
- Level the bracket before fully tightening screws.
- Test stability by giving it a gentle shake.
Connect Wires Correctly
Match wire colors:
– Black (hot) connects to black
– White (neutral) connects to white
– Green or bare (ground) connects to the ground screw or bare wire
Steps:
1. Strip ½ inch of insulation if needed.
2. Twist wires together clockwise.
3. Screw on outdoor-rated wire connectors until snug.
4. Tug gently on each wire to confirm a tight connection.
5. Optional: Wrap connections with electrical tape for extra moisture protection in humid climates.
Never connect neutral to ground since this can trip breakers or cause a fire.
Seal and Mount the Fixture
- Tuck wires neatly into the junction box.
- Apply a bead of silicone caulk around the base where the fixture meets the wall.
- Align the fixture with the bracket and secure with screws.
- Don’t over-tighten, as this can crush gaskets and break the seal.
- Adjust the head angle before locking the bolts.
Install a Flood Light in a New Location

Run New Electrical Cable
Warning: Running new wiring is advanced. Hire a licensed electrician unless you’re experienced.
Steps:
1. Obtain a permit, since most jurisdictions require one for new outdoor circuits.
2. Run outdoor-rated cable (such as UF-B) from the breaker panel or an existing GFCI-protected outlet.
3. Bury underground cables at the depth required by local code, often 18 to 24 inches.
4. Use conduit where cables are exposed or near foundations.
Install a Weatherproof Junction Box
- Mount a wet-location-rated junction box at the chosen spot.
- Secure it tightly to studs, masonry, or siding with appropriate fasteners.
- Feed the cable into the box using a clamp to prevent strain.
- Ground the box by connecting the bare wire to the grounding screw.
Make sure all components are rated for outdoor use.
Complete Wiring and Mounting
Follow the same steps as in replacement:
– Connect wires by color
– Use weatherproof connectors
– Seal with silicone
– Mount and aim the fixture
Before turning power back on, double-check:
– All connections are tight
– No exposed copper touches the box
– GFCI protection is active
Configure Smart and Sensor Features
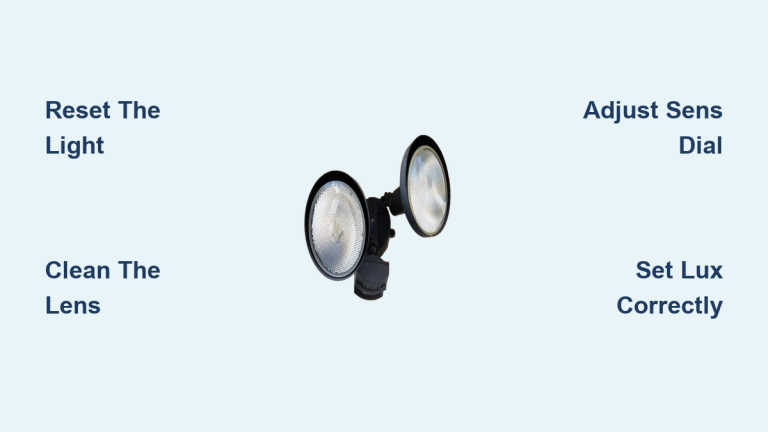
Set Up Motion Sensors
Many flood lights include motion detection. To avoid false triggers:
1. Clear obstructions like leaves or spider webs from the sensor lens.
2. Aim the sensor toward entry paths, not streets, trees, or pet zones.
3. Adjust sensitivity to medium initially, then fine-tune.
4. Set duration (how long the light stays on) to 1 to 5 minutes.
5. Exit test mode, since some sensors stay on permanently until disabled.
Avoid pointing sensors at:
– Air conditioners (vibrations)
– Swinging branches
– Reflective surfaces
Enable Dusk-to-Dawn Mode
Photocell sensors turn lights on at sunset and off at sunrise. To use:
– Ensure the sensor isn’t blocked by the fixture or nearby objects
– Don’t cover it with paint or tape
– Test by covering the sensor during the day. The light should turn on
Some models combine motion and dusk-to-dawn, so lights only activate at night when motion is detected.
Connect Smart Controls
For Wi-Fi or Z-Wave flood lights:
1. Download the manufacturer’s app (such as Ring, Philips, or Kasa).
2. Power on the light and put it in pairing mode, usually via quick on/off cycles.
3. Connect via app and follow setup prompts.
4. Name zones (like “Front Door”) and set schedules.
Tips:
– Ensure a strong Wi-Fi signal at the fixture
– Assign to a 2.4 GHz network rather than 5 GHz
– Update firmware regularly
Troubleshoot Common Flood Light Problems
Light Won’t Turn On
Possible causes:
– Tripped breaker
– Wall switch turned off
– Loose wire connection
– Failed driver (in LED)
Fix:
1. Check the breaker and reset if tripped.
2. Flip the wall switch to ensure it’s on.
3. Turn off power and recheck all wire connections.
4. Test voltage at the fixture with a multimeter.
5. If no power, trace back to the GFCI outlet or junction.
Breaker Trips When Light Is On
Likely issues:
– Short circuit
– Ground and neutral wires touching
– Moisture in the fixture or box
– Exposed copper touching the junction box
Fix:
1. Turn off power.
2. Remove the fixture and inspect for water or corrosion.
3. Check that no stray wire strands touch the metal box.
4. Confirm ground and neutral are not crossed.
5. Dry components completely before reassembling.
Light Flickers
Causes:
– Loose wire nut
– Overloaded circuit
– Voltage drop
– Failing LED driver
Fix:
1. Tighten all wire connections.
2. Unplug other devices on the same circuit.
3. Test voltage. It should read 110 to 120V.
4. Replace the fixture if flickering persists.
Light Stays On Constantly
Common reasons:
– Sensor in test mode
– Sensor aimed at moving objects
– High sensitivity setting
– Reflective surface triggering motion
Fix:
1. Consult the manual to disable test mode.
2. Reposition the sensor away from trees, roads, or vents.
3. Lower sensitivity and shorten duration.
4. Use shielding to block unwanted detection zones.
Moisture Inside the Fixture
Why it happens:
– Failed gasket
– Incomplete sealing at the base
– Temperature swings causing condensation
Fix:
1. Turn off power.
2. Remove the fixture and dry all parts.
3. Inspect the rubber gasket and replace it if cracked.
4. Reapply silicone caulk around the base.
5. Ensure the lens is tightly sealed.
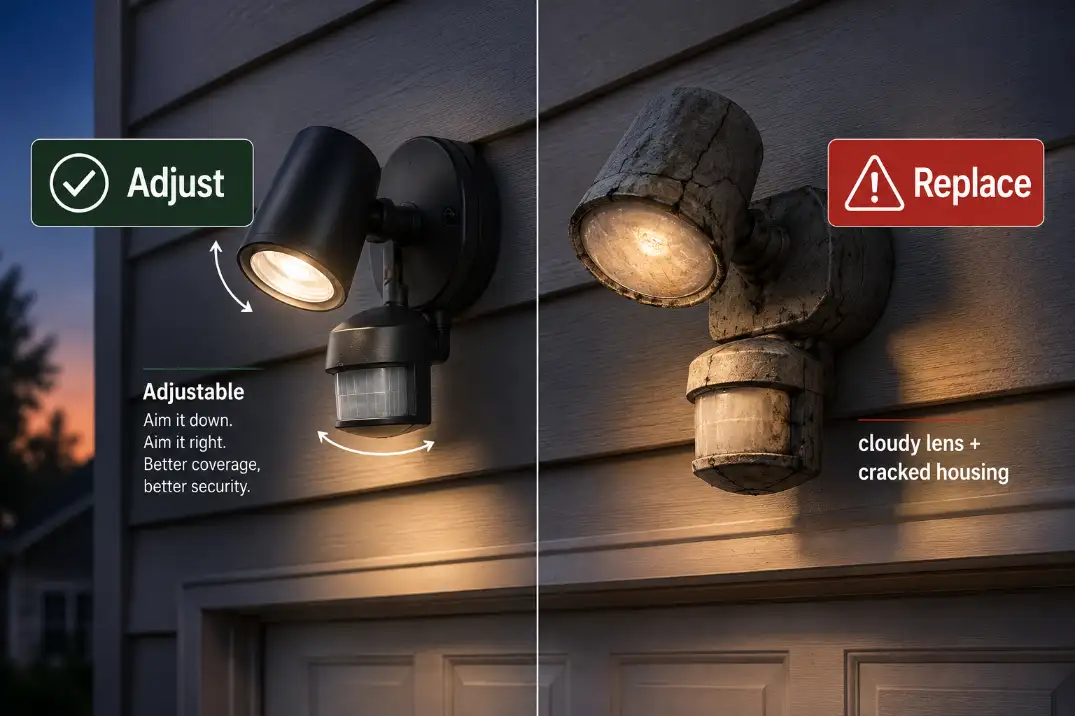
If fogging returns, the housing may be cracked and the unit should be replaced.
Maintain Flood Lights for Longevity
Clean Fixtures Regularly
Dirt, dust, and bugs can reduce brightness by up to 50%. Clean every 3 to 6 months:
1. Turn off power.
2. Wipe the lens with a soft cloth and mild soap.
3. Rinse with water. Don’t use pressure washers.
4. Dry completely before restoring power.
Never use:
– Acetone or mineral spirits
– Ammonia-based cleaners (damages polycarbonate)
– Steel wool or abrasive pads
Inspect Seals and Wiring Annually
Once a year:
– Check gaskets and silicone seals for cracks
– Re-caulk if gaps appear
– Open the fixture and inspect wires for corrosion
– Tighten mounting screws and bracket
– Test GFCI outlets by pressing “Test” and “Reset”
Test Motion and Smart Features
Verify sensor performance:
– Walk through detection zones at night
– Adjust aim or sensitivity if needed
– Update smart light firmware monthly
– Ensure mobile alerts are working
Frequently Asked Questions About Flood Light Setup
What height should flood lights be mounted?
Mount flood lights between 9 and 12 feet high for the best balance of coverage and safety. Lower than 8 feet causes glare, while higher than 12 feet reduces ground-level brightness.
Do outdoor flood lights need GFCI protection?
Yes. All outdoor circuits must have GFCI protection to prevent shocks from moisture. This is required by the National Electrical Code and applies to both outlets and breakers.
Can I install a flood light without running new wiring?
Yes, if you’re replacing an existing fixture. The wiring and junction box are already in place. Running new cable to a new location is more advanced and usually requires a permit and a licensed electrician.
Why does my flood light flicker at night?
Flickering usually means a loose wire connection, an overloaded circuit, or a failing LED driver. Tighten all connectors, reduce the load on the circuit, and test voltage. If the problem continues, replace the fixture.
How long do LED flood lights last?
Quality LED flood lights last between 30,000 and 50,000 hours, which equals roughly 10 to 15 years of residential use. Lifespan depends on heat management, voltage stability, and build quality.
How do I stop my motion sensor flood light from triggering falsely?
Reposition the sensor away from streets, trees, and reflective surfaces. Lower the sensitivity setting, shorten the duration, and make sure no obstructions like spider webs cover the lens.
Key Takeaways for Setting Up Flood Lights Successfully
Learning how to set up flood lights comes down to three essentials: plan your placement, respect electrical safety, and use outdoor-rated components. Mount between 9 and 12 feet, aim at a 30° to 45° downward angle, and always confirm GFCI protection before energizing the circuit.
When replacing a fixture, shut off the breaker, verify zero voltage, match wire colors, and seal every connection with weatherproof connectors and silicone caulk. For new locations, pull a permit, run outdoor-rated cable, and consider hiring a licensed electrician for the wiring work.
Once installed, clean your fixtures every few months, inspect seals annually, and test GFCI buttons twice a year to keep everything safe and bright. With proper setup and routine care, your flood lights will deliver reliable, energy-efficient performance for over a decade.