Every 13 seconds, a home is broken into in the United States, and nearly two-thirds of those intrusions involve entry through windows or doors. Installing security bars creates a physical barrier that deters intruders while also protecting children from dangerous falls. With over 5,000 children treated in emergency rooms each year for window-related injuries, these metal guards save lives. But poor installation can trap occupants during fires or weaken the barrier itself. This guide walks you through every step of how to install security bars correctly, from measuring your windows to mounting them with tamper-proof hardware.
You’ll learn how to choose the right bar type, meet egress codes, avoid common mistakes, and complete a professional-grade installation using basic tools. Whether you select fixed, hinged, or expandable models, following the right process ensures your home stays safe, compliant, and secure.
Choose the Right Security Bar Type
Fixed Bars for Maximum Security
Fixed security bars offer the strongest protection against forced entry. Welded permanently into place, they resist prying and cutting better than removable alternatives. These bars work best on ground-floor windows that are not used as emergency exits, especially in high-crime areas where maximum deterrence matters most.
Avoid installing fixed bars on bedroom or basement windows unless they include a certified quick-release mechanism. Always confirm local fire codes before installation, as many jurisdictions prohibit non-removable bars on sleeping room windows.
Hinged Bars for Easy Emergency Exit
Hinged or pivoting security bars swing open like a gate, giving you full window access when unlocked. They lock securely when closed but release instantly from inside without keys, making them ideal for bedrooms and escape routes.
Look for models that meet ADA egress standards, which require an opening of at least 24 inches high by 20 inches wide. The latch should operate with one hand and open fully in under 10 seconds. Proper alignment during installation ensures smooth movement and a tight seal against the frame.
Sliding Window Security Bars
Sliding security bars are designed for sliding glass doors or horizontal windows. They allow the window to open and close freely while the bar remains in place. Some models feature a movable grille that aligns with the sliding panel and blocks full entry when locked.
Installation requires guide rails mounted on both sides of the window. The bar must not interfere with the track or rollers, and the locking mechanism should engage automatically when closed to prevent outside bypass.
Expandable Bars for Renters and Temporary Setups
Expandable burglar bars require no drilling, making them perfect for renters or temporary installations. These adjustable units press into the window frame using tension screws and are available in round or square profiles. They expand from 485mm to over 1650mm, fitting most standard windows.
For maximum strength, never extend the bar to its absolute limit. Choose a model rated for at least 200mm more than your window width. For example, a 900mm opening needs a bar rated up to 1100mm or 1650mm. This keeps the internal springs under tension without overstressing them. Note that expandable bars are less secure than permanently mounted types but still deter casual intruders.
Removable and Vertical Guard Systems
Removable bars can be taken out when needed for cleaning or seasonal ventilation. They use quick-release brackets that hold firmly yet allow tool-free removal. Install these only if you will consistently reattach them after each use.
Vertical window guards feature evenly spaced uprights and are common in commercial buildings. Mounting styles include surface, flush, frame, and projection. Precision manufacturing ensures consistent spacing, which is critical for child safety since gaps must stay under 4 inches to prevent climbing.
Measure Windows Accurately Before Buying
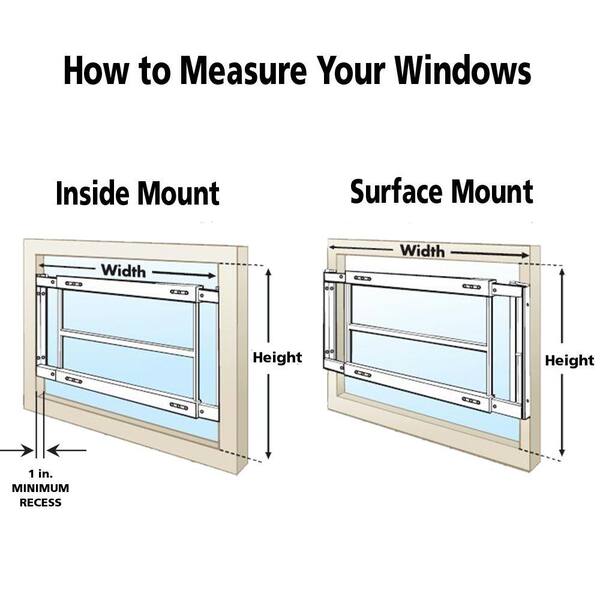
Interior vs. Exterior Mounting Measurements
How you measure depends on your chosen mount type.
For interior (inside mount) bars:
• Measure the inside edge of the window frame for both width and height
• Subtract 5 to 10 mm from each dimension to allow smooth insertion
• Add ½ inch (12 to 13mm) to total width if using brackets that extend beyond the bar
For exterior (face fix or flush mount) bars:
• Measure the opening size
• Add 100 mm (4 inches) to both width and height to accommodate the mounting frame
• Bars should sit slightly outside the window perimeter for full coverage
Expander Bar Sizing Rules
Use a tape measure to get the exact internal dimensions of the window reveal where the bar will sit.
• Choose an expander bar with a maximum extension 200 to 300mm wider than your window
• For a 900mm-wide window, select a bar rated up to 1100mm or 1650mm
• Over-extending weakens the bar and risks collapse under pressure
Position the bar vertically or horizontally based on frame depth. Horizontal placement works well for taller, narrower windows.
Check Frame Depth and Obstructions
Before purchasing, verify your window frame can support the chosen system.
• Inside mounts require at least 1 inch (25mm) of interior frame depth
• Pivoting guards need even more space for hinge channels
• Inspect for obstructions like window latches, blinds, cranks, or handles that might block placement
• Adjust bar orientation or choose a different model if hardware interferes
Prepare Tools and Materials
Essential Tools List
Gather these tools before starting your installation:
• Power drill (SDS hammer drill for masonry or brick walls)
• Drill bits:
– ¼-inch (6mm) for wood or stud pilot holes
– 5/32-inch for Grisham and Mr. Goodbar systems
– 2mm for expander bars in wood frames
– ½-inch masonry bit for concrete, brick, or stone
• Tape measure and pencil for marking
• Spirit level to ensure straight alignment
• Screwdriver or driver bit set
• Rubber mallet to seat brackets without damage
• Hammer for lead inserts or anchors
• One-way driver tool if using Unique Home Designs screws
Required Fasteners and Hardware
Use the correct fasteners for your wall type:
• Wood frames: ¼-inch lag screws or heavy-duty wood screws
• Masonry, brick, or concrete: Masonry anchors with matching screws
• One-way (non-reversing) safety screws to prevent removal from outside
• Lead inserts hammered into screw heads (Mr. Goodbar) to block tampering
• Fitting shims to level bars on uneven surfaces
• Color-matched sealant to seal exterior gaps and prevent water intrusion
Always use manufacturer-recommended hardware. Substitutions can compromise strength and void warranties.
Install Flush Mount Security Bars
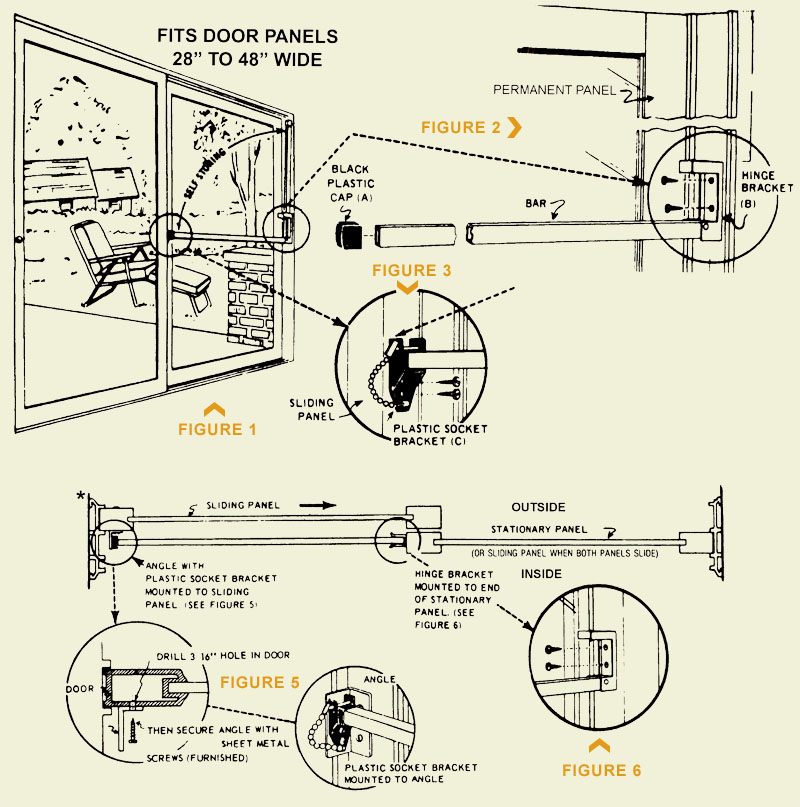
Position and Mark Brackets
Flush mount bars sit directly against the exterior wall for a low-profile look.
- Insert flush mount brackets into the horizontal tube of the bar unit.
- Hold the assembly in place on the window frame, centering it both horizontally and vertically.
- Use a spirit level to confirm perfect alignment.
- Mark screw hole locations with a pencil.
Drill and Secure to Frame
- Drill ¼-inch pilot holes at marked points.
- Align brackets with the holes.
- Insert one-way safety screws one at a time, tightening evenly to keep the bar level.
- Do not overtighten, as this can strip threads or crack masonry.
- Confirm all screws are fully seated and the bar is rigid.
Use masonry anchors for brick or concrete. For wood frames, ensure screws penetrate into structural studs rather than just siding.
Mount 3-Inch Projection Bars
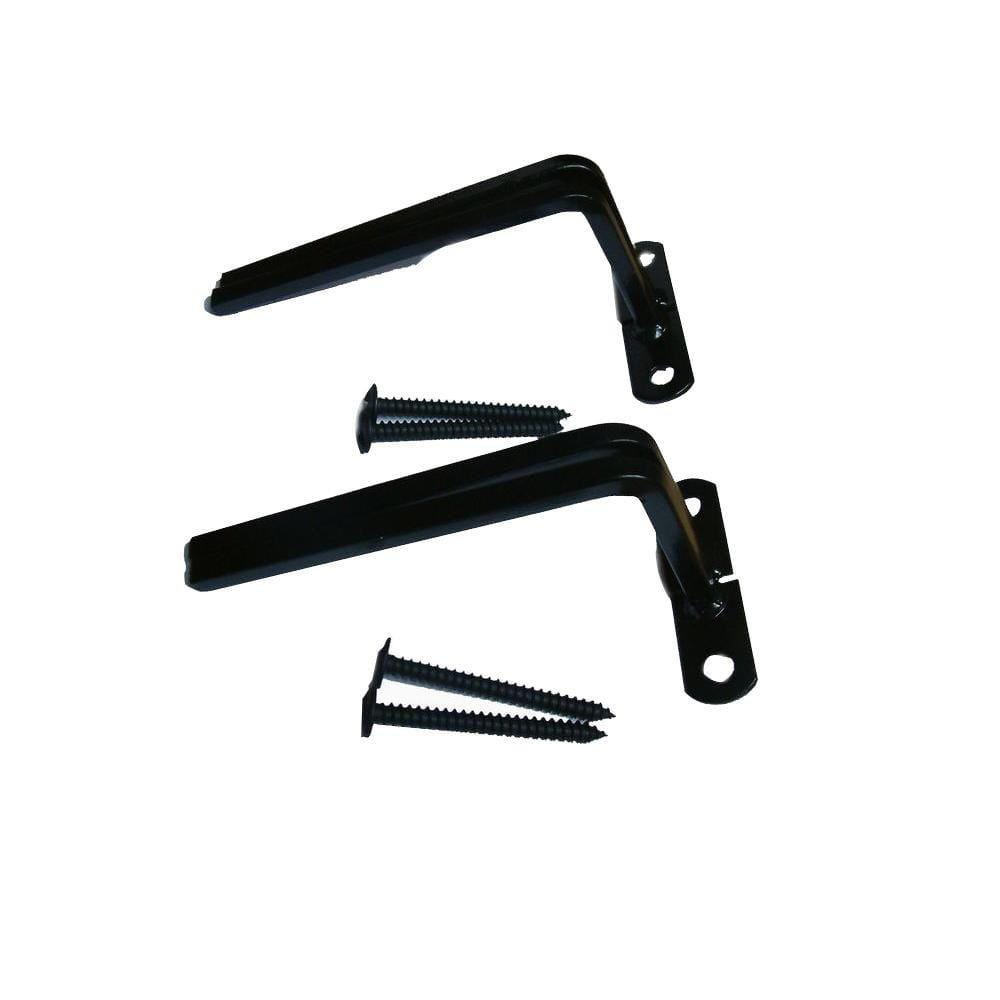
Install Brackets with Clearance
Projection bars extend 3 inches (76mm) from the wall, making them harder to pry off.
- Insert 3-inch projection brackets into the bar’s horizontal tube.
- Position the unit on the window frame, centered and level.
- Mark bracket hole locations.
- Drill ¼-inch pilot holes.
Use Temporary Support During Assembly
Because one side will be unsupported during installation, follow these steps:
- Insert a dowel or drill bit through the bracket hole on one side to temporarily hold the bar.
- Fasten screws on the opposite side first.
- Remove the dowel and secure the remaining side.
- Use a one-way driver tool if required by the brand.
This method prevents misalignment and ensures both brackets sit flush.
Inside Mount Installation Process
Fit Within Window Frame
Inside mounts hide hardware from view, which is ideal for aesthetic-sensitive areas.
- Measure the interior frame width and add ½ inch to account for bracket thickness.
- Insert inside mount brackets with fastener access facing outward.
- Center the bar inside the window opening.
- Mark bracket positions on the frame.
Drill and Fasten Safely
- Drill ¼-inch pilot holes.
- Attach with non-reversing screws.
- For Grisham-style units, cut the horizontal tube to customize fit if needed.
- Ensure the bar is snug and does not wobble.
Avoid over-tightening in wood frames, which can split the material.
Set Up Pivoting Window Guards
Install Hinged Side First
Pivoting guards require precise alignment.
- Place ¼-inch shims on the window sill to hold the guard at proper height.
- Position the guard against the interior frame with no more than ¼ inch clearance between seal and stiles.
- Use the hinged vertical channel as a template to mark pilot holes.
- Remove the guard and drill 5/32-inch holes.
- Secure with two safety screws.
Attach Latching Side
- Expand and position the latching side.
- Cut the nylon band holding the latching bar.
- Swing the guard open to access the latching channel.
- Mark, drill, and secure with two more safety screws.
- Remove shims and test swing motion.
Add Window Stops If Needed
If the window can open more than 4 inches above the bottom bar, install L-shaped window stops in the track to limit opening and prevent climbing or falling hazards. Ensure the latch engages smoothly and the guard opens freely from inside.
Assemble Expander Bars Without Drilling
Expand and Fit Into Frame
For no-drill installations:
- Adjust the expander bar to be slightly wider than the window opening.
- Compress it slightly and insert into the window reveal.
- Turn the adjustment screw clockwise to expand until snug.
Leave a 10 to 20 mm gap at top and bottom for ventilation and ease of operation.
Mount Brackets and Lock In Place
Some models use fixed brackets:
- Attach mounting brackets to the window frame with screws (use anchors in masonry).
- Insert the expanded bar into the brackets.
- Tighten locking bolts to secure.
Test by pushing and pulling. Any wobble means further tightening is needed.
Install Guide Rail Systems (Mr. Goodbar Style)
Mount Left and Right Guide Rails
- Center the LEFT GUIDE RAIL on the window’s left side.
- Mark and pre-drill with a 5/32-inch bit.
- Attach securely.
- On the right side, position the RIGHT GUIDE RAIL plus LOCK END BRACKET for hinged models.
- Mark, pre-drill, and attach.
Ensure both rails are perfectly vertical and aligned.
Slide and Secure the Grille
- Slide the GRILLE onto the left rail.
- Align the right rail and slide it onto the grille.
- Secure the right rail to the frame.
- Center the grille left-to-right using adjustment screws.
- Hammer LEAD INSERTS into screw heads to prevent tampering.
Verify smooth operation. The grille should move freely but not rattle.
Connect Multiple Bars for Large Windows

Join Units with T Brackets
For windows wider than standard bars, use 3-inch T Bracket Connectors when structural backing is available.
- Attach T connectors at top and bottom between two bar units.
- Install 3-inch projection brackets on all four outer corners.
- Slide bars together and secure using standard mounting steps.
This creates a rigid, unified barrier.
Use Connector Pins for Unsupported Joints
When no wall support exists behind the joint, use connector pins instead.
- Insert pins at the top and bottom center joint.
- Slide bars together until pins engage.
- Mount flush, projection, or inside brackets at the four outer corners.
No backing is required, making this ideal for corner windows or thin walls.
Follow Framed System Installation Sequence
Build Frame in Correct Order
For full-frame systems like Lamsteel:
- Fix the base section first to ensure stability.
- Attach side sections next to keep alignment true.
- Install the top section last for final adjustments and even pressure distribution.
This sequence prevents warping and misalignment.
Drill and Seal for Durability
- Use an SDS drill with a 6mm bit to bore through pre-marked holes into the wall.
- Insert anchors and fasten securely.
- Apply color-matched sealant around outer edges to prevent water ingress and improve appearance.
Sealing also reduces drafts and enhances weather resistance.
Maintain and Test Security Bars
Clean and Inspect Regularly
Even durable steel or aluminum bars need upkeep.
• Wipe down monthly with a damp cloth
• Check for rust on exterior units and touch up paint if needed
• Inspect screws and brackets quarterly for looseness
• Tighten any wobbling components immediately
For hinged models, lubricate pivot points annually with silicone spray rather than oil, which attracts dust.
Test Egress Mechanisms Monthly
Safety depends on function.
• Operate quick-release latches once a month
• Ensure release happens in under 10 seconds with one hand
• Practice emergency exit drills with family members
• Confirm the escape opening meets the 24-inch by 20-inch minimum
Replace any mechanism that sticks, jams, or requires excessive force.
Avoid Common Installation Mistakes
Ignoring Egress Codes
Never install non-removable bars on bedroom or basement windows without a code-compliant release. Fire departments routinely cite this as a life-threatening error. Always use keyless quick-release systems on sleeping areas, verify local codes before installation, and label release mechanisms clearly.
Over-Tightening Screws
Excessive torque can crack masonry, strip screw heads, or warp metal brackets. Follow manufacturer torque specs and stop before resistance spikes.
Misaligned Mounting
A crooked bar weakens structure and looks unprofessional. Always use a spirit level during marking and installation, double-check alignment after each screw, and use shims to correct minor frame irregularities.
Cost and DIY vs. Professional Installation
Average Project Costs
• Basic aluminum bars: $90 to $150 per window
• Wrought iron (custom): $100 to over $1,000
• Hinged or swing-open models: $220 and up
• Transparent polycarbonate bars: $150 and up
• DIY expander kits: As low as $200 total
These figures cover materials only, without labor.
Save Money With DIY
DIY installation saves approximately $150 per window in labor costs. Full professional installation averages around $940. Services are available through Mr. Handyman, Home Depot, and Lowe’s in the US, or Rona, Walmart, and Amazon in Canada. DIY is feasible for most homeowners with basic tools and careful planning.
Explore Alternative Security Options
Security Window Films
Clear adhesive films bond to glass and hold shards together if broken. They resist smash-and-grab attempts, are nearly invisible, and cost $5 to $15 per square foot. Professional application delivers the best results. Use them alongside bars for layered protection.
Window Sensors and Alarms
Wireless sensors trigger alerts when a window opens or glass breaks. They connect to home security systems, send phone notifications, deter intruders with audible alarms, and offer easy DIY installation. Pair them with physical bars for comprehensive coverage.
Reinforced Glass Upgrades
Tempered or laminated glass is harder to break. Laminated glass has a plastic interlayer that keeps it intact even when cracked, offering sound insulation and UV protection. Though more expensive than film or bars, it suits high-risk or high-value properties.
Frequently Asked Questions About Installing Security Bars
Do security bars need a quick-release mechanism on bedroom windows?
Yes. Building codes in most jurisdictions require a quick-release mechanism on any security bar covering a window in a sleeping room or basement with habitable space. The release must operate without keys and allow exit in under 10 seconds.
What is the minimum egress opening for security bars?
The ADA-compliant minimum is 24 inches high by 20 inches wide. This ensures occupants can escape quickly during emergencies and that first responders can enter if needed.
Can I install security bars on a rental property?
Yes, but you should use no-drill expandable bars or removable models to avoid damaging the window frame. Always get written permission from your landlord before installation.
How much does it cost to install security bars professionally?
Professional installation averages around $940 for a full home, while DIY installation saves approximately $150 per window in labor costs. Material prices range from $90 for basic aluminum bars to over $1,000 for custom wrought iron.
What gap size is safe for child window guards?
Gaps between vertical bars should be under 4 inches to prevent children from climbing or slipping through. The gap between the window sill and the bottom horizontal bar should also stay under 4 inches.
How do I prevent security bar screws from being removed?
Use one-way (non-reversing) safety screws, which can be installed but not removed without destroying the head. For added security, hammer lead inserts into screw heads on Mr. Goodbar systems.
Key Takeaways for a Secure Security Bar Installation
Learning how to install security bars properly comes down to three critical factors: choosing the right bar type, measuring precisely, and following code-compliant egress rules. Fixed bars offer maximum security but should never block emergency exits. Hinged and removable models provide safe egress for bedrooms and basements. Expandable bars work well for renters who cannot drill into frames.
Accurate measurements prevent costly returns and weak fits. Always check frame depth, obstructions, and local codes before purchasing. Using the correct fasteners, including one-way screws and masonry anchors, ensures your bars resist tampering and forced entry.
Your next step is to assess each window in your home, decide which bar type fits each location, and gather the tools and hardware listed above. With careful planning and attention to safety codes, you can complete a professional-grade installation that protects your family for years to come.