
Basement windows are a frequent entry point for intruders because they sit low to the ground, hide behind shrubs, and often get overlooked during home security planning. Installing security bars on basement windows adds a strong physical barrier that stops break-ins before they start. These bars also protect children and pets from falls and provide safe emergency exit routes when installed to code.
Choosing the right bar type and mounting method makes the difference between real protection and a false sense of security. This guide covers how to pick the right bar, measure your windows, gather the correct tools, and install bars on both concrete and wood surfaces. You will also learn how to meet fire codes, test emergency releases, and maintain your bars for years of reliable use.
Choose the Right Security Bar Type
Match Bar Style to Window Function
Your bar type must match how the window is used. A window in a bedroom needs a different setup than one in a storage room.
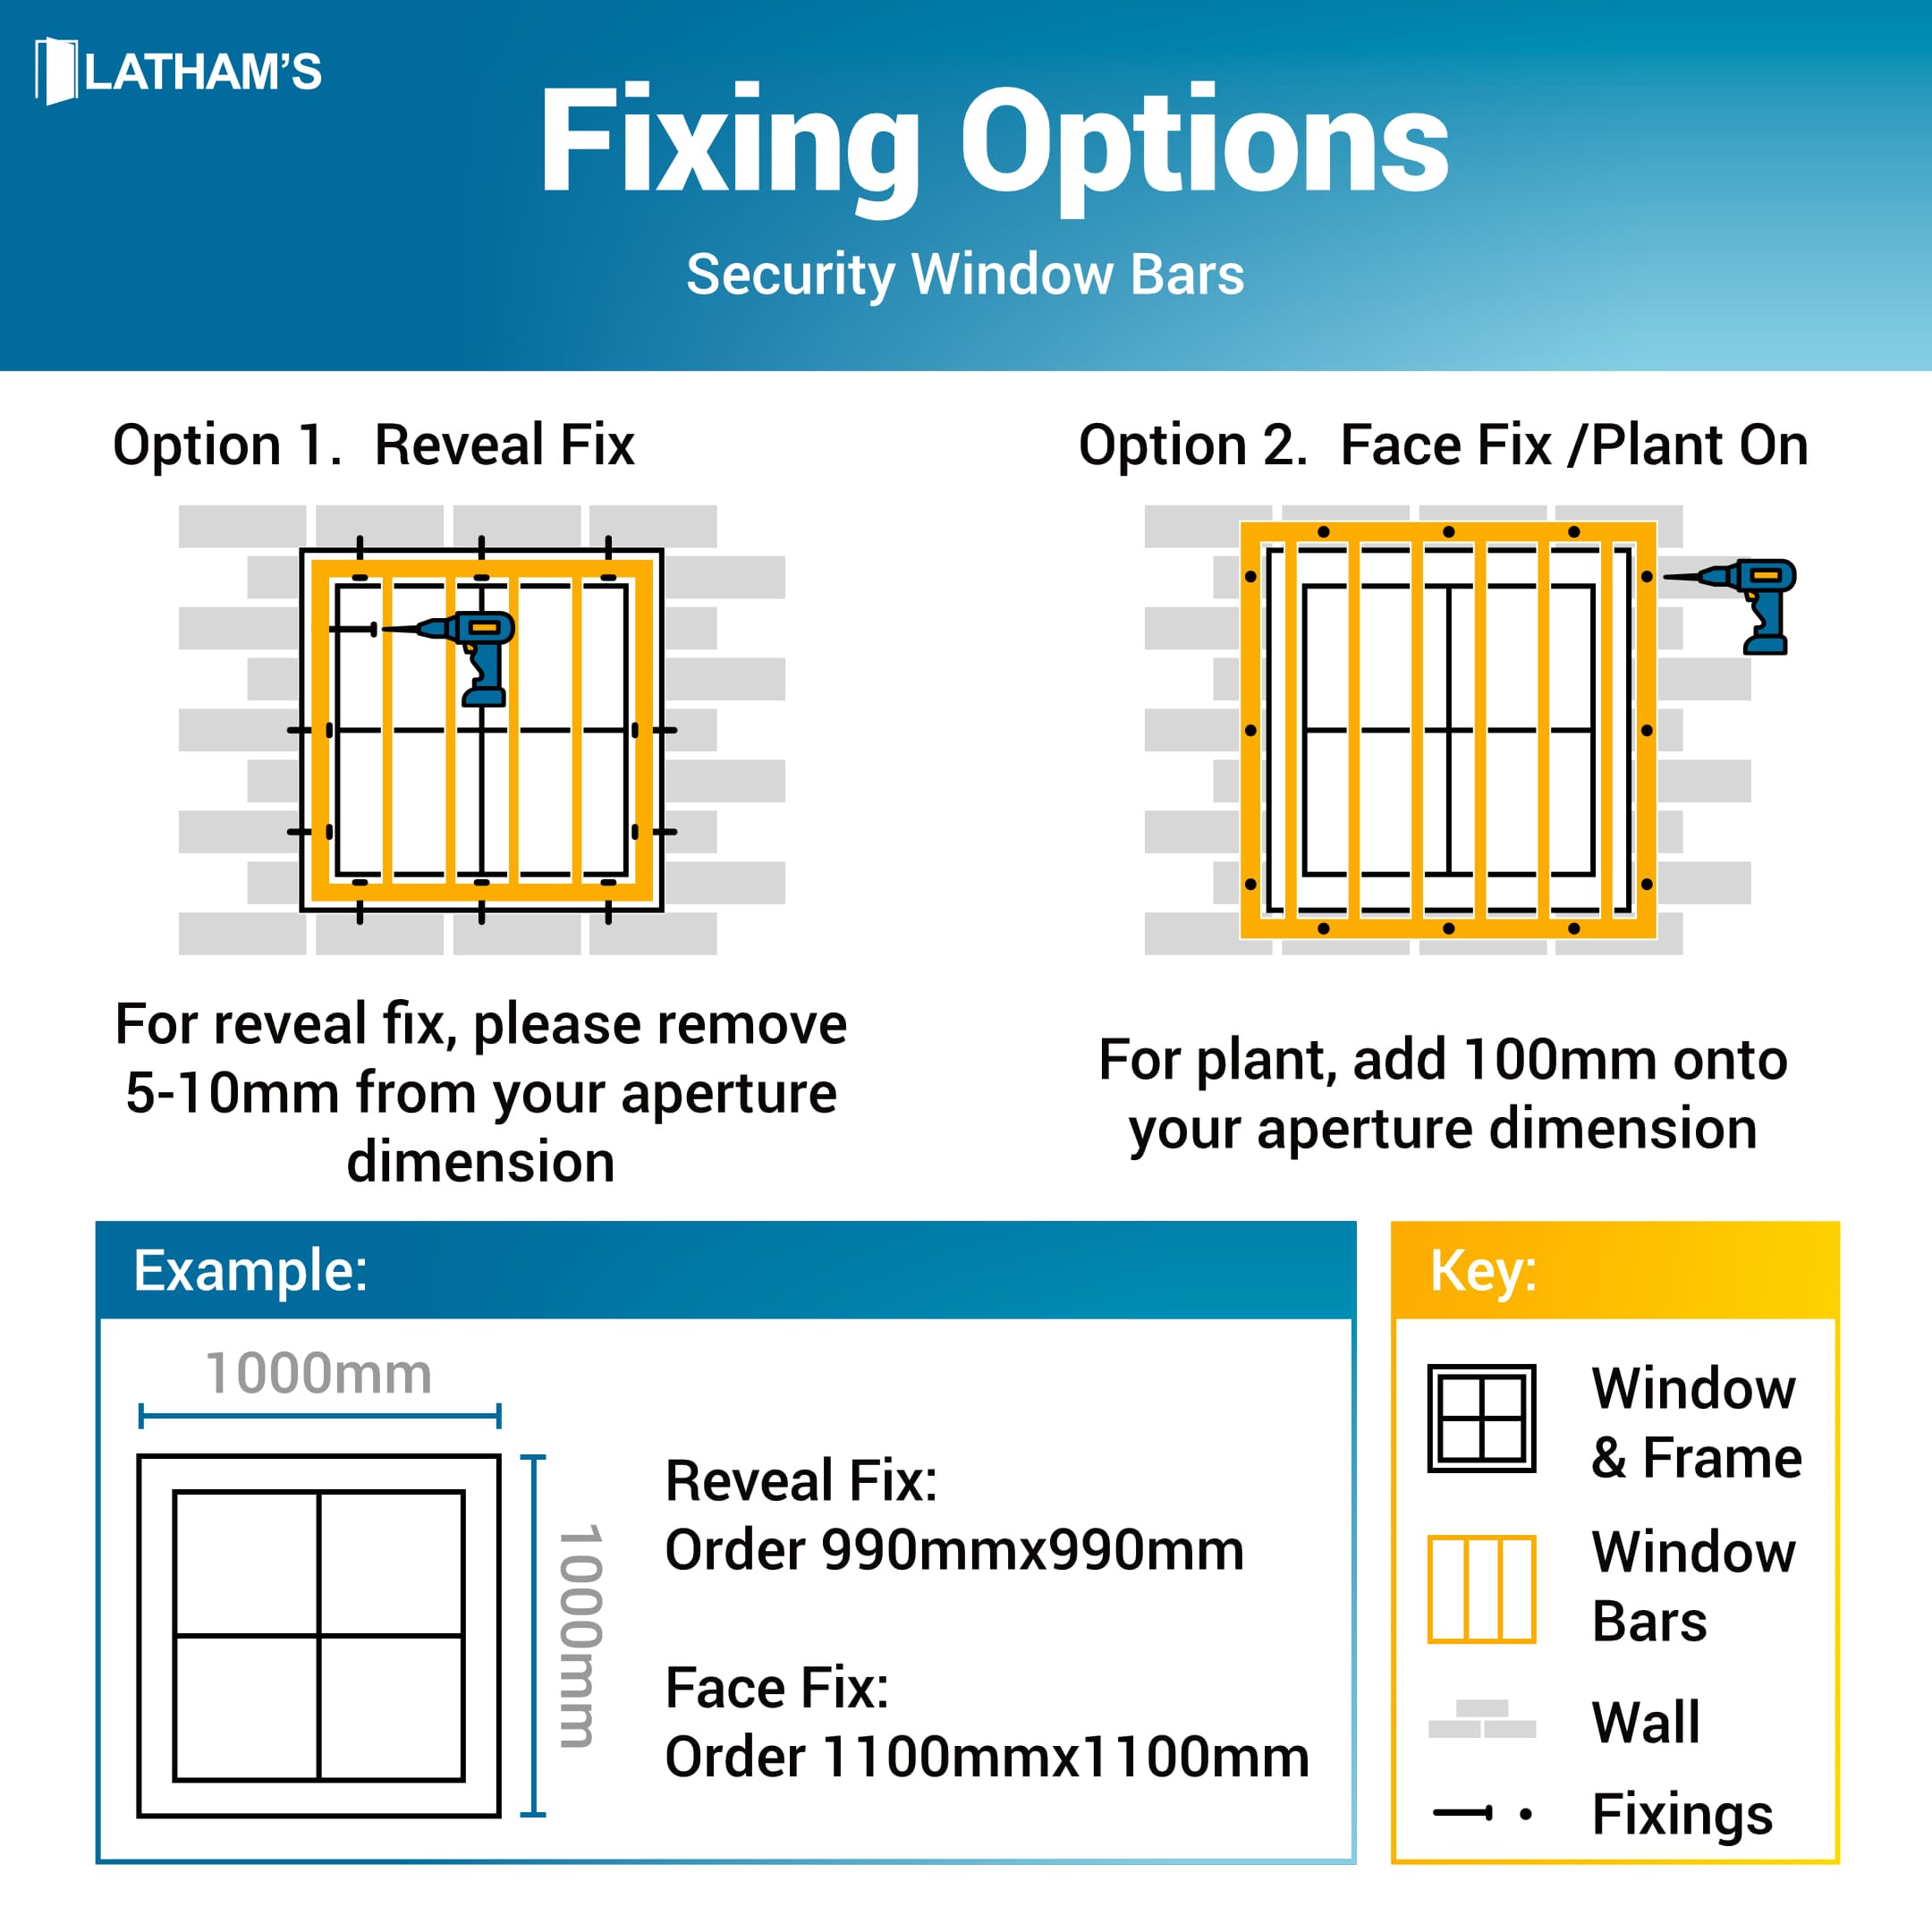
Permanent bars offer the strongest protection. Mounted with heavy-duty anchors into concrete or steel, they work best on non-egress windows that no one uses to escape. However, they are illegal on bedroom windows in most areas because they block emergency exits.
Breakaway bars meet fire code standards for interior use. They feature a quick-release pin or lever that lets anyone inside remove the whole unit instantly without tools. These are required for any basement bedroom or living space.
Swing-away bars use hinges to open like a door, giving full window access for cleaning or ventilation. Choose models with high-grade steel hinges and tamper-resistant locks.
Removable bars suit rentals or seasonal properties. They are lightweight and tool-free but offer less strength than fixed models.
Sliding bars are built for sliding basement windows. They lock in place while still allowing the window to open partially for air.
Pick Durable, Code-Compliant Materials
Material choice affects strength, maintenance, and price.
Steel or wrought iron is the top option for serious security. It resists cutting and holds up against forced entry. Wrought iron can be custom-shaped for a decorative look but needs rust protection. Custom jobs often run $100 to $300 or more per window.
Aluminum is lighter and cheaper, usually $20 to $100 per unit. It works in low-risk areas but is easier to break through.
Transparent polycarbonate offers high impact resistance without blocking your view. Some versions are even bullet-rated. Prices start around $150 for small windows and resist rust naturally.
Always confirm that your product meets local building codes, especially for egress windows. Look for “breakaway” labels or third-party certifications before buying.
Measure and Plan Before Installation
Take Accurate Window Dimensions
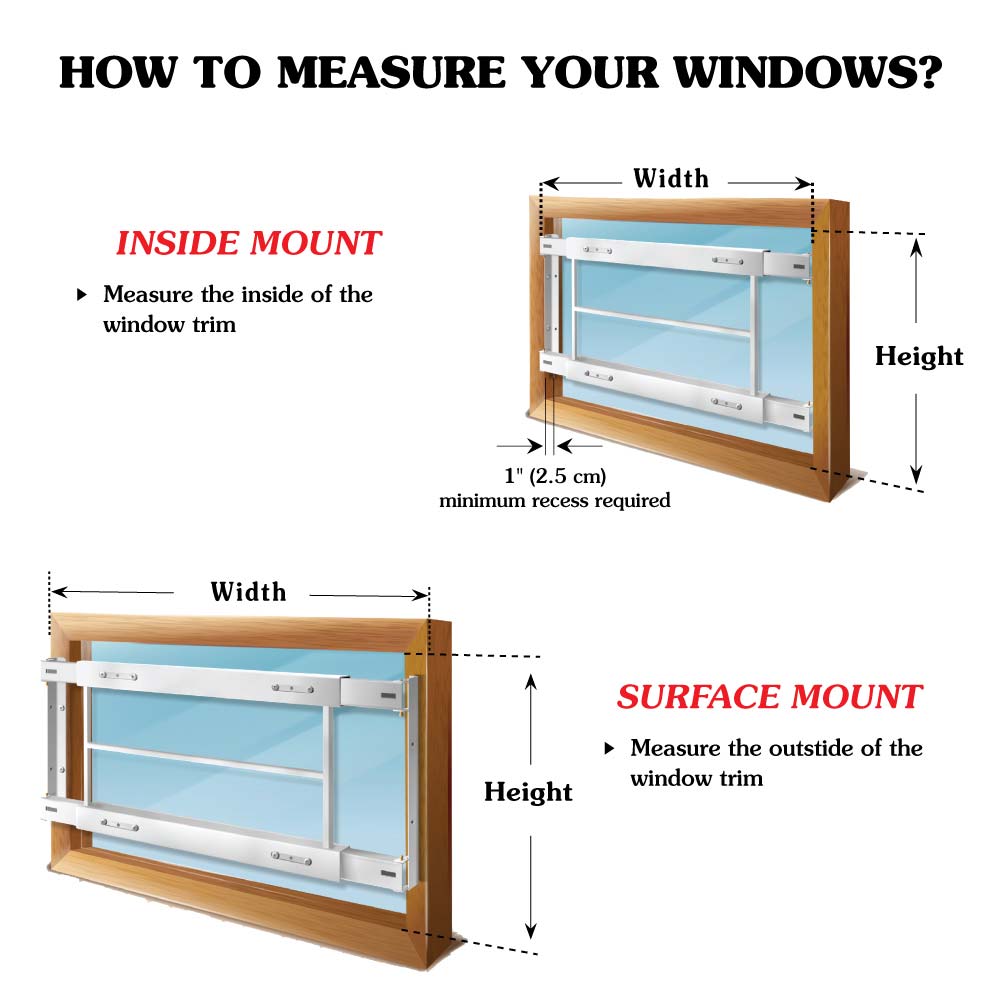
Wrong measurements create gaps that intruders can exploit. Measure every window individually, even if they look identical.
Measure width and height at three points: top, middle, and bottom. Always use the smallest measurement. This prevents wobble and removes space for prying tools.
- Width: Measure inside edge to inside edge of the frame.
- Height: Measure from the top of the frame down to the sill.
- Depth: Confirm at least 1 inch of flat mounting surface on the frame or wall.
Expandable bars adjust to fit ranges like 30 to 54 inches. For odd-sized windows, order custom bars.
Check for Obstructions and Surface Type
Look around each window for air conditioners, pipes, or uneven siding. These may require offset brackets or specially shaped bars.
Identify your mounting surface before buying hardware:
- Concrete or cinder block walls need masonry anchors and a roto hammer drill.
- Wood framing requires lag screws driven into studs.
Use a stud finder behind drywall or siding to locate solid wood. Never anchor into drywall or vinyl alone, since these materials cannot hold against force.
Confirm Egress and Safety Compliance
If your basement has a bedroom or living space, the window must serve as a legal emergency exit. The minimum opening is 24 inches high by 20 inches wide, operable from inside without tools.
Permanent bars violate this rule. Only breakaway or swing-away models are allowed on egress windows. Test the release mechanism once a month to confirm it works.
Avoid keyed locks on egress windows. Many fire codes ban them because trapped occupants cannot find the key in a panic. If a key is required, it must stay in a breakable container nearby.
Gather Tools and Fasteners
Essential Tools for Any Installation
The right tools ensure a clean, secure install.
- Tape measure: For precise dimensions.
- Spirit level: Keeps bars straight, which matters for both function and appearance.
- Power drill: Use a roto hammer drill for concrete and a standard drill for wood.
- Drill bits:
- Carbide-tipped masonry bit (1/4″, 5/16″, or 1/2″ depending on anchor)
- Wood bit (1/8″ for pilot holes)
- Metal bit for drilling through steel bars
- Center punch: Stops drill bit slippage on smooth metal.
- Screwdriver set: Flathead and Phillips, with sharpened tips to prevent stripping.
- Clamps: Hold metal parts steady during drilling.
- Safety glasses: Required when drilling metal or masonry.
Select the Correct Anchors and Screws
Fasteners must match the surface and the expected load.
For masonry (concrete, brick, cinder block):
– Lead anchors or conical screw anchors
– Drill the hole 1 inch deeper than the screw length to leave room for dust
– Match anchor size to screw diameter (for example, a 1/2″ bit for a 1/2″ anchor)
For wood framing:
– Lag screws 2 to 3 inches long driven into studs
– Self-tapping screws for thinner profiles
– Pilot holes at 1/8″ diameter, no deeper than 1/2″ to avoid breaking glass
Use non-reversing security screws where possible. These resist removal with common tools. Hammer lead inserts into screw heads after installation to hide and protect them.
Install Bars on Concrete Basement Walls
Mark and Level Mounting Points
Hold the mounting brackets in place and use a spirit level to confirm perfect alignment. Mark each drill point with a pencil, then double-check both sides and the top and bottom.
For breakaway bars, find the center post location first since it usually anchors before the side pieces.
Drill Pilot Holes in Masonry
Use a roto hammer drill with a carbide-tipped bit sized to your anchor. Start slowly and let the hammer action do the work without forcing it. Drill about 1 inch deeper than the screw to allow dust space.
To prevent overheating:
– Drill in short bursts
– Dip the bit in water every 10 to 15 seconds
This keeps the bit sharp and extends its life.
Insert Anchors and Secure Brackets
Clean out dust with compressed air or a small brush. Hammer lead anchors into the holes until they sit flush with the wall. They expand as screws tighten, creating a strong grip.
Place the brackets over the anchors and drive in the screws. Tighten fully but avoid over-torquing, which can crack the anchors.
Attach the Security Bars
Slide or bolt the bar assembly into the mounted brackets. For expandable bars, stretch the arms to fit the window width, then secure the center joining post with screws through pre-drilled holes.
For breakaway models, confirm the quick-release pin engages smoothly. Test it right away after installation.
Mount Bars on Wood Window Frames

Position and Mark Bracket Locations
Interior mounts often attach to wood window frames. Place the guide rails or saddle brackets so they do not block window operation.
Make sure brackets sit over structural studs, not just the frame trim. Mark screw points with a pencil.
Drill Pilot Holes in Wood
Use a 1/8-inch bit to drill pilot holes no deeper than 1/2 inch. Going deeper risks hitting the glass behind the frame.
Drill straight. Angled holes can strip screws or miss the stud entirely.
Install Anti-Lift Locks (Recommended)
Bars alone do not stop a window from being pried upward. Anti-lift locks solve this problem.
- Apply double-sided tape to the back of the lock
- Press firmly onto the window frame behind the bracket
- These stop the window from being lifted out of its track
Secure Brackets and Assemble the Bar
Align the bracket over the anti-lift lock and drive in self-tapping screws. Tighten just enough to hold. Over-tightening strips soft wood or plastic frames.
For sliding grilles:
1. Slide the bar into the left guide rail
2. Slide the right rail onto the bar
3. Center the unit left to right
4. Secure the right rail to the frame
Use adjustment screws on hinged models to fine-tune swing clearance.
Build DIY Rebar Security Bars (No-Weld Method)
Cut and Space Rebar Posts
For a budget-friendly, high-strength option, use 1/2-inch rebar. Cut vertical pieces to match window height, such as 36 inches. Space them about 4.75 inches apart, since wider gaps allow body passage.
Mark drilling points on the wooden window frame studs.
Drill and Adhere Rebar into Frame
Use a 5/8-inch drill bit to bore holes into the studs at marked spots. Inject Loctite Construction Adhesive into each hole, filling about two-thirds full.
Insert rebar firmly until flush. Wipe away excess adhesive right away. Let the assembly cure for 24 hours before use.
Add Top Horizontal Bar
Drill horizontal holes at the top of the vertical bars. Slide a horizontal rebar piece through to tie them together. This cross-bracing makes the whole assembly much harder to pry apart.
Test and Maintain Installed Bars
Verify Stability and Emergency Release
After installation, shake the bars hard. Any movement means weak anchoring, so reinstall with longer screws or better anchors.
For breakaway models, pull the release pin. The bar should detach instantly. Reset and relock to confirm it works repeatedly. Test monthly, especially before winter or storm season.
Lubricate and Inspect Annually
Annual maintenance prevents failure.
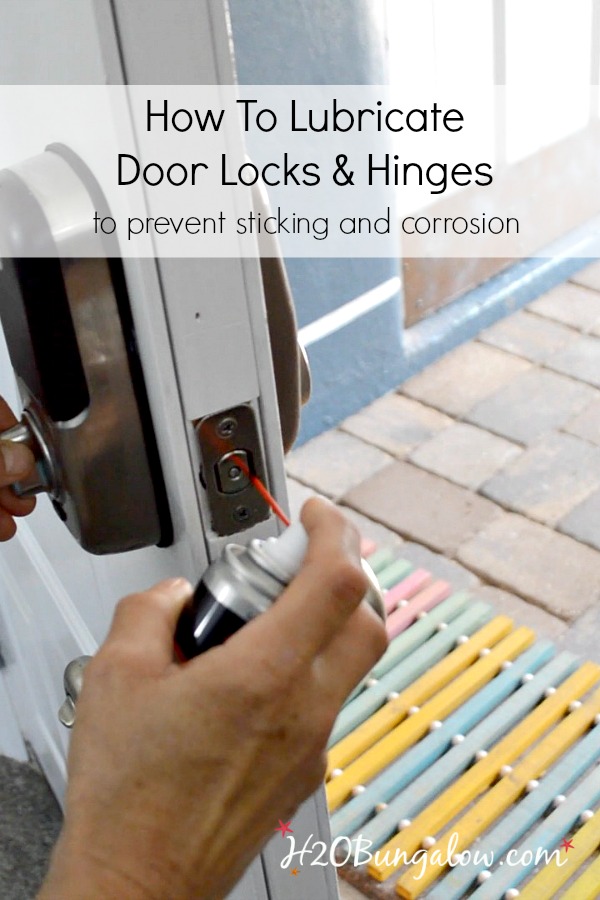
- Lubricate hinges and locks on swing-away bars with silicone spray or light oil
- Check for rust on exterior steel or iron bars, then sand and repaint as needed
- Inspect all screws and anchors yearly, since concrete settles and wood expands
- Trim landscaping around basement windows to remove hiding spots and keep emergency exits clear
Avoid Common Installation Mistakes
Prevent Drill Bit Slippage
Drilling into smooth metal causes bits to skate. Fix this with a center punch. Tap it at the mark to create a small dimple that guides the bit.
For masonry, start with a smaller pilot bit before switching to the final size.
Stop Screw Stripping
A dull or ill-fitting screwdriver strips screw heads fast.
- Sharpen tips with a single-cut file
- Apply firm, steady pressure
- Keep the driver straight without wobbling
Use impact-rated bits if you are using a driver.
Avoid Shallow or Off-Target Anchoring
Screws must hit structural studs or solid masonry. They should never land in drywall, siding, or window frames alone.
If bars feel loose, the anchors missed the stud. Redrill in the correct location.
Never Block Egress with Permanent Bars
Installing fixed bars on bedroom windows is dangerous and often illegal. If discovered during inspection, you will face fines and forced removal.
Replace any permanent bars on sleeping areas with breakaway or swing-away models immediately.
Combine Bars with Other Security Layers
Reinforce Glass with Security Film
Even with bars, glass can shatter. Apply transparent security film 4 to 7 mil thick to hold broken pieces together. This delays entry and works with all bar types.
Add Window Sensors and Alarms
Electronic window sensors detect opening or glass breakage. Pair them with a home alarm system for real-time alerts, even when no one is home.
Install Motion-Sensor Lighting
Dark corners invite crime. Place motion-activated lights near basement windows to deter intruders and aid any surveillance cameras.
Use Window Well Covers
If your basement has window wells, install steel grate covers. They block direct access while still allowing light and emergency escape. Make sure the cover has a quick-release mechanism on the inside.
Monitor with Security Cameras
Doorbell or window cameras with night vision and two-way audio let you see and speak to anyone near your windows. AI detection can alert you to loitering or attempted break-ins.
Frequently Asked Questions About Basement Window Security Bars
Do security bars on basement windows violate fire codes?
Permanent bars can violate fire codes if installed on bedroom windows or any window serving as an emergency exit. Breakaway or swing-away bars with quick-release mechanisms meet code requirements because occupants can remove them from inside without tools.
What is the best material for basement window security bars?
Steel or wrought iron offers the highest strength and cut resistance. Aluminum is lighter and cheaper but easier to compromise. Transparent polycarbonate provides impact resistance without blocking views and resists rust naturally.
How much does it cost to install security bars on basement windows?
DIY installation runs $20 to $100 per window for basic aluminum or steel expandable bars. Custom wrought iron jobs range from $100 to $300 or more per unit. Professional installation averages around $940 total for materials and labor.
How do I anchor security bars into concrete basement walls?
Use a roto hammer drill with a carbide-tipped masonry bit matched to your anchor size. Drill about 1 inch deeper than the screw length, then insert lead or conical screw anchors. Drive screws through brackets into the anchors for a strong hold.
How often should I test breakaway bar release mechanisms?
Test the quick-release pin or lever once a month to confirm smooth operation. Also test before winter and storm season. Lubricate moving parts annually and check all fasteners for tightness.
Can I install security bars on basement windows myself?
Yes, with basic tools and careful measurement. DIY works best for expandable bars on wood frames. Concrete installations require a roto hammer drill and masonry experience. Always verify local building codes before starting.
Key Takeaways for Securing Your Basement Windows
Installing security bars on basement windows is one of the most effective ways to deter break-ins and protect your family. Start by choosing the right bar type, especially breakaway models for any window that serves as an emergency exit. Anchor bars securely into masonry or studs using the correct fasteners and tools for your surface.
Avoid common errors like shallow mounting, stripped screws, or blocked exits. Pair your bars with security film, motion lighting, and window sensors for layered protection. With proper installation and annual maintenance, your basement windows will stay secure for years to come.
Ready to start? Measure your windows today, then choose breakaway bars for any egress window and permanent bars for storage areas. Your home security upgrade begins with that first measurement.