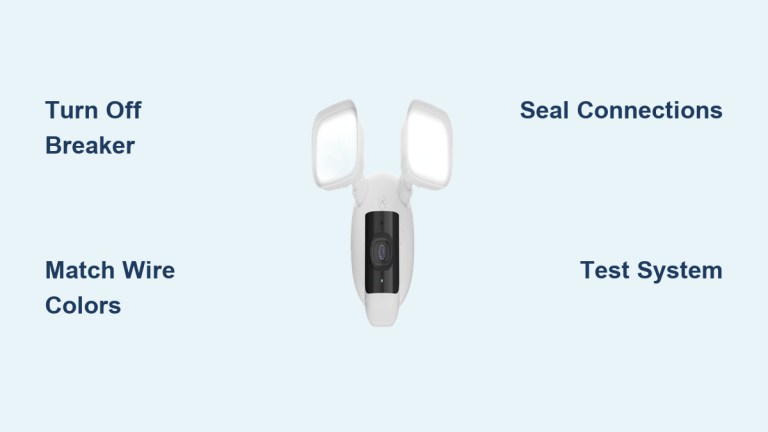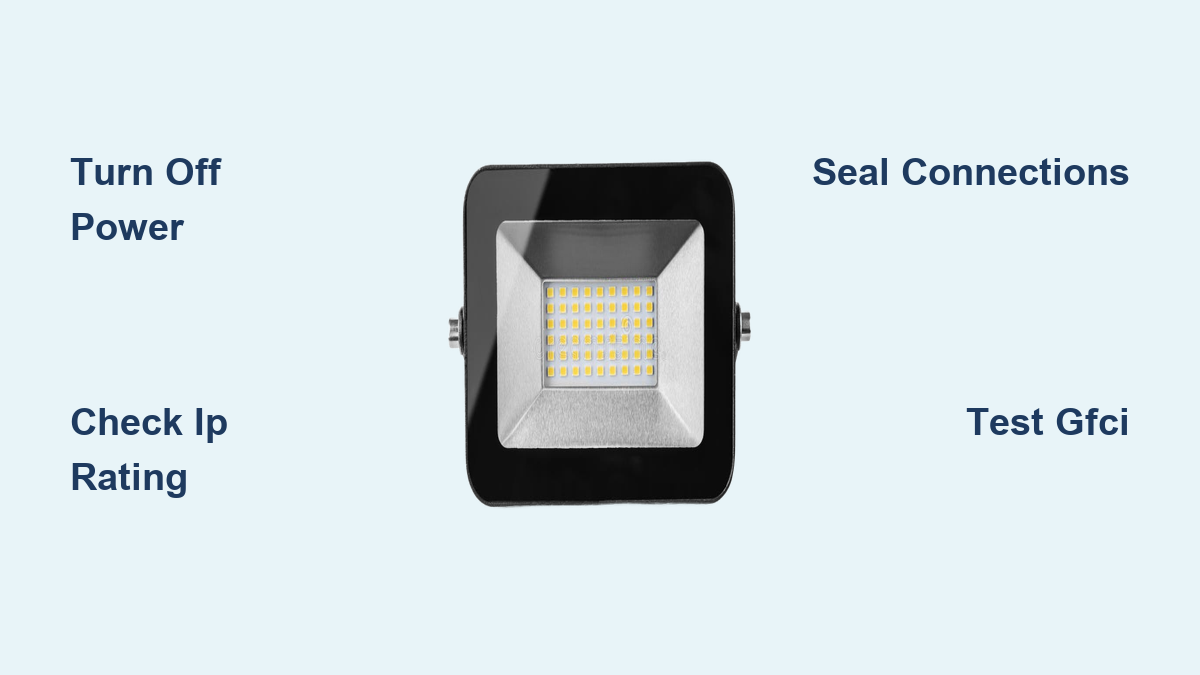

Installing an LED flood light transforms dark outdoor spaces into well-lit, secure areas around your home or business. If you are learning how to install LED flood light fixtures the right way, you will avoid the most common pitfalls: moisture damage, loose wiring, and code violations. These lights are energy-efficient, long-lasting, and versatile enough for driveways, gardens, building exteriors, and commercial lots. Because they connect directly to mains power, a careful approach protects both your property and your personal safety. This guide covers planning, mounting, wiring, testing, and maintenance so you can complete the job with confidence.
Safety First: Power and Electrical Protocols
Outdoor electrical work demands strict caution. Skipping these steps risks shock, fire, or damage to your new fixture.
Turn Off Power at the Breaker
Never rely on a wall switch alone. Go to your main electrical panel and switch off the circuit breaker supplying the area. Wall switches can be miswired or bypassed, leaving live current behind.
Verify Power Is Off
Use a non-contact voltage tester at the fixture location and inside the junction box. Test every wire, even if it appears dead. A live conductor in damp conditions can cause severe injury.
Lock Out the Circuit
If possible, place a lockout or tagout device on the breaker. This prevents anyone from restoring power while you work and eliminates dangerous surprises.
Choose the Right Installation Method

Your mounting method determines coverage, complexity, and long-term performance.
Wall Mounted: Best for Residential Use
Ideal for homes, garages, and fences. Mount 9 to 12 feet high with a downward angle of 30° to 45° for wide, even coverage.
- Beam Angle: 60° to 120°
- Pros: Easy access, uses existing structure
- Cons: Must avoid glare on windows or siding
Ground Mounted: Highlight Landscaping Features
Perfect for uplighting trees, sculptures, or architectural details.
- Beam Angle: 15° to 60°
- Pros: Creates dramatic visual effects
- Cons: Vulnerable to splash zones, requires high IP rating
Pole Mounted: For Large Open Areas
Used in parking lots, stadiums, and roadways for broad, elevated lighting.
- Beam Angle: 60° to 120°
- Pros: Wide coverage, minimal glare
- Cons: Requires foundation and professional installation
Portable or Tripod: Temporary Lighting Only
Great for construction sites or events. Not suitable for permanent setups.
- Beam Angle: 90° to 120°
- Pros: Mobile, no wiring needed
- Cons: Less stable, not weatherproof long-term
Check Fixture and Location Requirements
Proper planning prevents problems months after installation.
Confirm Voltage Compatibility
Most residential LED flood lights support 100 to 277V AC, but always check the label. Connecting a 120V-only unit to higher voltage destroys the driver instantly.
Verify IP Rating
Outdoor fixtures need a minimum rating of IP65, which means dust-tight and protected against water jets. Lower-rated models fail quickly in exposed locations.
Inspect the Junction Box
Ensure your electrical box meets these criteria:
- Made of metal or weatherproof plastic
- Rated for wet locations
- Securely mounted with no cracks or rust
- Equipped with a proper gasket or seal
Plan for Sealing
Even IP65 fixtures fail if moisture enters through gaps. Have exterior-grade silicone caulk ready to seal around the box and mounting screws.
Gather Tools and Materials
The right equipment ensures a clean, code-compliant install.
Essential Tools
- Non-contact voltage tester
- Screwdrivers matching fixture hardware
- Drill with masonry bits for brick or concrete
- Ladder rated for your mounting height
- Wire strippers for trimming damaged leads
- Masking tape for labeling wires
Required Materials
- Outdoor-rated wire connectors, preferably dielectric-grease filled
- Exterior silicone sealant
- Masonry anchors for hard surfaces
- Electrical tape for humid climates
Replace an Existing Fixture (DIY-Friendly)

Upgrading from an old light is manageable with careful attention.
Remove Old Fixture Safely
- Power off at the breaker.
- Unscrew and remove the old fixture.
- Take a photo of the wiring before disconnecting.
- Label wires with tape if colors are faded.
Inspect Wiring and Box
Check for cracked insulation, corroded terminals, or moisture inside the box. Trim damaged wire ends and strip half an inch of insulation if needed. Replace the box if it shows cracks or rust.
Mount the New Bracket
Attach the universal mounting bracket to the junction box. Use a level to confirm it is straight. For masonry, use corrosion-resistant anchors.
Connect Wires Correctly
Match wire colors carefully:
- Black to Black (Hot)
- White to White (Neutral)
- Green or Bare to Ground
Twist wires together clockwise with pliers, then screw on a wire nut until snug. Gently tug each wire to confirm it will not pull out.
Pro Tip: Wrap connections with electrical tape in humid areas for extra moisture protection.
Seal and Mount the Fixture
- Tuck wires neatly into the box.
- Apply a continuous bead of silicone around the junction box edges and screw holes.
- Align the fixture base with the bracket and secure with screws.
- Do not over-tighten, as this can crush gaskets and break seals.
Install in a New Location (Call a Pro)
Running new wiring is not a DIY job. Mistakes here create fire hazards and failed inspections.
Why You Need an Electrician
- New circuits must be GFCI-protected
- Underground conduit or trenching may be required
- Junction box must be properly grounded and rated
- Must comply with NEC and local codes
What the Pro Will Do
- Run cables from a power source
- Install a weatherproof, wet-location-rated box
- Ground the circuit properly
- Ensure GFCI protection is active
Wire Sensors and Smart Controls
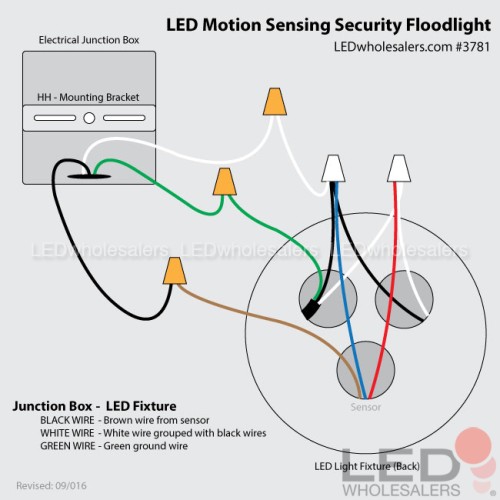
Add motion detection or remote control for convenience and efficiency.
Built-in Sensors
Many LED flood lights include motion or dusk-to-dawn sensors.
- Test mode may keep light on continuously, so refer to the manual to exit
- Adjust sensitivity and duration dials after installation
- Reposition if false triggers occur from swaying branches
External Sensors
Wired in-line with the hot (black) wire between power and fixture.
- Neutral and ground bypass the sensor
- Follow the manufacturer diagram exactly
- Do not use 0–10V sensors unless the fixture is dimmable
Smart Modules (Wi-Fi or Z-Wave)
Enable app control and scheduling.
- Verify the module matches fixture load in wattage
- Some require a neutral wire at the switch location
- Follow the wiring guide precisely to avoid damaging electronics
Test and Fine-Tune the Light
Never skip post-installation checks.
Restore Power and Observe
- Turn the breaker back on.
- Watch for immediate illumination or sensor delay.
- Confirm there are no tripped breakers or flickering.
Check for Even Coverage
Stand in the target area and look for dark spots, overlapping beams, or glare toward windows and streets.
Adjust Aiming While Lit
Turn the light on and make small adjustments to the bracket. Use built-in pivots to fine-tune the beam, then tighten lock nuts securely.
Troubleshoot Common Issues
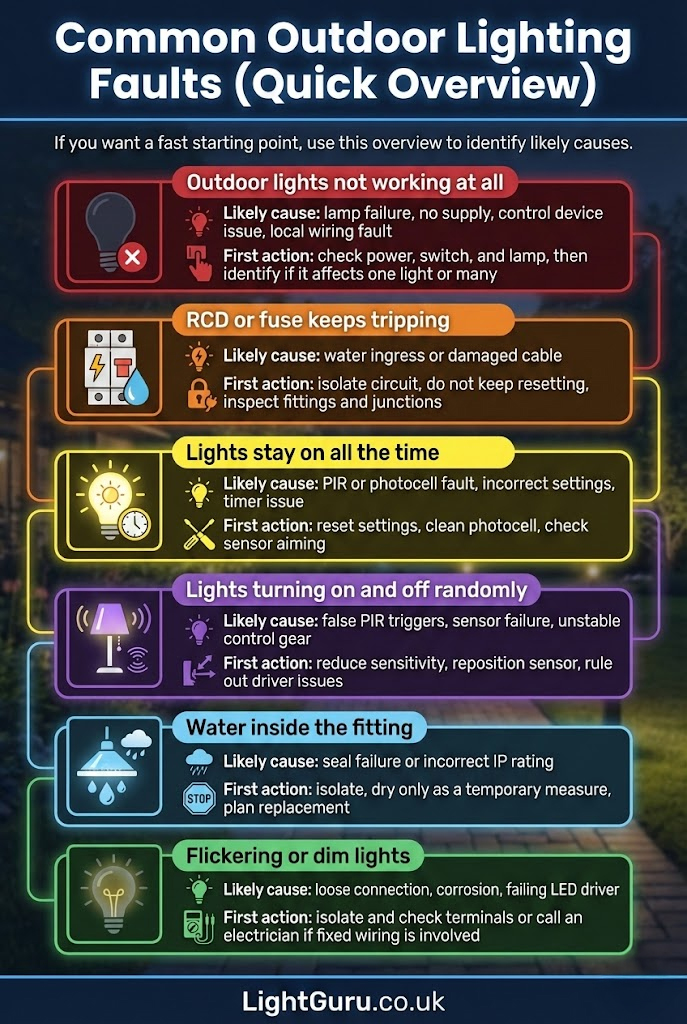
Quick fixes for frequent problems.
Light Will Not Turn On
- Causes: Tripped breaker, loose wire, power not restored
- Fix: Check breaker and switch, test voltage at fixture leads, re-tighten hot and neutral connections
Breaker Trips Immediately
- Causes: Short circuit, ground fault, moisture
- Fix: Inspect for exposed copper touching box, dry out junction box, ensure neutral and ground are not crossed
Flickering Light
- Causes: Loose connection, overloaded circuit, failing driver
- Fix: Tighten all wire nuts and terminals, unplug other devices on the circuit, replace fixture if internal driver is faulty
Light Stays On Constantly
- Causes: Sensor in test mode, aimed at moving objects
- Fix: Exit test mode per manual, reposition sensor away from traffic or trees, lower sensitivity setting
Dim or Fading Output
- Causes: Low voltage, moisture in housing, driver failure
- Fix: Measure input voltage, open housing (power off) and check for condensation, replace if seal is broken
Moisture Inside Lens
- Causes: Failed gasket, loose cable gland
- Fix: Power off, dry interior, reseal housing-to-box interface, replace fixture if lens seal is compromised
Maintain for Longevity
LEDs last 30,000 to 50,000 hours when maintained properly.
Clean the Fixture Regularly
- Wipe the lens with a soft cloth and mild soap
- Never use: Ammonia, acetone, or abrasive pads, which damage polycarbonate
Seasonal Inspections
After heavy rain or seasonal shifts:
- Check gaskets and seams for gaps
- Reapply silicone if needed
- Tighten mounting screws
Annual Electrical Check
- Turn off power.
- Open the junction box.
- Look for corrosion, rust, or oxidation.
- Replace any damaged components.
Test GFCI Protection
Press Test, then Reset on GFCI outlets or breakers every six months. If it does not trip, replace it immediately.
Avoid Critical Mistakes
Prevent failures before they happen.
Do Not Skip Grounding
The ground wire (green or bare) is not optional. It prevents shock in wet conditions. Always connect it securely.
Do Not Assume Dimmability
Most standard LED flood lights are not dimmable. Connecting to a dimmer switch causes flickering or permanent damage.
Do Not Over-Tighten Screws
Crushing the gasket breaks the weather seal. Tighten until snug, no further.
Do Not Ignore Heat Buildup
Avoid enclosing the fixture unless rated for enclosed use. Heat shortens LED lifespan and damages drivers.
Frequently Asked Questions About LED Flood Light Installation
Do I need an electrician to install an LED flood light?
You only need an electrician for new wiring runs or new junction box installations. Replacing an existing fixture on a code-compliant box is a manageable DIY task if you follow safety protocols.
What IP rating do I need for outdoor LED flood lights?
Outdoor fixtures require a minimum rating of IP65, which protects against dust and water jets. Lower ratings fail quickly when exposed to rain.
Can I connect any LED flood light to a dimmer switch?
No. Most standard LED flood lights are not dimmable. Connecting one to a dimmer causes flickering or permanent driver damage. Only use dimmers with fixtures explicitly rated as dimmable.
How high should I mount an LED flood light?
For residential wall mounting, install the fixture 9 to 12 feet high with a downward angle of 30° to 45°. This balances wide coverage with strong ground-level brightness.
Why does my LED flood light flicker after installation?
Flickering usually means a loose wire connection, an overloaded circuit, or a failing driver. Tighten all terminals, reduce the load on the circuit, and replace the fixture if the internal driver is faulty.
How often should I test GFCI protection on outdoor circuits?
Press the Test and Reset buttons on GFCI outlets or breakers every six months. If the device does not trip during testing, replace it immediately to maintain shock protection.
Final Thoughts on Installing LED Flood Lights
Learning how to install LED flood light fixtures correctly comes down to three priorities: safety, sealing, and smart placement. Always kill power at the breaker and verify with a voltage tester before touching any wires. Treat sealing as seriously as wiring, since moisture causes the majority of outdoor lighting failures. Finally, choose the mounting method that matches your goal, whether that is wall-mounted security lighting, ground-mounted landscape accents, or pole-mounted area illumination.
Your next step is simple: gather your tools, inspect your existing junction box, and confirm your fixture meets the 100 to 277V and IP65 standards. A little preparation now means years of reliable, bright outdoor lighting ahead.