Installing flood lights dramatically improves your home’s nighttime safety, security, and visibility. Whether you’re replacing an old fixture or adding new lighting above a garage or backyard corner, knowing how to install flood lights correctly ensures long-term performance and electrical safety. This guide walks you through every step, from planning placement to final testing, while prioritizing code compliance, weatherproofing, and DIY feasibility. You’ll learn when to tackle the job yourself and when to call a licensed electrician, plus tips for avoiding common pitfalls like moisture damage or tripped breakers.
Plan Your Flood Light Placement
Choose Optimal Mounting Locations
Target high-traffic or shadow-prone areas like front doors, driveways, garages, and dark yard corners. Prioritize spots that enhance visibility for guests and deter intruders. Avoid placing lights where overhangs, trees, or gutters block the beam. Ensure the fixture is reachable with a stable ladder for future maintenance.
Set Correct Height and Angle
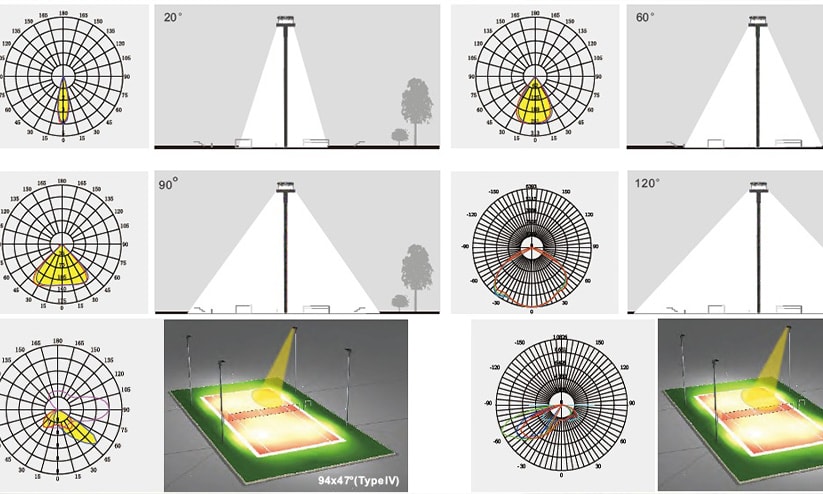
Mount flood lights between 9 and 12 feet high for balanced coverage. Lower mounts (9 ft) offer focused illumination for walkways but increase glare risk. Higher mounts spread light wider but reduce ground brightness. Aim beams downward at a 30–45° angle to minimize glare and light pollution. At 10 feet, a 60° beam covers ~12 feet wide; a 100° beam spans ~18 feet.
Select the Right Fixture Type
Choose LED flood lights for energy efficiency and lifespan (30,000–50,000 hours). Add features based on needs:
– Motion sensor: Activates on movement; adjustable range and timer.
– Dusk-to-dawn: Turns on automatically at night.
– Smart controls: Wi-Fi-enabled for remote scheduling and camera integration.
Ensure dimmable fixtures only pair with compatible dimmer switches.
Follow Critical Safety Steps
Shut Off Power Completely
Go to your main electrical panel and turn off the circuit breaker controlling the outdoor line. Never rely on wall switches alone. Verify power is off using a non-contact voltage tester at the junction box. As a backup, plug a lamp or radio into a nearby outlet on the same circuit. If it doesn’t turn on, power is likely cut.
Confirm Circuit Compatibility
Most residential flood lights run on 120-volt AC. Confirm your supply matches. Check that the circuit can handle the added load without exceeding 80% capacity. Overloaded circuits cause flickering or breaker trips. All outdoor circuits must have GFCI protection to prevent shock from moisture. Test GFCI outlets twice a year using the “Test” and “Reset” buttons.
Know When to Call an Electrician
Hire a licensed professional if:
– Running new wiring from the main panel.
– Installing new junction boxes or conduit.
– Existing wires show cracked insulation or corrosion.
– Local codes require permits (check with your municipality).
– Drilling into masonry or structural beams.
Gather Tools and Materials
Essential Tools
- Non-contact voltage tester
- Ladder or stable platform
- Screwdrivers (Phillips and flathead)
- Wire strippers and cutters
- Drill with masonry bits (for brick/concrete)
- Spirit level (magnetic torpedo level ideal)
- Fish tape (for conduit pulls)
- Caulk gun
- Tape measure and pencil
Required Materials
- Wet-location-rated flood light fixture
- Outdoor-rated wire nuts and electrical tape
- 14/2 nonmetallic Romex cable (for new runs)
- 14-gauge stranded copper wire (for conduit)
- Corrosion-resistant screws and anchors
- Exterior-grade silicone caulk
- Conduit system (if running new wiring): EMT tubing, connectors, hangers, junction boxes
Replace an Existing Flood Light

Remove Old Fixture Safely
Turn off the breaker and verify no power with a tester. Unscrew the old light from its bracket or electrical box. Disconnect wires by untwisting wire nuts. Inspect the junction box for rust, cracks, or loose screws. Check wire insulation. If frayed or corroded, trim damaged ends or replace the box before proceeding.
Install New Mounting Bracket
Attach the new fixture’s bracket to the electrical box using included screws. Ensure it’s level and flush against the wall to create a tight seal. For brick or concrete walls, use appropriate anchors. Do not over-tighten screws, which can warp the mounting surface.
Connect Wires Correctly
Strip ½ inch (1.3 cm) of insulation from each wire end if needed. Match colors:
– Black (hot) to black
– White (neutral) to white
– Green/bare (ground) to ground wire or grounding screw
Twist connections clockwise with wire nuts until snug. Gently tug each wire to confirm security. Wrap connections with electrical tape for extra moisture protection in humid climates. Tuck wires neatly into the box.
Seal and Mount the Fixture
Align the new light base with the bracket and secure with mounting screws. Apply a continuous bead of exterior-grade silicone caulk around the fixture’s edge where it meets the wall. This prevents water intrusion. Attach the lens or cover per manufacturer instructions.
Test and Adjust
Restore power at the breaker. Turn on the wall switch and test the light. If equipped with a motion sensor, walk through the detection zone to confirm activation. Adjust head angles for full coverage. Set timer, sensitivity, or smart features as needed.
Install Flood Lights in a New Location
Tap Into Existing Power Source
Shut off power to the garage or nearby room. Remove the faceplate of an accessible indoor outlet near your target area. Screw a metal mounting plate over the existing box. Attach a ½-inch extension box with a top-facing conduit connector to the plate.
Run Conduit to New Fixture
Measure from the extension box to the ceiling, subtracting 1.5 inches to avoid contact. Cut EMT tubing to length with a hacksaw and file sharp edges. Connect a right-angle conduit fitting to one end and attach the other to the extension box.
Secure the conduit with hangers every 12 inches using #10 screws. Use a torpedo level to keep it straight. At corners, add elbow connectors and continue routing toward the new light location.
Mount Outdoor Junction Box
Inside, drill a 7/8-inch hole through the wall at the desired height (typically 1 inch below ceiling). Feed conduit through. Outside, attach a junction box to the conduit end and secure to the ceiling with #6 screws.
Push 14/2 Romex cable through the junction box and out the wall. Insert a plastic cable connector into a round outdoor outlet box. Feed the cable through and tighten the clamp.
Seal the wall penetration with silicone caulk or weather-resistant putty. Press the outlet box flat and secure with 2-inch decking screws.
Pull Wires and Complete Circuit
Fish Wires Through Conduit
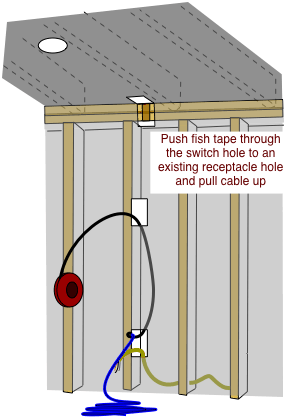
Unspool fish tape from the right-angle connector down to the extension box. Tape one strand each of black, white, and green 14-gauge stranded wire to the fish tape hook. Pull the wires up through the conduit to the extension box.
Feed the fish tape through to the junction box and pull the wires through completely. Leave at least 6 inches of wire exposed at both ends.
Wire Fixture and Power Source
At the outdoor box:
– Strip ½ inch of insulation from each conductor.
– Connect black to black, white to white, ground to ground using outdoor-rated wire nuts.
– Wrap with electrical tape and tuck into the box.
At the indoor extension box:
– Connect the pulled wires to the GFCI receptacle switch terminals:
– Black to brass (hot)
– White to silver (neutral)
– Green to green screw (ground)
– Mount the switch and restore power to test.
Mount and Test New Light
Secure the flood light to the outdoor box with machine screws. Insert bulbs (if not integrated). Restore main power and test operation. Adjust sensor settings or beam angles as needed.
Upgrade with Smart Features
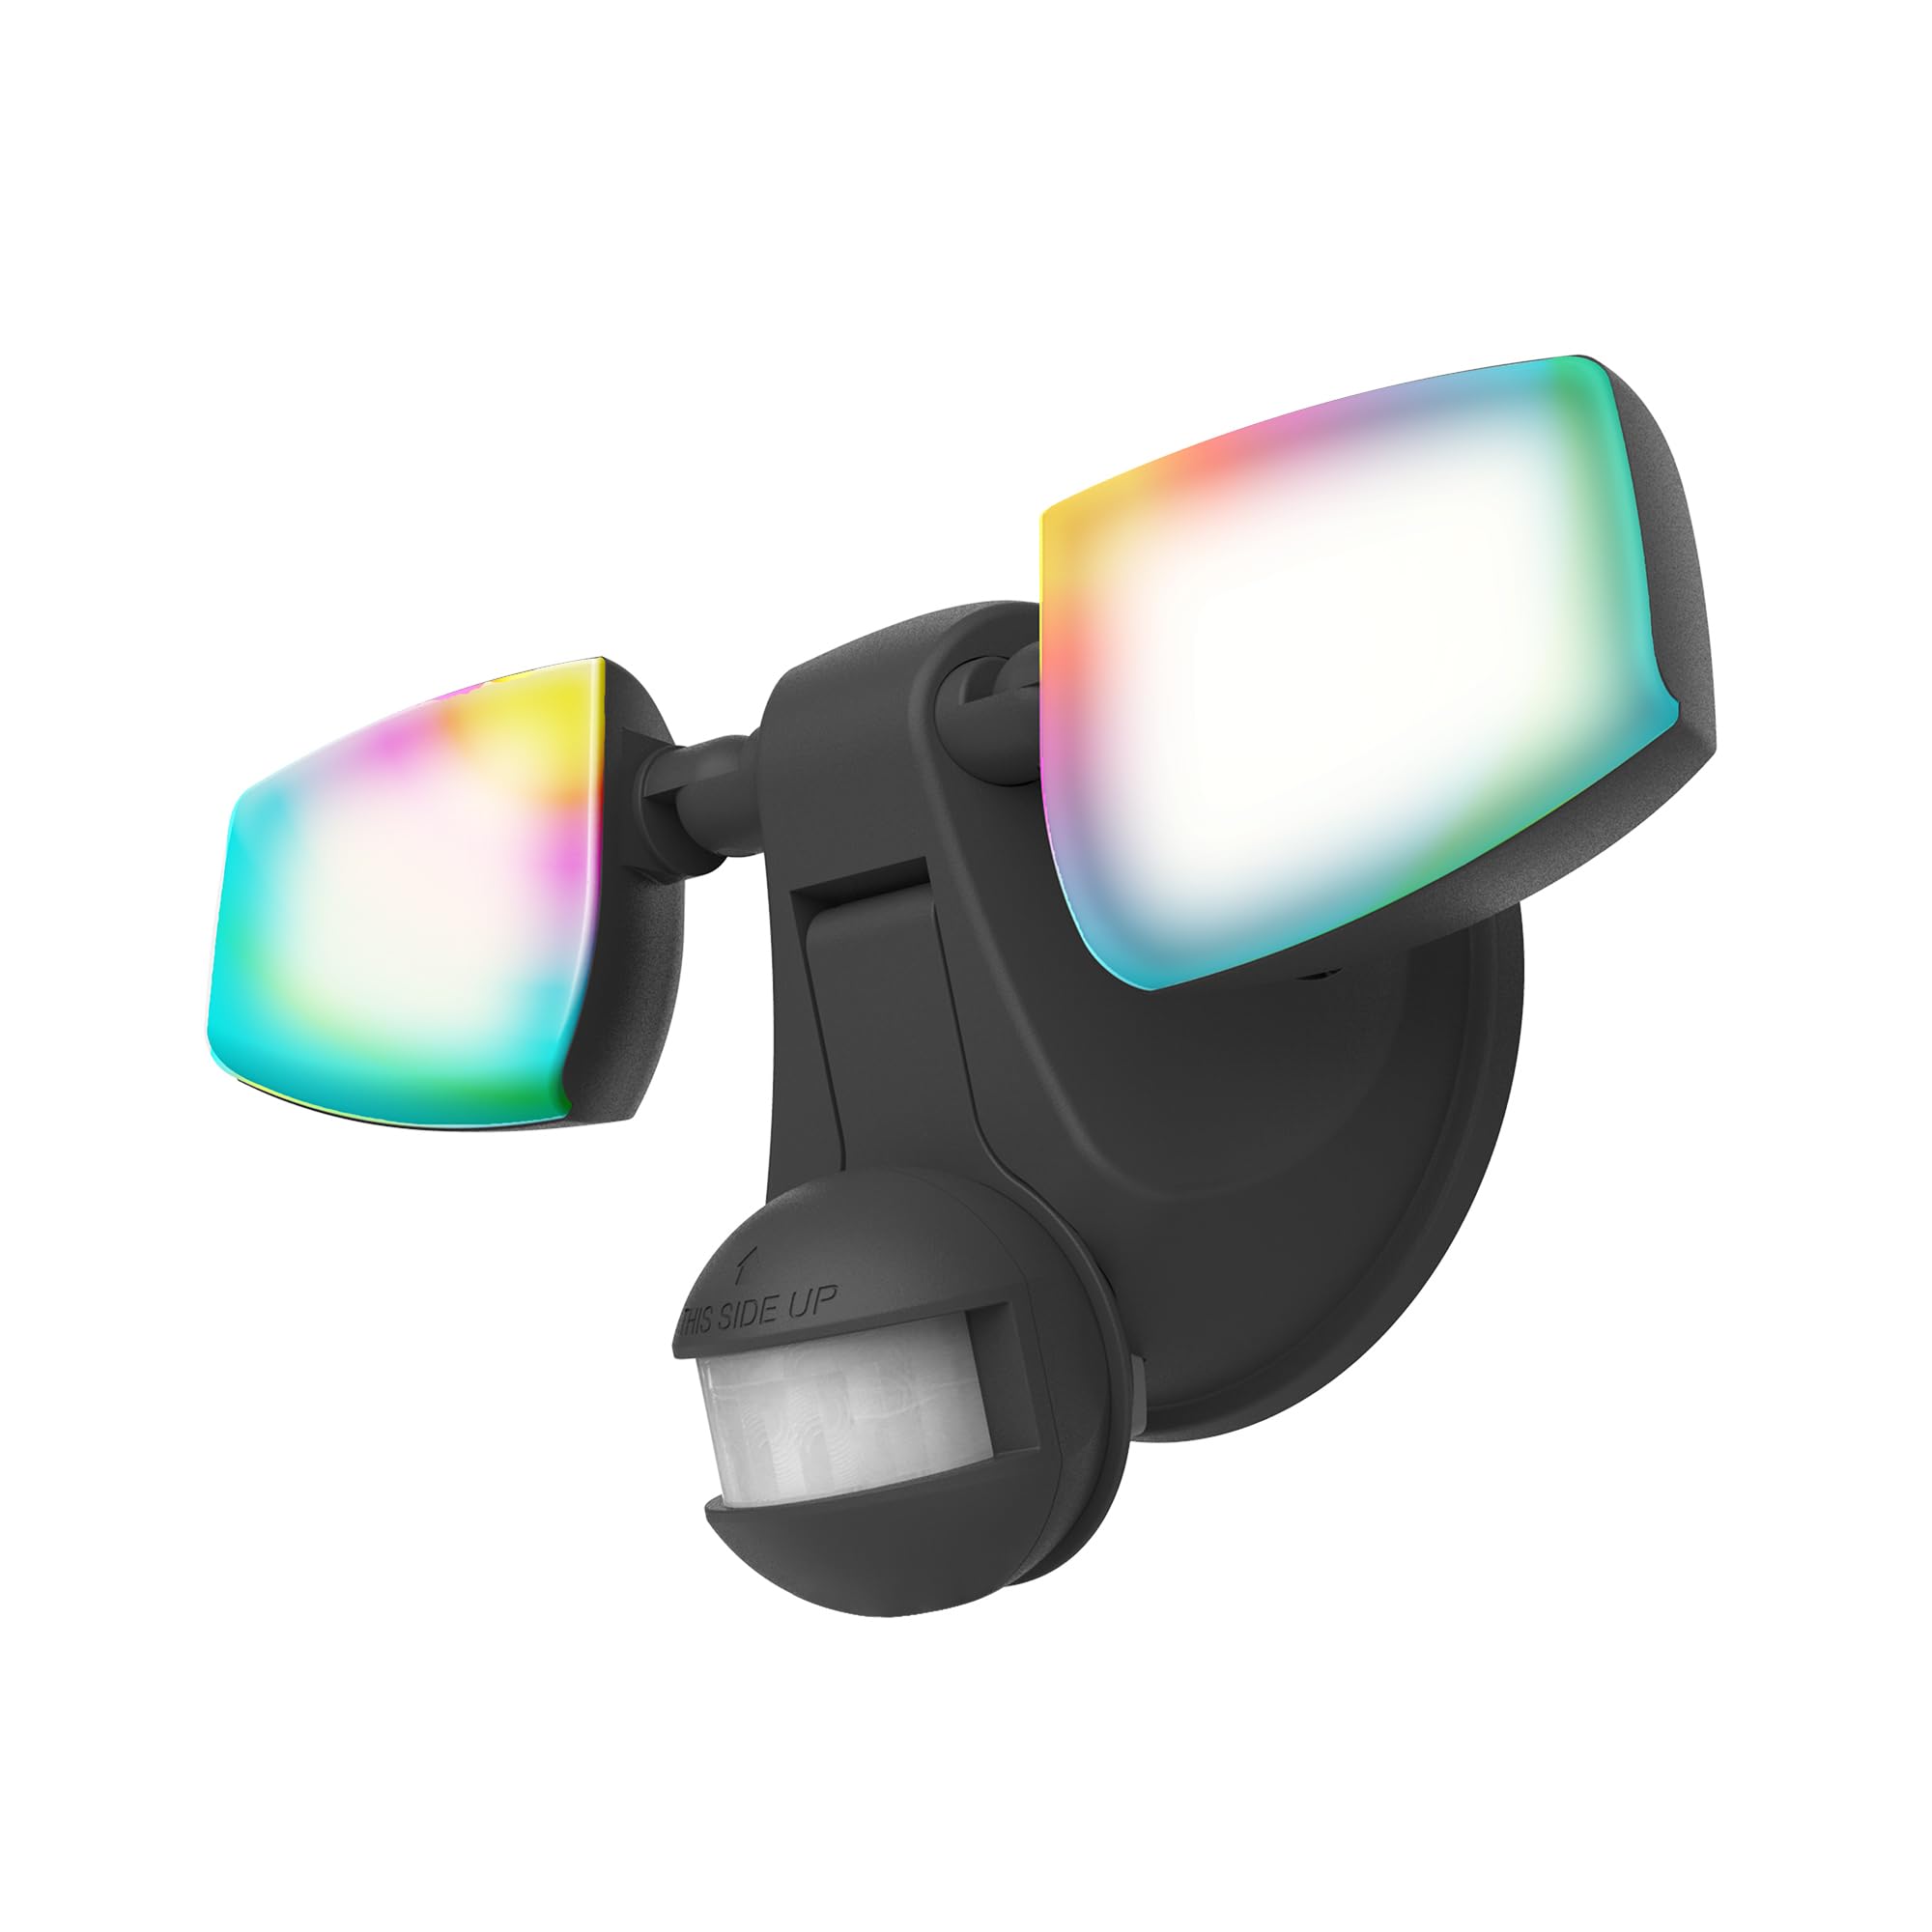
Add Motion or Dusk-to-Dawn Sensors
Many flood lights come with built-in sensors. If yours doesn’t, wire it to an external motion or photocell sensor and ensure voltage and switching type match. Bypass sensors only if the fixture allows manual override.
Integrate Smart Controls
Install Wi-Fi or Z-Wave modules to enable:
– Remote on/off via smartphone
– Scheduling (e.g., turn on at sunset)
– Integration with security cameras or alarms
Verify the module supports your fixture’s wattage and is rated for outdoor use.
Reduce Light Spill
Use shields or visors to direct light downward and avoid shining into neighbors’ windows. Install swivel mounts for precise aiming or extension arms to clear roof overhangs or siding.
Fix Common Flood Light Issues
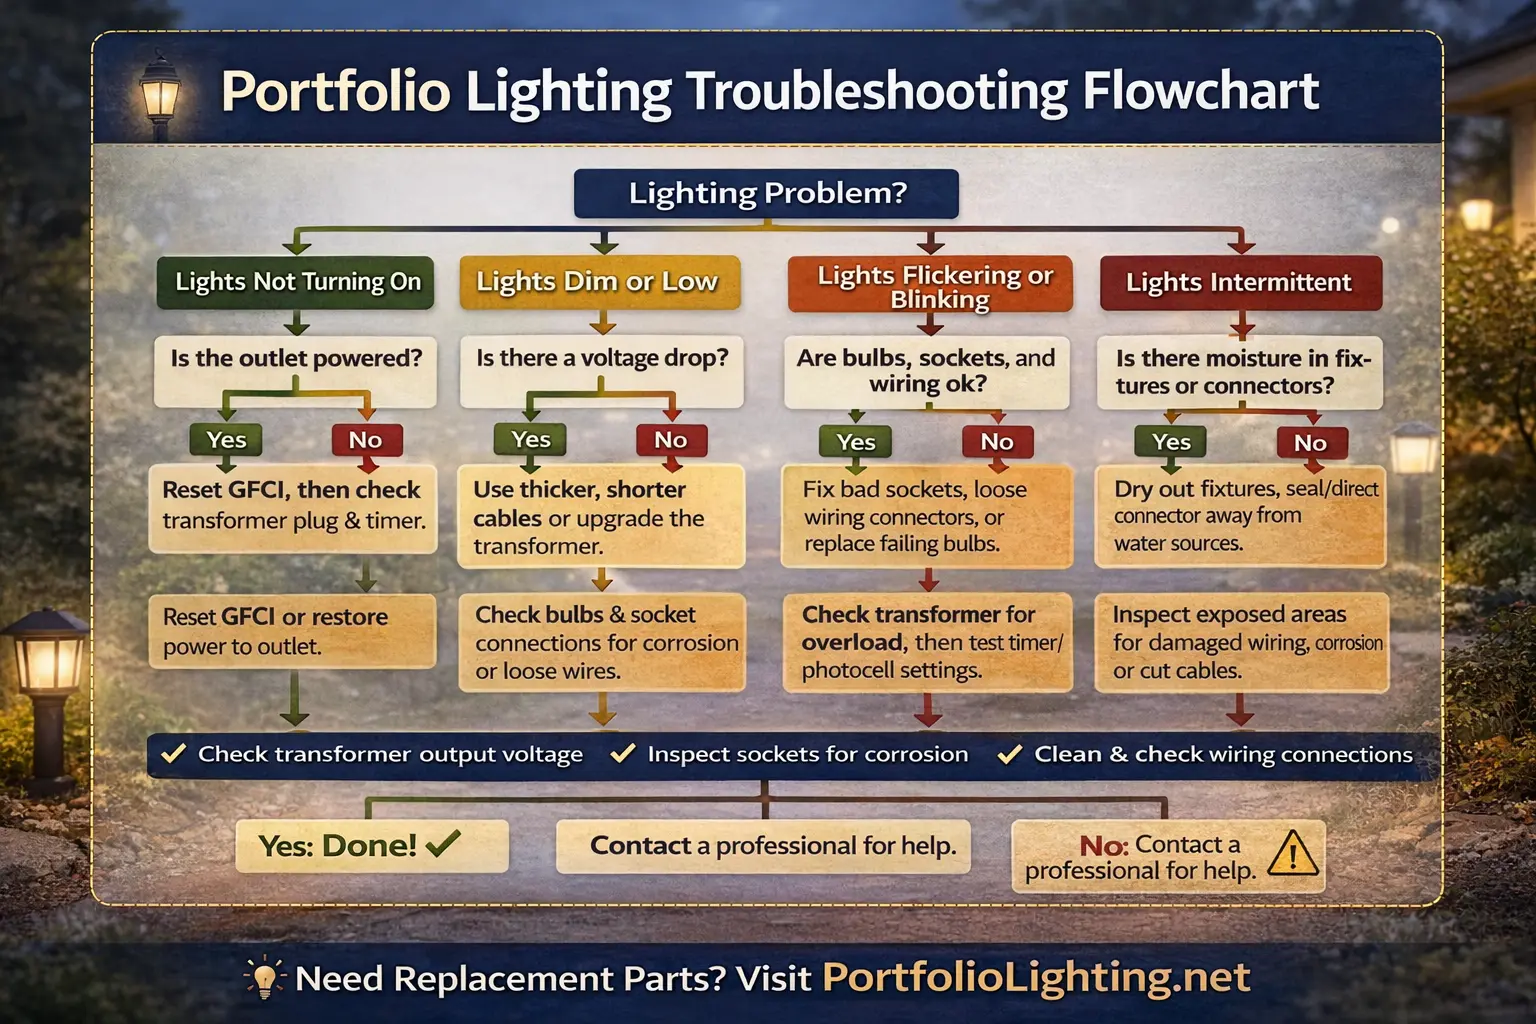
Light Won’t Turn On
Check for a tripped breaker or switched-off wall control. Use a voltage tester to confirm power at the wires. Tighten loose black (hot) or white (neutral) connections. Replace the bulb if applicable. If using a sensor, ensure the wall switch is on, since many need constant power.
Breaker Trips Immediately
Power off and inspect for a short circuit. Look for exposed copper touching the junction box or crossed neutral and ground wires. Dry out any moisture in the housing. Correct wiring errors and retest.
Flickering Lights
Tighten all wire nuts and fixture screws. Flickering can also stem from circuit overload. Unplug other devices on the same line. If the issue persists, the LED driver may be failing and the fixture needs replacement.
Light Stays On Constantly
The motion sensor may be in “Test Mode.” Consult the manual to exit. Reposition the sensor away from moving tree branches, street traffic, or reflective surfaces. Lower sensitivity settings if available.
Light Doesn’t Activate Automatically
Clear debris blocking the sensor lens. Ensure the wall switch is ON, since sensors often require continuous power. Adjust detection range and sensitivity. For dusk-to-dawn models, clean the photocell lens from dirt or paint.
Fixture Has Moisture Inside
Minor fogging due to temperature swings is normal. Persistent condensation means a failed seal. Power off, dry the housing, and reseal the fixture-to-box interface with silicone. Replace the unit if the lens seal is compromised.
Maintain Flood Lights for Long Life
Clean and Inspect Regularly
Wipe lenses and housings with a soft cloth and mild soap. Avoid harsh solvents like acetone or ammonia, especially on polycarbonate lenses. Inspect gaskets and seams after heavy rain. Reapply caulk if gaps appear.
Perform Annual Electrical Checks
Once a year, turn off power and examine the junction box for corrosion, loose wires, or rusted components. Replace damaged parts immediately. Test GFCI protection twice a year by pressing “Test” and “Reset.”
Maximize LED Lifespan
Quality LED flood lights last 10–15 years (30,000–50,000 hours). Prolong life by ensuring proper heat dissipation, stable voltage, and tight seals. Avoid frequent on/off cycling with motion sensors unless necessary.
Consider Solar-Powered Alternatives
Use Solar When Wiring Isn’t Feasible
If running electrical lines is impractical or prohibited, solar flood lights offer a wire-free solution. They charge during daylight and activate at dusk or via motion detection. Mount on any sun-exposed surface with no trenching or permits needed.
Understand Performance Limits
Solar models rely on direct sunlight, so output drops in cloudy climates or shaded areas. They typically provide lower brightness than hardwired units and may require battery replacement every 2–3 years. Ideal for secondary zones, not primary security lighting.
Frequently Asked Questions About Flood Light Installation
Do I need an electrician to install flood lights?
Not always. Replacing an existing fixture using current wiring is DIY-friendly for most homeowners. However, running new wiring from the main panel, installing new junction boxes, or working with damaged wiring requires a licensed electrician to meet code requirements.
What height should flood lights be mounted?
Mount flood lights between 9 and 12 feet above ground. This range balances wide coverage with reduced glare. Lower mounts provide focused light for walkways, while higher mounts spread illumination across larger areas.
How do I keep water out of my outdoor flood light?
Use only fixtures rated for wet locations. Apply exterior-grade silicone caulk around the fixture’s perimeter where it meets the wall. Ensure rubber gaskets sit between the fixture base and electrical box, and avoid over-tightening screws, which can deform seals.
Why does my flood light trip the breaker immediately?
An immediate trip usually signals a short circuit. Common causes include exposed copper touching the junction box, crossed neutral and ground wires, or moisture inside the housing. Power off, dry the area, inspect connections, and correct any wiring errors before retesting.
Can I install a flood light without existing wiring?
Yes. Solar flood lights require no wiring at all and mount to any sun-exposed surface. For hardwired alternatives, you’ll need to run new conduit and cable from an existing power source, which often requires a licensed electrician.
How long do LED flood lights last?
Quality LED flood lights typically last 30,000 to 50,000 hours, or roughly 10–15 years of residential use. Lifespan depends on heat management, voltage stability, and seal integrity.
Key Takeaways for Installing Flood Lights Successfully
Start by planning placement and selecting a wet-location-rated LED fixture suited to your needs. Always shut off power at the breaker and verify with a voltage tester before touching any wires. For straightforward replacements, the job takes 2–4 hours and requires basic tools. For new locations or complex conduit runs, hire a licensed electrician to ensure code compliance and safety.
Seal every connection with silicone caulk and outdoor-rated wire nuts to prevent moisture intrusion. Test GFCI protection twice a year and inspect seals after heavy storms. With proper installation and annual maintenance, your flood lights will deliver reliable, bright security for over a decade.