A sliding glass door is one of the most vulnerable entry points in any home. Standard factory latches can be defeated in seconds with basic tools, leaving your living space exposed. Installing a sliding door security bar transforms that weakness into a fortified barrier that resists forced entry. This upgrade costs far less than a full lock replacement while delivering dramatically better results.
Below, you will learn how to choose the right bar, gather proper tools, complete a permanent hinged installation, set up a renter-friendly pressure-fit model, and maintain your system for years of reliable protection.
Choose the Right Security Bar for Your Door

Selecting the correct model is the foundation of a successful installation. The wrong bar leads to poor fit, constant readjustment, or compromised security.
Hinged vs. Telescoping Models
Hinged bars mount permanently and rotate into a locked position with a simple lift-and-drop motion. They deliver superior strength and are ideal for homeowners who want maximum security with daily convenience. Telescoping bars require no drilling and extend across the track using a pressure-fit mechanism. These work best for renters or anyone needing a non-permanent solution, though they offer slightly less rigidity under extreme force.
Measure Your Door Width Accurately
Most adjustable bars fit door tracks ranging from 24.75 to 47.5 inches. Some models extend to 50 inches with add-on poles, while heavy-duty versions like the Ideal Security SK-110 support spans up to 84 inches. Measure the inside width of your track where the bar will rest. For fixed aluminum tubes, cut the bar 1/8 inch shorter than your measurement to leave room for end caps.
Identify Your Door Configuration
Determine whether your sliding panel moves on the interior or exterior side of the track. This detail directly affects bracket placement. If both panels slide or your screen sits on the inside, you may need an angled bracket for proper alignment. Also confirm you have enough vertical clearance for the bar to rotate into storage without striking the door header.
Gather Tools and Safety Gear
Proper preparation prevents frame damage and ensures a secure mount.
Required Tools
You will need a drill, a 1/8-inch drill bit (8 inches long for thick jambs), a Phillips screwdriver, a level, measuring tape, a pencil, and a saw if cutting fixed aluminum tubes. A sharp drill bit is essential, as dull bits can slip or crack vinyl frames.
Recommended Screws
Match your screws to your frame material for optimal holding power:
– Truss head or pan-head tapping screws for the rotating bracket, which distribute load effectively
– Flat head tapping screws or #8 x 1/2″ sheet metal screws for the saddle bracket
– A total of five screws: two for the rotating bracket and three for the saddle
Safety Precautions
Wear safety glasses to protect against flying debris. Mark your drill bit with tape to limit depth to 1/8 inch and avoid cracking or drilling into the glass pane. Never force the drill; let the bit do the work.
Prepare the Installation Site
A clean, functional track ensures smooth operation and accurate alignment.
Clean the Track and Frame
Remove all dirt, sand, and debris from the bottom track and frame. Buildup can prevent the door from closing fully, which leads to misalignment and improper bar seating.
Test Door Operation
Open and close the door several times. It should glide smoothly without sticking or binding. If it drags, address the issue before installing the bar, since an improperly functioning door undermines the entire security system.
Mark Mounting Heights
Close the door completely. Decide where to place the rotating bracket, choosing a height that allows vertical storage clearance but avoids obstructions. Mark the spot on the interior door jamb for interior-sliding models, or on the fixed panel’s edge for exterior-sliding setups.
Install the Rotating Bracket
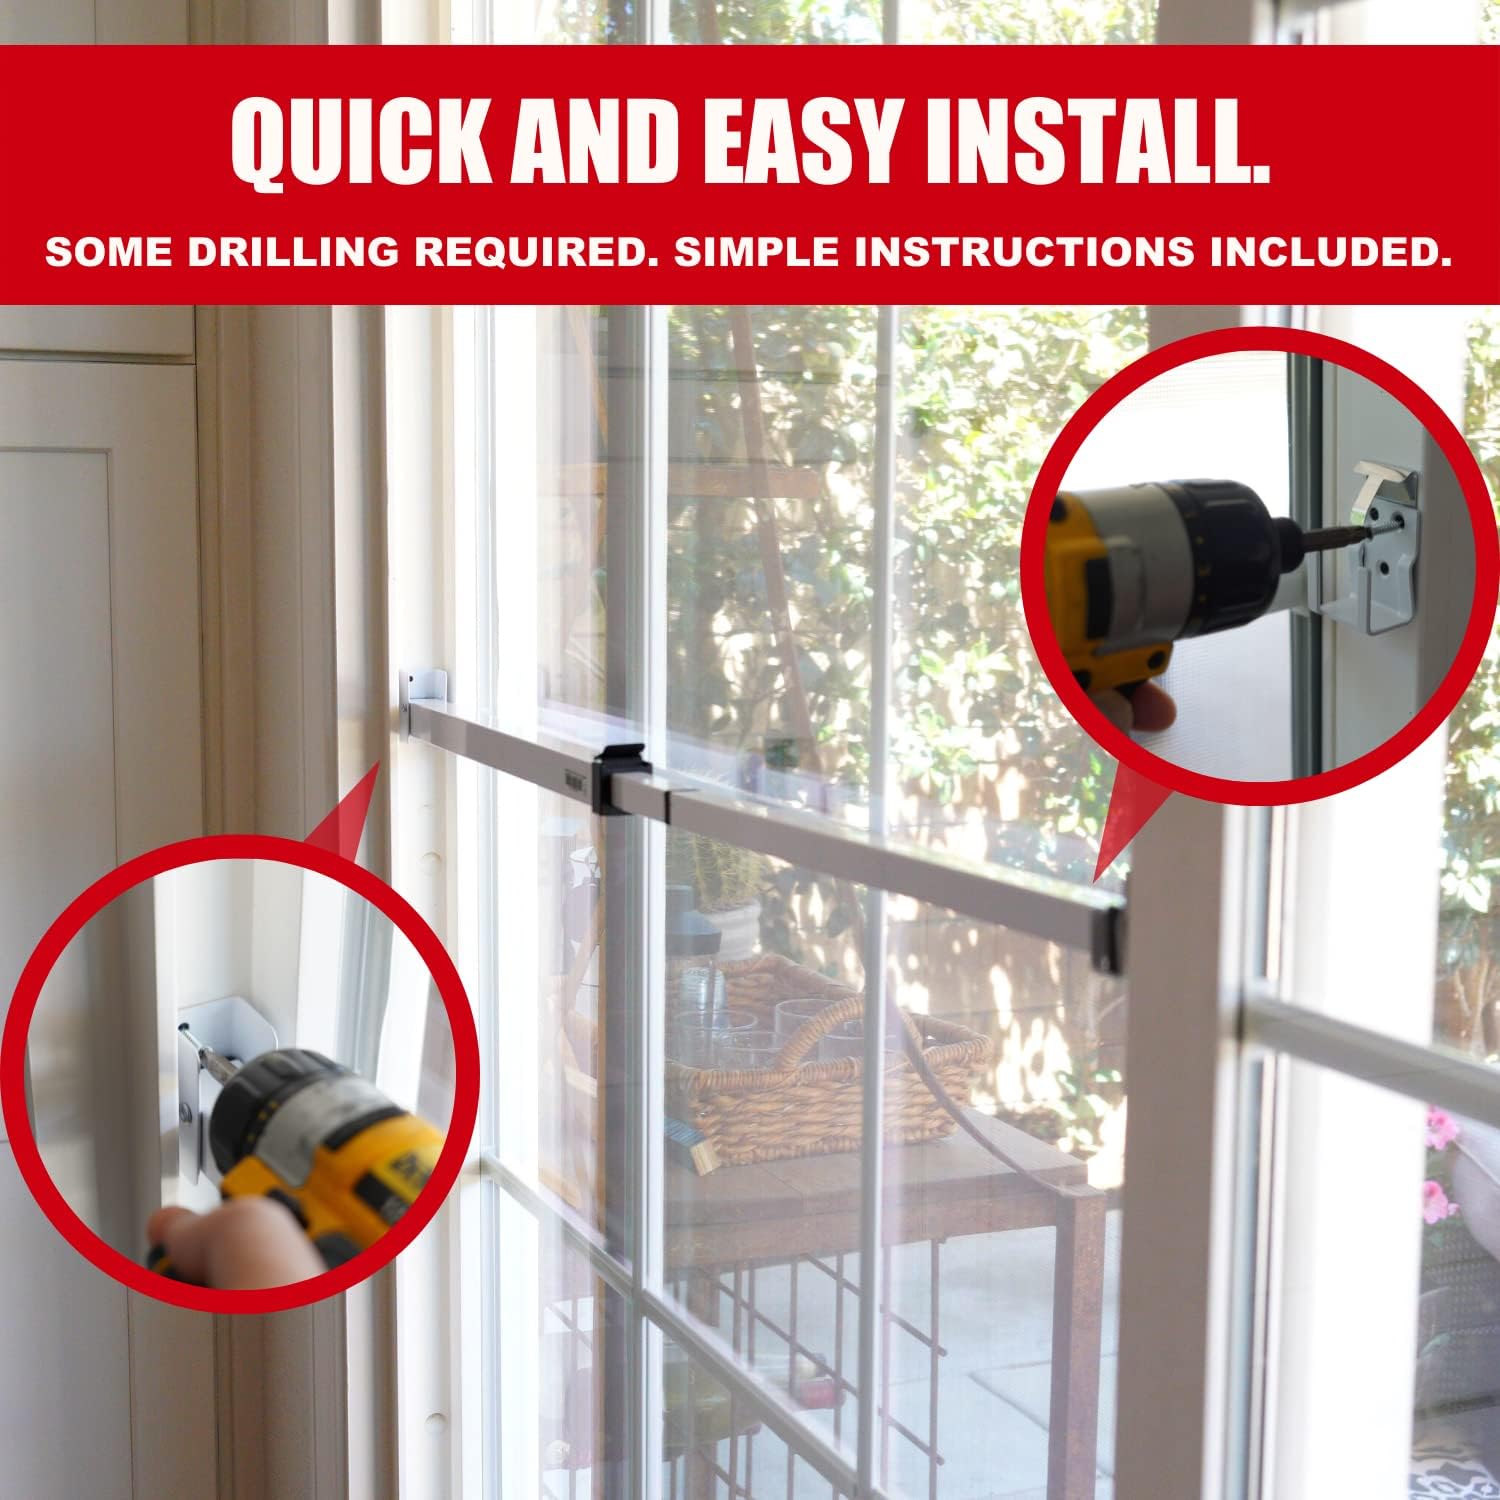
This anchor point holds the security bar when not in use and must be solidly mounted.
Position and Mark the Bracket
Hold the rotating bracket against the jamb or fixed panel. Align it with the door’s edge, but avoid the extreme outer edge, since the saddle is wider and misalignment will prevent proper engagement. Use a pencil to mark the two screw holes.
Drill Pilot Holes
Using the 1/8-inch bit, drill pilot holes at the marked spots. Apply light, steady pressure, especially when penetrating vinyl or aluminum. Stop when the bit reaches about 1/8 inch into the frame.
Secure the Bracket
Hold the bracket in place and drive in the truss or pan-head screws. Install the top screw first, then lift the bracket slightly to access the bottom hole. Ensure the bracket sits flush and does not wobble. A loose bracket compromises the entire system.
Mount the Locking Saddle
The saddle is where the bar locks into place when engaged, and it must be perfectly horizontal.
Align the Saddle Horizontally
Insert the bar’s end into the nylon or plastic saddle. Extend the bar toward the sliding panel. Place the saddle on the back edge for interior sliders or on the face for exterior sliders, roughly 2 inches above the handle. Use a level to confirm perfect horizontal alignment. Even a slight tilt causes binding or allows the bar to pop out under force.
Mark and Drill Saddle Holes
Mark the three screw locations. Drill only deep enough to penetrate the frame. Never risk hitting the glass. Use tape on the drill bit as a depth limiter.
Fasten the Saddle
Secure the saddle with three flat-head or #8 x 1/2″ screws. Drive them firmly but avoid overtightening, which can strip the frame. The saddle must stay fixed without any shifting.
Assemble and Test the Security Bar
With brackets mounted, it is time to verify everything works correctly.
Install End Caps and Extend the Bar
For fixed aluminum models, slide the black nylon cap onto the cut end. For telescoping bars, extend the inner pole until the locking pins engage. The bar should feel solid with no flexing.
Test the Locking Mechanism
Lift the bar approximately half an inch, rotate it horizontally, and lower it into the saddle. It should drop in smoothly and stay locked. Try to wiggle or pull it out; there should be zero movement.
Verify Full Door Security
Close the door and engage the bar. Attempt to slide the panel open from the outside or simulate force. The door should not budge. If it does, check screw tightness and bracket alignment.
Use Ventilation Mode Safely
One major advantage of security bars is the ability to ventilate your home while staying protected.
Open the Door with the Bar in Place
Press and hold the release lever (usually on top). Slide the door open to your desired width, then release the lever. The bar should lock in the new position.
Prevent Forced Opening
In this mode, the bar acts as a stop. An intruder cannot force the door open wider or slam it closed from outside. This setup is ideal for warm nights when you want fresh air without sacrificing peace of mind.
Install a Pressure-Fit Bar Without Drilling
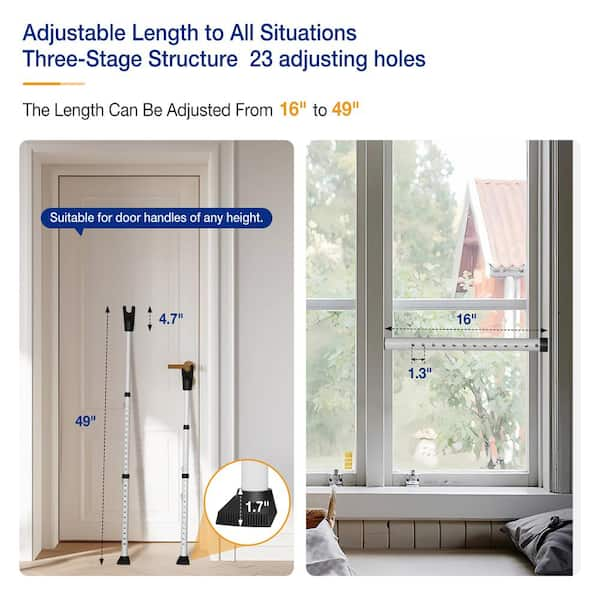
Perfect for renters or anyone avoiding permanent modifications.
Extend and Position the Bar
Slide the inner pole out until the bar spans the track width. Place it in the track behind the sliding panel. Ensure the plastic end caps press firmly against the fixed frame and sliding panel.
Lock the Pins
Rotate the inner shaft until the locking pins click into the outer tube’s holes. The bar should feel rigid with no flexing. Test by pushing on it to confirm stability.
Verify Stability
Apply moderate pressure. If the bar shifts or compresses, retract slightly and re-engage the pins. Avoid over-extending, which can weaken the locking mechanism.
Troubleshoot Common Installation Issues
Even careful installations can hit snags. Here is how to resolve the most frequent problems.
Bar Won’t Fit Vertically When Stored
If the bar hits the header, lower the mounting height of the rotating bracket. Alternatively, retract telescoping models before storing them.
Saddle Misalignment
If the bar does not drop in easily, recheck the level. A tilted saddle causes binding. Loosen the screws, reposition, and retighten.
Drilling Stalls in Vinyl or Aluminum
Use a sharp 1/8-inch bit and light pressure. Forcing the drill can crack the frame. Let the speed of the bit do the work.
Bar Pops Out Under Pressure
Ensure the steel bracket is fully seated in the plastic saddle. If the saddle is loose, replace the screws with longer or thicker ones for a tighter grip.
Maintain and Inspect Your Bar Regularly
Long-term security depends on consistent upkeep.
Clean and Inspect Monthly
Wipe down the bar and check for loose screws, worn end caps, or corrosion. Dirt in the telescoping mechanism can hinder extension over time.
Lubricate When Needed
If the rotating bracket sticks, apply a light lubricant to the pivot point. Avoid greasy products that attract dust and debris.
Ensure Child Safety
If you have young children, use a key-lock model to prevent them from disengaging the bar. Store the key in an accessible but secure spot for adults.
Maximize Your Security Setup

Installation alone is not enough. Layer your defenses for the best protection.
Combine with Other Measures
Use the security bar alongside reinforced locks, door jamb alarms, or motion-sensor lighting. Layered security deters most intruders before they attempt entry.
Avoid Wood Stopper Risks
A scrap wood block can serve as a temporary stopper, but it lacks locking strength, can damage tracks, and is easy to remove. A dedicated bar is far more reliable.
Understand Force Limits
Standard bars resist up to 300 pounds of force, based on tests of models like the Ideal Security SK-110. High-end barricades claim over 4,000 pounds of resistance, but these are not typical adjustable bars. Do not expect a budget telescoping model to match a hinged steel unit.
Frequently Asked Questions About Sliding Door Security Bars
Do sliding door security bars really prevent break-ins?
Yes. Quality bars resist up to 300 pounds of outward force and create a visible physical barrier. Most intruders look for easy targets, and a secured bar signals that your door is reinforced.
Can I install a security bar without drilling?
Yes. Pressure-fit telescoping bars require no tools or modifications. They extend across the track and lock with pin mechanisms. These are ideal for renters, though they offer slightly less rigidity than permanent hinged models.
Will a security bar damage my sliding door?
No, when installed correctly. End caps protect the frame and glass from scratches. The critical rule is to limit drill depth to 1/8 inch to avoid contacting the glass pane.
How do I use a security bar for ventilation?
Press and hold the release lever on top of the bar, slide the door open to your desired width, then release the lever. The bar locks in place and prevents the door from being forced open or closed from outside.
What is the best height to mount the rotating bracket?
Mount it high enough for vertical storage clearance but low enough to avoid obstructions when the bar rotates up. Test the swing motion before drilling to confirm the bar clears the header.
Are security bars safe for homes with children?
Yes, especially models with key-lock features. These prevent children from disengaging the bar. Store the key in a location accessible to adults but out of children’s reach.
Key Takeaways for Installing a Sliding Door Security Bar
A sliding door security bar is one of the most cost-effective upgrades you can make to protect your home. Begin by choosing the right model for your door configuration and measuring your track width accurately. Gather the correct screws and tools, and always limit drill depth to 1/8 inch to protect your glass. During installation, prioritize level alignment of the saddle and a flush mount for the rotating bracket. Test the locking mechanism thoroughly and inspect the system monthly for loose hardware or wear.
Your next step is simple: measure your sliding door today, select a bar that fits your security needs, and set aside an hour for installation. The result is immediate peace of mind, secure ventilation, and a visible deterrent that tells potential intruders your home is not an easy target.