
A flickering porch light or a dark driveway at night can make any homeowner uneasy. When it comes time to install or replace a flood light, knowing how to connect flood light wire properly is the key to a safe, long-lasting result. A bad connection doesn’t just cause annoying flickers. It can lead to breaker trips, moisture damage, or even electrical fires.
This guide breaks down the entire process into clear, manageable steps. You’ll learn how to cut power safely, identify each wire, make weatherproof connections, and troubleshoot common issues. Whether you’re upgrading to a motion-sensor LED or replacing an old halogen unit, you’ll finish with a fixture that’s secure, code-compliant, and built to last.
Cut Power and Confirm It’s Off
Turn Off the Correct Breaker
Always kill power at the main breaker panel, never just at the wall switch. Switches can fail, and someone could flip one back on without realizing you’re working. Locate the correct breaker by labeling your panel or testing each circuit until the right one is off. If your panel supports it, lock or tag the breaker so no one accidentally restores power mid-project.
Test for Voltage Before Touching Wires
Grab a non-contact voltage tester and hold it near each wire in the junction box. You don’t even need to touch the copper. If the tester beeps or lights up, power is still flowing. Go back to the panel and double-check. Only proceed when the tester confirms zero voltage on every conductor.
Warning: The U.S. Consumer Product Safety Commission links hundreds of annual electrocutions to DIY electrical work. Most are preventable with a simple voltage test.
Inspect the Junction Box and Mounting Location
Check the Electrical Box Condition
The junction box must be secure, level, and rated for wet locations. Look closely for:
– Cracks or rust
– Loose mounting screws
– Frayed or damaged wire insulation
If the box is metal, confirm it has a grounding screw or terminal in good shape. Replace any compromised hardware before moving forward.
Plan Mounting Height and Beam Angle
For the best coverage and security:
– Mount the fixture 9 to 12 feet high
– Angle the head 30–45° downward
– Avoid aiming at windows, siding, or other reflective surfaces
Check for obstructions like gutters, eaves, or tree limbs that could block or shadow the beam.
Identify Each Wire Before Connecting
:max_bytes(150000):strip_icc()/electrical-wire-color-coding-1152863-1885f3461ba9443f8bcf14a1f9236a2d.png)
Standard Wire Colors and What They Mean
Getting the wire pairings right is non-negotiable:
– Black (Hot) carries power from the source
– White (Neutral) completes the circuit
– Bare Copper or Green (Ground) provides a safety path to earth
Some homes also have a red wire, often used for motion sensors or dual-switch setups. If your new fixture doesn’t need it, cap the red wire individually with a wire nut and tuck it safely into the box.
Never guess wire functions. If colors look faded or non-standard, trace each wire back to its source or call an electrician.
Label Wires During Removal
When taking out an old fixture, snap a photo and tag wires with masking tape. This simple step prevents confusion, especially in multi-wire or sensor setups.
Make Weatherproof Wire Connections
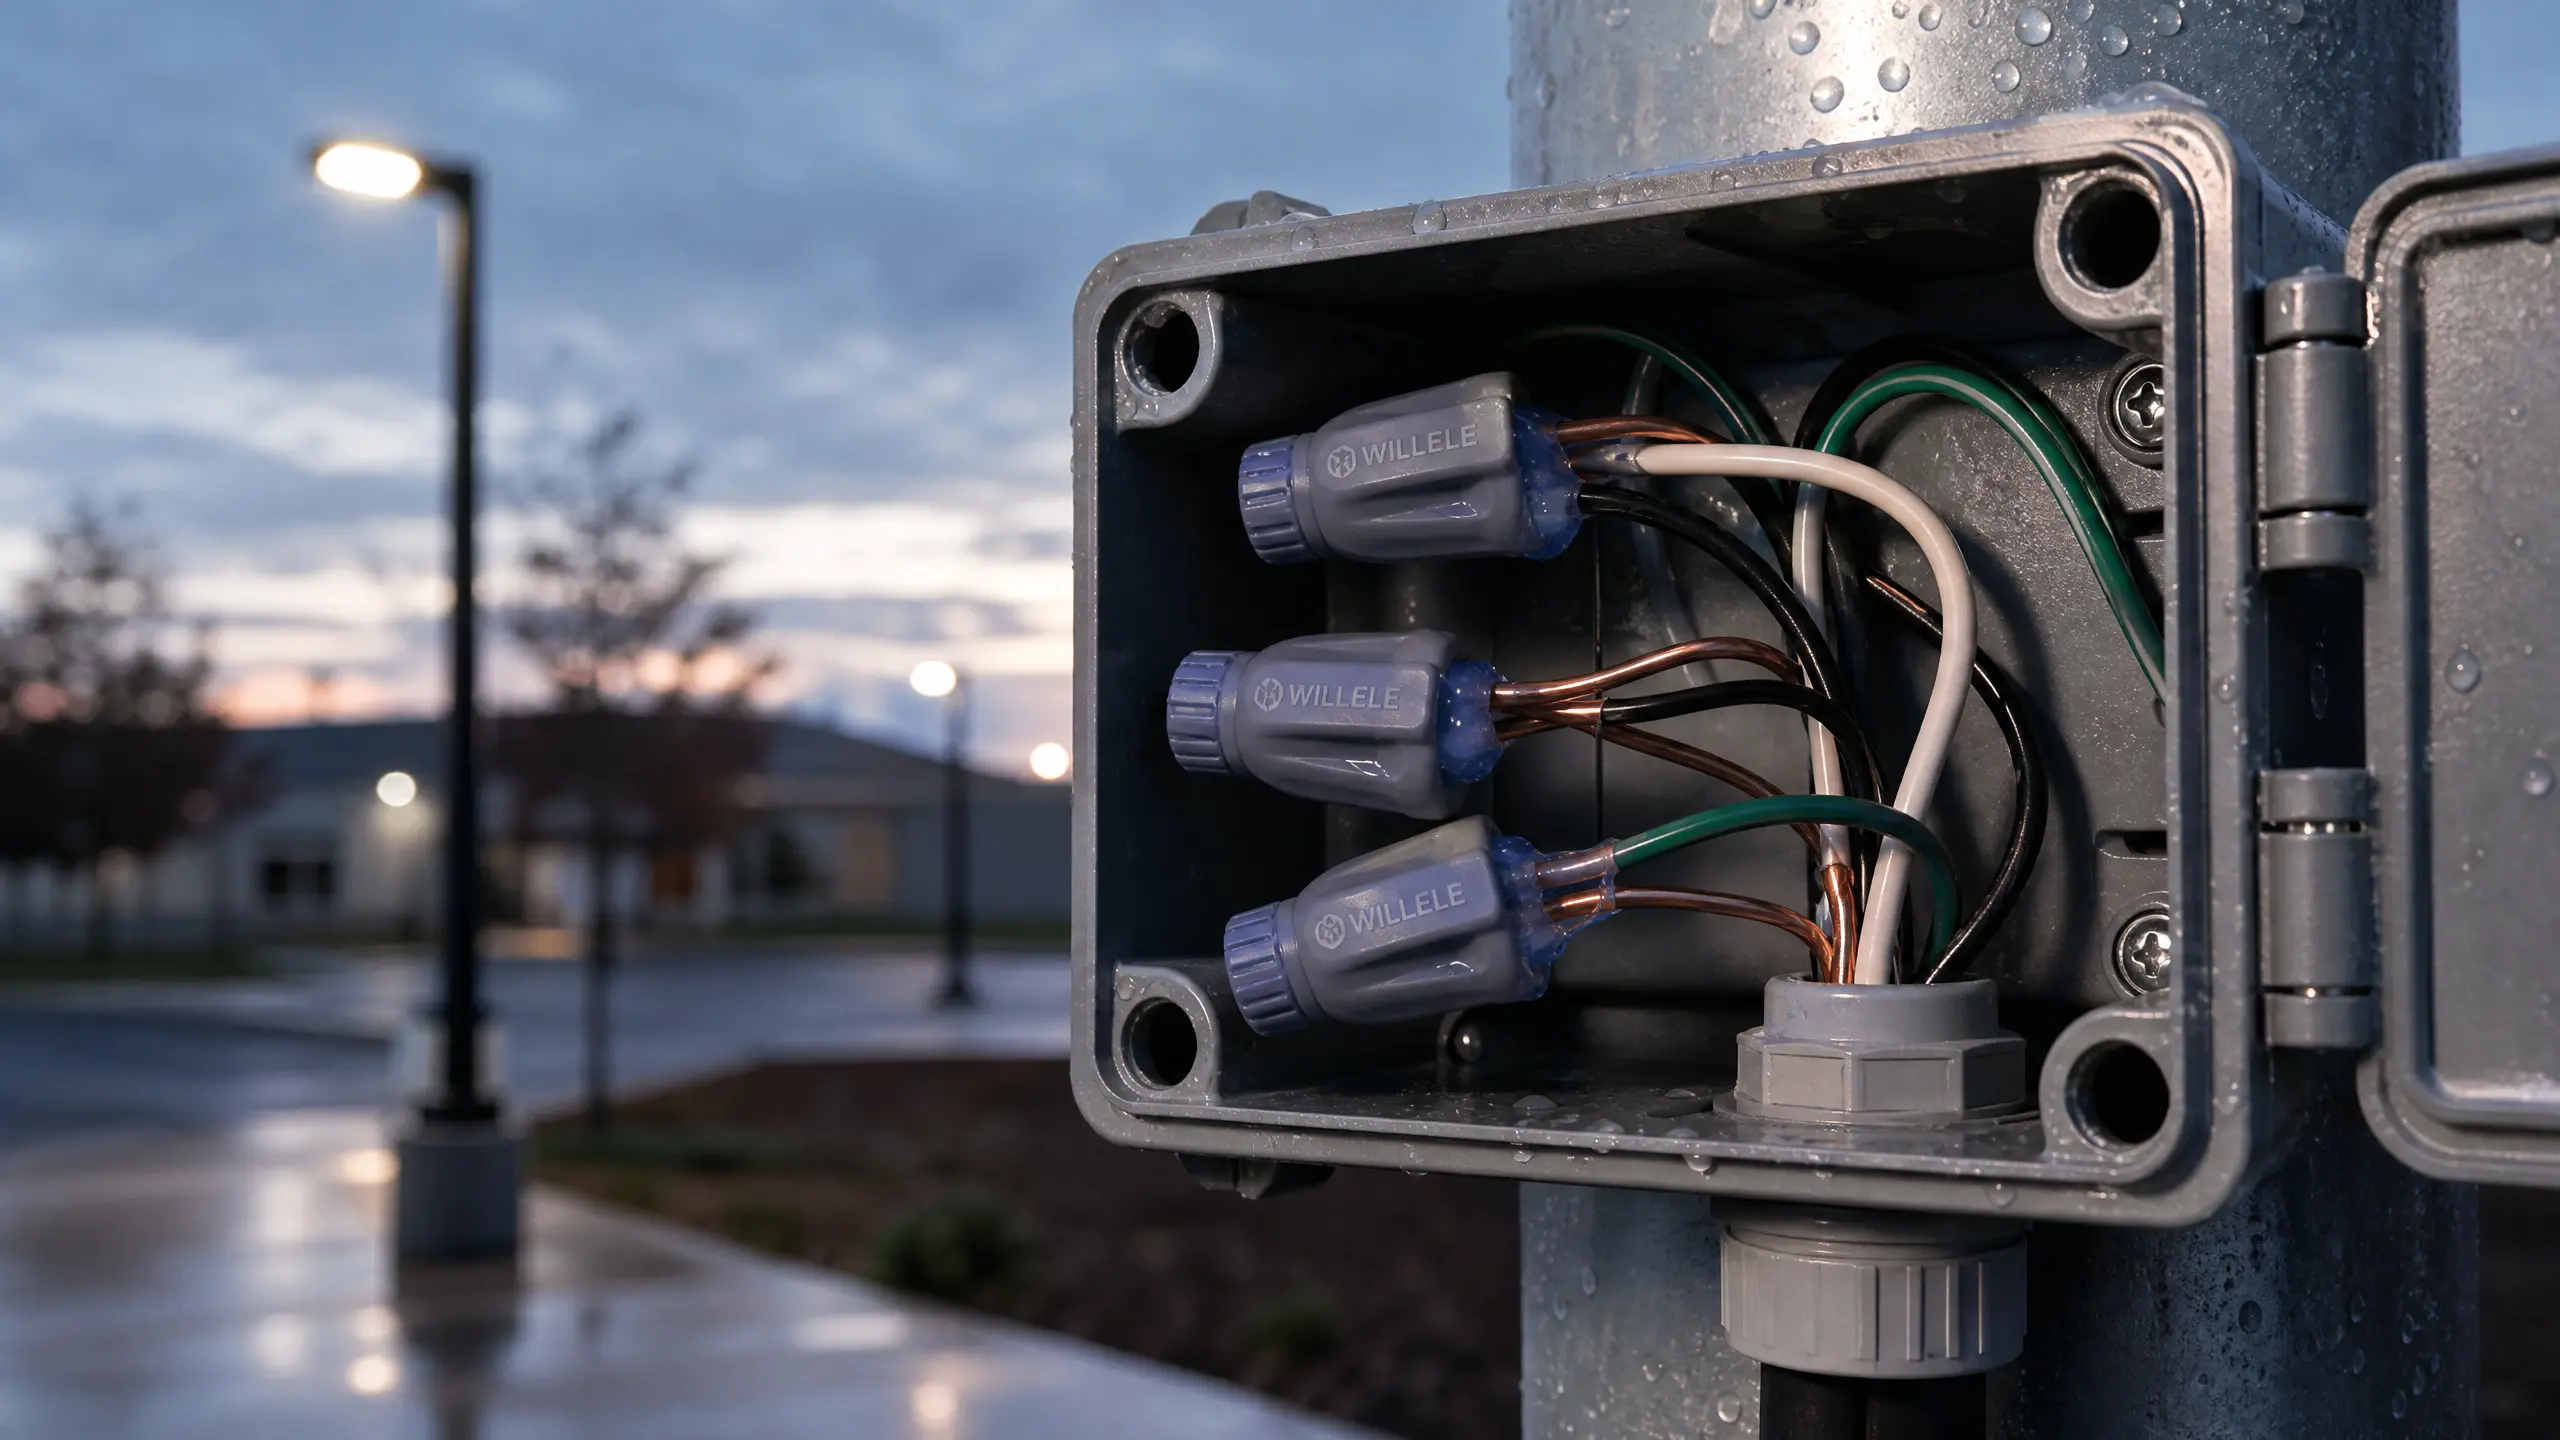
Connect Inside the Junction Box Only
All splices must happen inside the junction box, never inside the fixture housing. Wiring inside the fixture breaks the seal and makes future service nearly impossible.
Match and Secure Each Pair
- Hot to Hot: Twist the fixture’s black wire with the house black wire.
- Neutral to Neutral: Connect white to white.
- Ground to Ground: Join the fixture’s green wire to the house bare copper wire. If the box is metal, bond the ground to the box’s grounding screw too.
Pro Tip: Strip only about 3/4 inch of insulation. More exposed copper invites moisture and short circuits.
Use Outdoor-Rated Wire Nuts
Choose dielectric-grease-filled wire nuts rated for exterior use. Twist clockwise until snug, then gently tug each wire to confirm it won’t slip loose. Avoid twisting wires without connectors or using indoor-rated nuts. Both fail quickly in damp conditions.
Seal Out Moisture
Water is the number-one enemy of outdoor wiring.
- Wrap each connection with electrical tape for extra moisture resistance
- Apply a bead of exterior-grade silicone caulk around the fixture base where it meets the wall or box
- Make sure gaskets sit flat between the fixture and the box
Over-tightening mounting screws can crush gaskets and break the seal. Snug is enough.
Mount and Aim the Fixture
Attach the Bracket Securely
Fasten the universal mounting bracket to the junction box with the included screws. On masonry or stucco walls, use outdoor-rated anchors. Confirm the bracket is level before tightening.
Set the Angle and Final Position
Slide or screw the fixture onto the bracket. Before fully tightening the adjustment bolts, aim the head 30–45° downward toward your target area. Once the angle looks right, lock everything down and do a final seal check around screw penetrations.
Restore Power and Test the Light

Power On and Observe
Flip the breaker back on and wait a few seconds. A properly wired LED flood light should:
– Turn on instantly
– Run without flicker or buzz
– Respond correctly to motion or dusk-to-dawn controls
If your fixture has a motion sensor, switch it to test mode (if available), walk through the detection zone, and adjust sensitivity and range as needed. Some sensors require the wall switch to stay ON at all times, even when controlled remotely.
Troubleshoot Common Problems
| Symptom | Likely Cause and Fix |
|---|---|
| No light at all | Check the breaker, switch, and wire connections |
| Breaker trips immediately | Look for exposed copper touching metal or crossed neutral/ground |
| Flickering or buzzing | Tighten wire nuts and check for a loose neutral |
| Light stays on constantly | Sensor is in test mode or aimed at moving objects |
| Won’t activate automatically | Wall switch is off, sensor is blocked, or sensitivity is too low |
| Moisture inside the lens | Reseal the base and replace any damaged gaskets |
Prevent Early Failure and Extend Lifespan

Follow NEC and GFCI Requirements
All outdoor circuits must have GFCI protection. This device cuts power in milliseconds if moisture creates a ground fault, preventing shock. Test your GFCI outlets or breakers every six months using the built-in Test and Reset buttons.
Avoid These Common Wiring Mistakes
- Wiring inside the fixture housing instead of the junction box
- Skipping the ground connection
- Using indoor wire nuts outdoors
- Capping a red wire with neutral or ground
- Over-tightening screws and crushing gaskets
Each of these shortcuts leads to early failure or safety hazards.
Maintain Your Flood Light Annually
Once a year, turn off the power and:
– Remove the fixture
– Inspect for corrosion, rust, or loose wires
– Clean the lens with mild soap and a soft cloth
– Reapply silicone if you see gaps in the seal
Never use ammonia, alcohol, or abrasive cleaners on polycarbonate lenses. They cause clouding and cracking.
Consider an Integrated LED Upgrade
If you’re rewiring often or replacing bulbs frequently, a fully integrated LED flood light is worth considering. These units:
– Come sealed against moisture from the factory
– Include built-in drivers and sensors
– Last 30,000 to 50,000 hours
– Reduce long-term maintenance
They’re engineered for outdoor use from day one, so you spend less time troubleshooting and more time enjoying reliable light.
Frequently Asked Questions About Connecting Flood Light Wires
What tools do I need to connect a flood light wire?
You need a non-contact voltage tester, screwdriver or drill, wire strippers, outdoor-rated wire nuts (preferably filled with dielectric grease), electrical tape, exterior-grade silicone caulk, and a sturdy ladder. Masking tape is helpful for labeling wires during removal.
Can I connect flood light wires without turning off the breaker?
No. You must always turn off power at the breaker and verify with a voltage tester before touching any wires. A wall switch alone is never enough to guarantee safety.
Where do I connect the red wire on a flood light?
If your new fixture doesn’t use a red wire, cap it individually with a wire nut and tuck it into the junction box. Never connect it to the neutral or ground wires. Red wires often come from older dual-switch or motion-sensor setups.
How do I keep water out of my flood light connections?
Use dielectric-grease-filled wire nuts, wrap connections with electrical tape, apply exterior silicone caulk around the fixture base, and make sure gaskets are seated correctly. Avoid over-tightening screws, which can deform seals.
Why does my flood light flicker after installation?
Flickering usually points to loose wire nuts, a loose neutral connection, or voltage drops from an overloaded circuit. Tighten all connectors and check that the fixture isn’t sharing a circuit with heavy appliances.
Should I hire an electrician to connect flood light wires?
If you’re replacing an existing fixture with existing wiring, most homeowners can handle the job safely. But if you’re running new wire, installing a new junction box, or unsure about local codes, hiring a licensed electrician is the smart move.
Key Takeaways for a Safe Flood Light Installation
Connecting flood light wire correctly comes down to three essentials: safety, weatherproofing, and accuracy. Always cut power at the breaker and verify with a tester before touching anything. Match each wire by color, secure connections with outdoor-rated hardware, and seal every gap against moisture. Finally, test the fixture thoroughly and inspect it once a year to catch small issues before they become big problems.
If you ever feel unsure about your wiring, box condition, or local code requirements, call a licensed electrician. A professional installation protects your home, your family, and your peace of mind for years to come.