Your flood light used to light up the whole driveway, but lately it looks dim, yellowed, or patchy. Before you can clean the lens or swap a burnt-out bulb, you have to get past the cover. Skip this step correctly and the job takes minutes. Rush it and you may end up with a cracked lens or stripped clips. This guide walks you through how to remove flood light cover the right way, using tools you probably already own. You will learn how to spot hidden fasteners, free stuck covers, and avoid the mistakes that send most fixtures to the landfill.
Check for Clips or Screws Before You Pry

Jumping straight to prying is the fastest way to break a flood light cover. Take a minute to inspect the perimeter first and identify what is actually holding it in place.
Look for Spring Clips
Many modern fixtures, including most Keystone models, use spring clips that snap into a groove around the rim. Run your fingertip along the edge and feel for small bumps or indentations. These usually sit at the top, bottom, and sides of the cover.
Spot Hidden Screws
Other models hide screws beneath rubber plugs or silicone caps to keep water out. Shine a flashlight around the top, bottom, and corners. If you see a small raised dot, lift it gently with the tip of a utility knife and check for a screw underneath.
Pro Tip: Never assume a cover is clip-only. Forcing a screwed-on cover can crack the housing or strip the plastic threads.
Choose the Right Tool for the Job
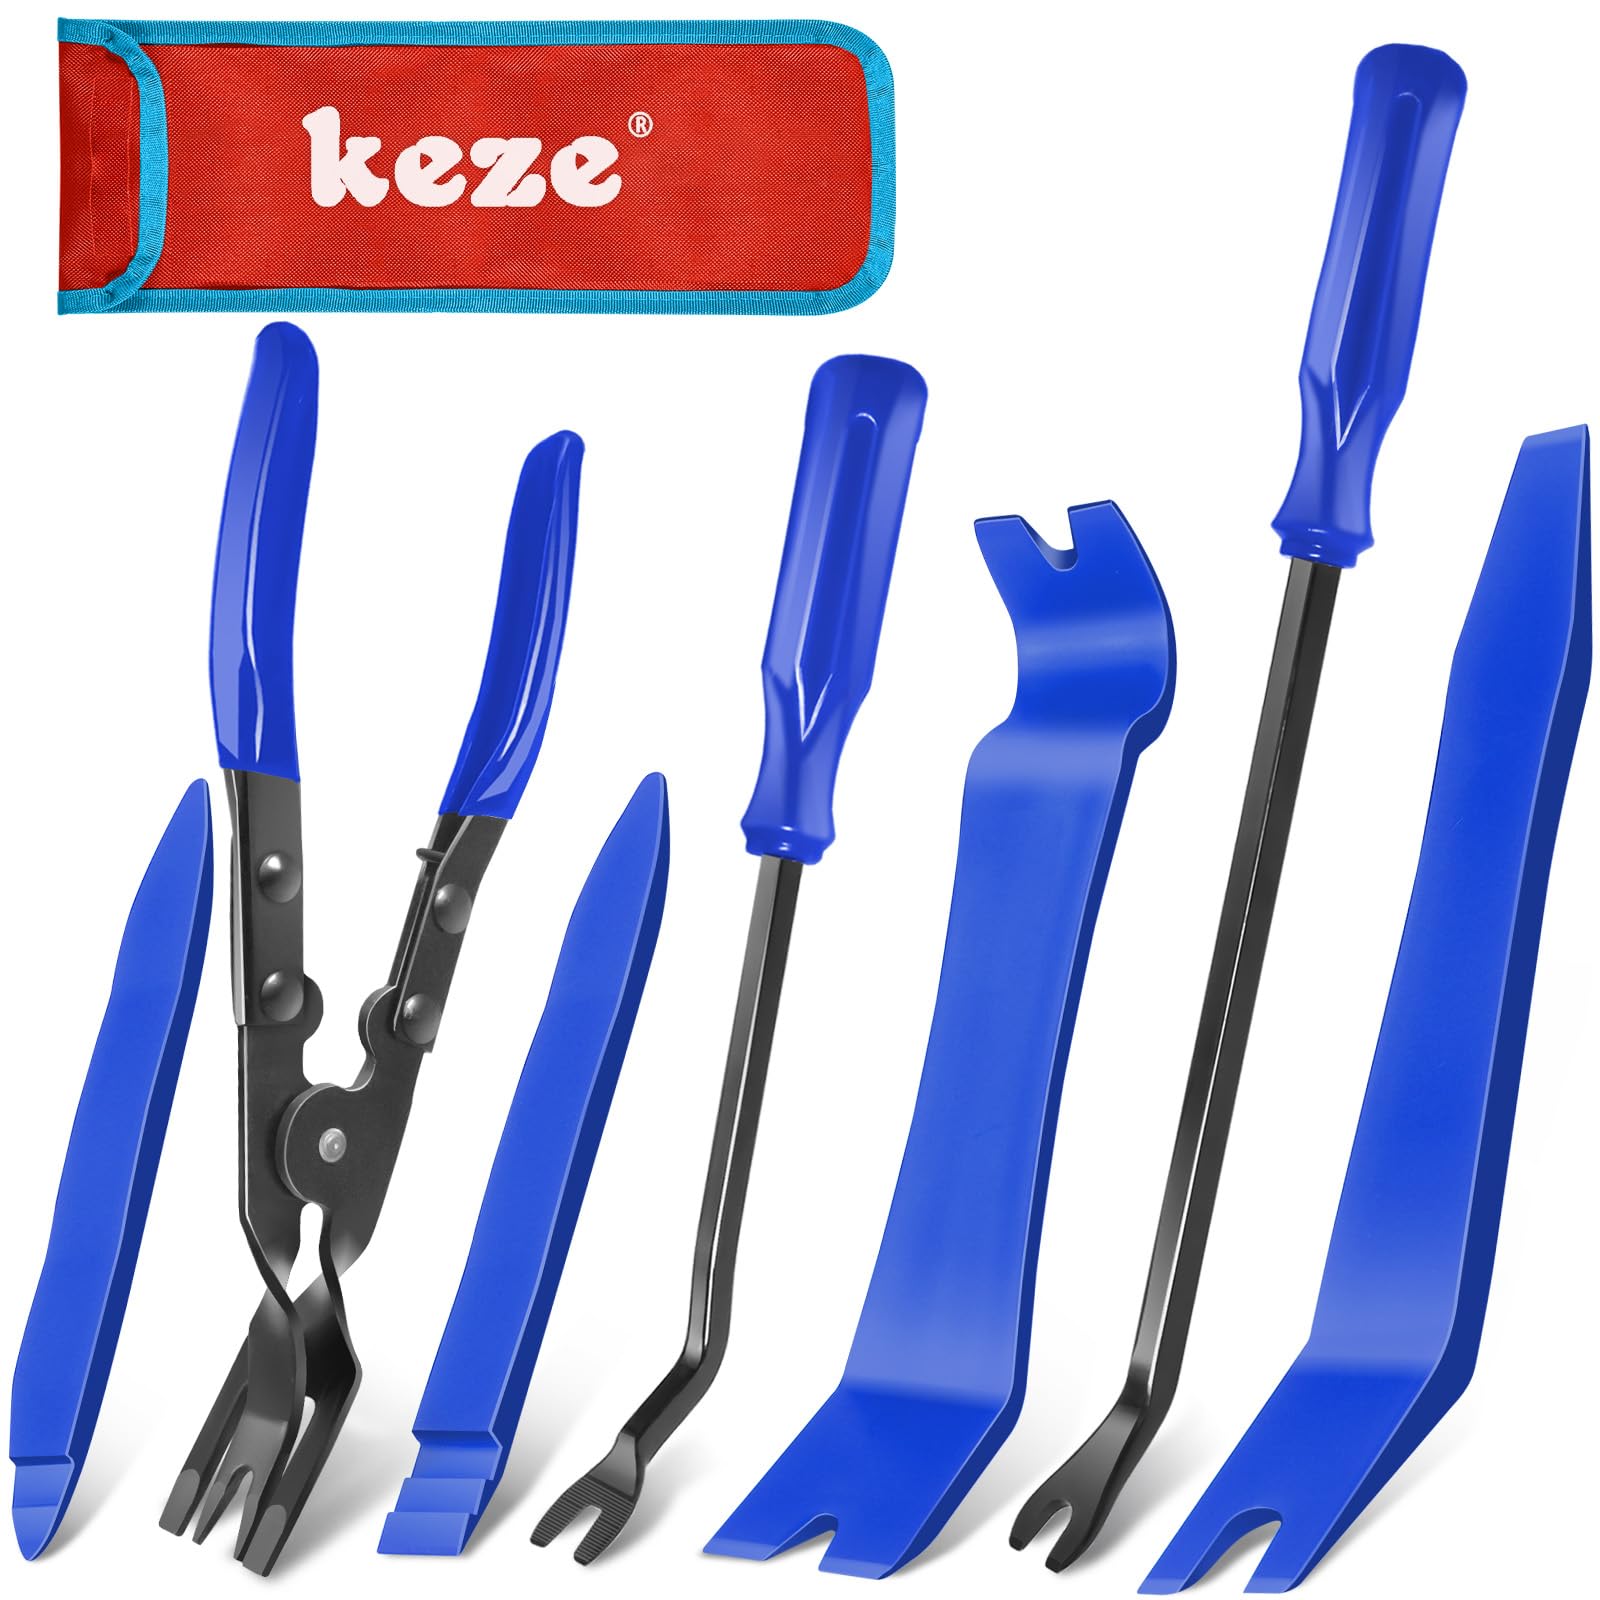
The tool you reach for matters more than the force you apply. Metal tools are the leading cause of scratched frames and chipped lenses.
Use a Plastic Pry Tool
A plastic trim removal tool, the kind sold for automotive interior work, is ideal. Its thin, flexible edge slides behind the cover without leaving marks. Insert the tip near a clip and twist gently until you feel the clip release.
Wrap a Screwdriver If You Must
If you do not have a plastic tool, wrap the tip of a flathead screwdriver with two layers of painter’s tape. The tape cushions the metal and reduces the chance of scratching the finish. Go slow and let the tape do the work.
Avoid Knives and Putty Knives
A butter knife or putty knife might seem harmless, but both can chip polycarbonate covers and gouge the mounting frame. Save those tools for the workshop, not the flood light.
Apply Even Pressure Around the Edges
Once you release the first clip, resist the urge to pull the cover straight off. Most covers are held at multiple points and need balanced pressure to come free cleanly.
Start at One Corner
Begin where you have already confirmed a clip or screw. Lift just enough to release that fastener, then hold the gap open slightly. This relieves tension and makes the next clips easier to free.
Work Your Way Around the Perimeter
Move slowly from clip to clip in a clockwise or counterclockwise pattern. You should hear a soft pop each time a clip lets go. If you do not hear that sound, stop. You are probably pressing on a section that is still secured.
Visual Cue: A working clip release feels smooth and makes a quiet snap. A forced release feels gritty and may produce a cracking sound.
Handle Adhesive-Secured Covers with Care

Some flood lights rely on weatherproof adhesive rather than mechanical fasteners. Forcing these covers is a guaranteed way to bend the housing or tear the seal.
Test for Adhesive Resistance
After removing every visible screw and clip, try lifting one corner. If the cover resists evenly all the way around, adhesive is likely holding it in place.
Soften the Seal with Gentle Heat
Use a hair dryer on its lowest setting or a heat gun held at least six inches away. Keep the heat moving in slow circles for 30 to 60 seconds per section. The warmth softens the adhesive just enough to let the cover release without damage.
Warning: Never use open flames or high heat on plastic covers. Polycarbonate can warp or discolor above 150°F.
Consult the Manufacturer’s Guide
Every flood light is built a little differently. The general steps above cover most cases, but the safest path is always the one your manufacturer recommends.
Find Your Model Number
Check the back of the fixture, the inside of the wiring compartment, or the side of the mounting arm. The model number is usually printed on a small sticker along with the voltage and wattage ratings.
Look Up the Manual Online
Search the manufacturer’s website using your model number. Keystone, GE, Philips, and most major brands offer free PDF manuals with disassembly diagrams. Many Keystone owners report that newer units combine one screw with two spring clips, so verifying before you start can save a lot of guesswork.
Work Slowly to Prevent Costly Damage
Speed is the enemy of a clean removal. Even experienced DIYers crack covers by applying too much force too quickly.
Plan for 5 to 10 Minutes
Set aside enough time that you are not rushing to finish. A slow, deliberate pace gives you room to inspect, adjust, and back off if something feels wrong.
Stop the Moment You Feel Resistance
If the cover stops moving after releasing a clip, pause and check for missed screws, additional clips, or mineral buildup. Hard water deposits can fuse a cover to its housing over time.
Common Mistake: Twisting the cover sideways instead of pulling it straight off. This bends the clips and often snaps the tabs off the cover.
Note the Cover’s Orientation Before Removal

Once the cover is off, it is surprisingly easy to forget exactly how it sat. A few seconds of preparation now can save headaches during reassembly.
Snap a Quick Photo
Take one picture from the front and one from the side before you detach anything. This is especially helpful if the cover has a directional gasket or a specific groove alignment.
Inspect the Gasket While It Is Open
Check the rubber or silicone seal for cracks, brittleness, or mold. A damaged gasket lets moisture into the fixture and should be replaced before you put the cover back on.
Reattach the Cover the Right Way

A clean removal deserves a clean reinstallation. A few small habits will keep your flood light sealed and weatherproof for years.
Align the Clips Before You Press
Position the cover so each tab lines up with its matching clip. Press gently around the edges until you hear each clip click into place. Do not press on the center of the lens.
Hand-Tighten Any Screws
If your model uses screws, snug them by hand first. A power driver can easily strip the soft plastic housing and leave you with a cover that will never sit tight again.
Pro Tip: A thin smear of dielectric grease on the rubber gasket keeps it flexible and improves water resistance over time.
Frequently Asked Questions About Removing a Flood Light Cover
How do I know if my flood light cover has clips or screws?
Run your finger around the rim and look for small bumps, indentations, or rubber plugs. Clips usually feel like raised tabs, while screws are often hidden under small silicone caps. A flashlight helps reveal both.
Can I use a flathead screwdriver to remove the cover?
Yes, but wrap the tip in two layers of painter’s tape first to protect the finish. A plastic trim tool is safer because it will not scratch or chip the housing if you slip.
What if the cover feels glued in place?
Warm the seam with a hair dryer on low heat for 30 to 60 seconds per section. The heat softens the adhesive so the cover releases without bending the housing. Avoid high heat or open flames.
How long does it take to remove a flood light cover?
Most covers come off in 5 to 10 minutes when you work slowly. Rushing the job is the main reason covers crack, so give yourself plenty of time to inspect and adjust.
Should I replace the gasket when I remove the cover?
It is a good idea, especially if the gasket looks cracked, stiff, or moldy. A fresh rubber or silicone seal keeps moisture out and protects the bulb and wiring inside.
Key Takeaways for Safely Removing Your Flood Light Cover
Knowing how to remove flood light cover without damage comes down to three habits: inspect first, use the right tool, and work slowly. Always check for hidden clips or screws before prying, reach for a plastic trim tool instead of metal, and release fasteners one at a time around the perimeter. If the cover resists, stop and look for adhesive or mineral buildup rather than forcing it. Your next step is simple: grab a flashlight, identify your fasteners, and set aside ten quiet minutes before you make the first move.