
You flip the switch, but nothing happens. You grab a ladder, inspect the fixture, and realize the bulb is burned out. Only it won’t budge. No matter how hard you twist, the flood light bulb is frozen in place. You’re not alone. Stuck flood light bulbs are a common household frustration, especially in recessed or outdoor fixtures exposed to heat, moisture, and frequent on-off cycles. The good news? With the right tools, techniques, and safety precautions, you can remove a stuck flood light bulb without damaging the socket or risking injury.
This guide delivers a step-by-step roadmap for removing a stuck flood light bulb, whether it’s intact, partially broken, or fully shattered. From simple household hacks to professional-grade methods, you’ll learn how to safely disconnect power, boost grip, avoid common mistakes, and know when it’s time to call an electrician. By the end, you’ll be equipped to tackle even the most stubborn bulbs with confidence.
Power Off and Cool Down Before Touching the Fixture
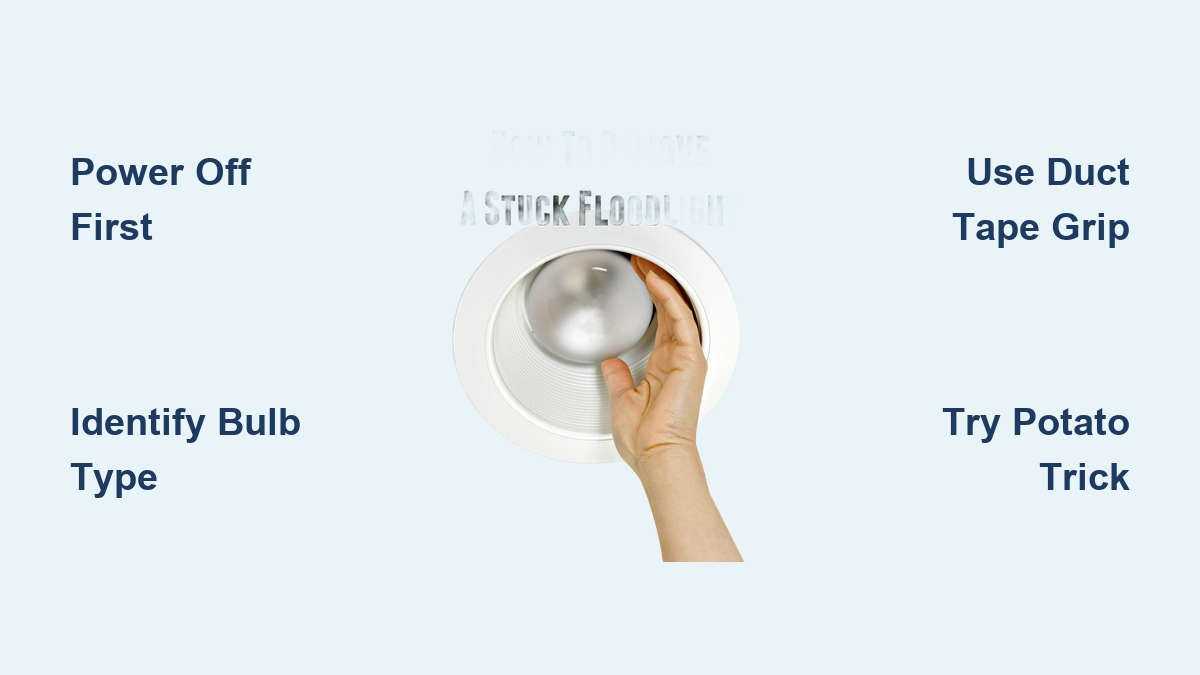
Before touching anything, cut power at the source. Flip the circuit breaker, not just the wall switch, to eliminate shock risk. Never assume the switch alone stops electricity flow. Then, wait. If the light was recently on, let the bulb cool for 10 to 15 minutes. Heat expands the metal base, making it bind tighter in the socket. Trying to turn a hot bulb increases breakage risk and reduces grip. Use this time to gather tools and inspect the fixture from below.
Confirm Electrical Safety With a Voltage Tester
Double-check the breaker is off by testing the switch. No light means power is truly disconnected. Avoid touching metal parts of the fixture with bare hands until you’re certain. Use a non-contact voltage tester near the socket if available. This small step prevents dangerous surprises during removal.
Wear Safety Glasses and Work Gloves
Put on safety glasses and work gloves. Glass can shatter unexpectedly, especially under pressure. If the bulb is already cracked, wear long sleeves to guard against sharp fragments. Use a stable step ladder rated for ceiling-height work. Don’t overreach or stand on unstable surfaces.
Critical Warning: Never spray WD-40, penetrating oil, or any fluid lubricant into the light socket. These substances damage electrical components and create fire hazards.
Identify the Bulb Type Before Applying Force
Not all flood lights unscrew. Knowing your bulb type prevents wasted effort and damage.
Screw-Base E26 and E27 Flood Bulbs
Most common in household fixtures, these have a threaded metal base and turn counter-clockwise to remove. If the bulb won’t budge, thermal expansion or corrosion is likely the culprit.
Twist-and-Lock GU10 and GU5.3 Halogen Bulbs
These don’t screw in. Look for three small dots on the bulb face. To remove:
- Push the bulb up into the ceiling.
- Twist one-quarter turn counter-clockwise.
- Pull the entire assembly down.
Forcing a twist-lock bulb like a screw type can break the socket. Confirm the type before applying torque.
Boost Grip on Intact Bulbs Without Crushing the Glass
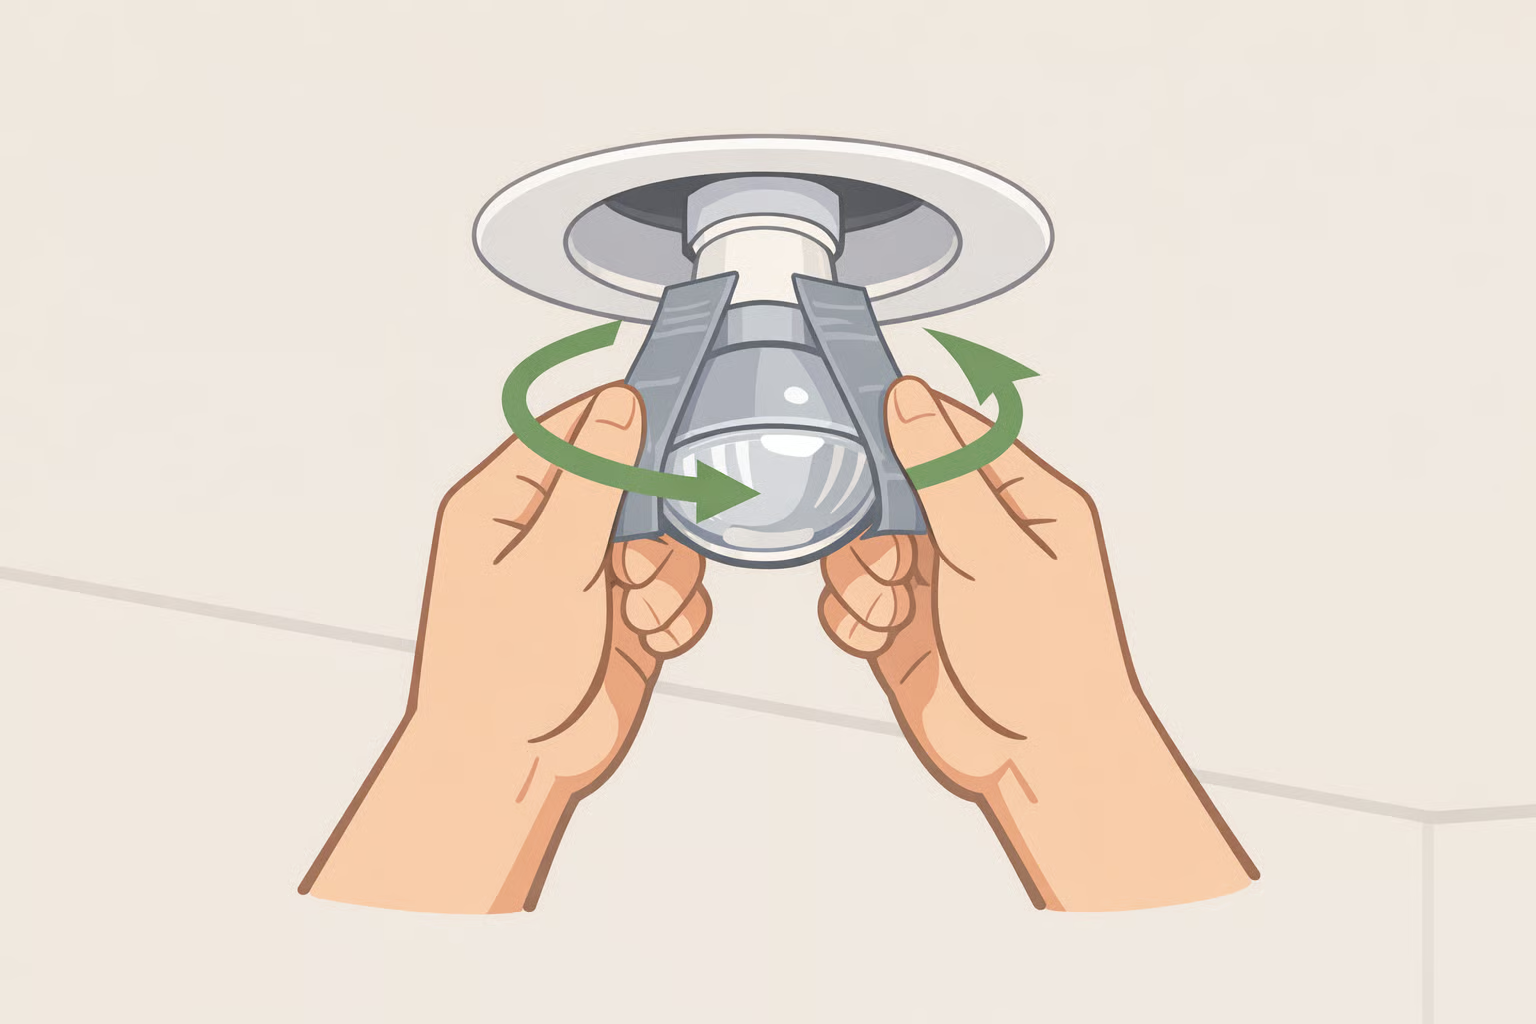
If the glass is whole but won’t turn, improve traction using household items.
Use Duct Tape for Extra Torque
Create a sticky loop:
- Cut a 3-inch piece of duct tape.
- Form a circle with the sticky side out.
- Press it firmly onto the bulb’s flat face.
- Insert fingers into the loop and twist counter-clockwise.
Pro Tip: Works best on cooled bulbs. Heat weakens adhesive and can fuse the tape permanently to the glass.
Try the Tape Handle Method for Domed Bulbs
For hard-to-grip shapes:
- Use an 8-inch duct tape strip.
- Stick one end to the bulb’s side using a butter knife.
- Loop it around and attach the other end opposite.
- Insert a knife into the dangling loop and twist. It bunches the tape, creating a lever.
This method generates mechanical advantage with minimal tools.
Silicone and Rubber Grip Aids for Slippery Glass
- Silicone oven mitts: Slip one on and twist. The textured surface grips slick glass.
- Rubber jar opener pads: Press against the bulb face and rotate.
- Large rubber band: Wrap tightly around the bulb base for added friction.
- Rubber glove wrist: The thick cuff provides secure grip.
These are low-risk, high-reward solutions before moving to mechanical tools.
Apply Plastic Wrap for Safety and Grip
Wrap the bulb in plastic wrap before attempting removal. It improves grip and contains glass if the bulb breaks. Re-wrap after each failed attempt for fresh traction.
Use Suction Techniques on Flat-Faced Bulbs
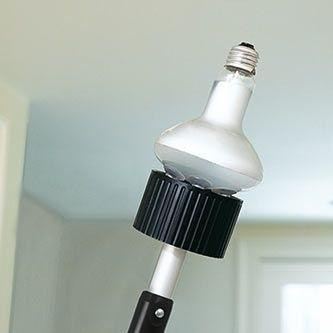
Best for bulbs with flat or slightly curved fronts.
Attach a Small Suction Cup
Grab a suction cup from a shower caddy or hook. Clean the bulb face with a dry cloth, press the cup firmly in the center, then twist counter-clockwise. The seal creates leverage without stressing the glass.
Try a Vacuum Cleaner Hose for Recessed Fixtures
Turn on the vacuum and place the hose end over the bulb. The suction holds the bulb while you gently twist the hose. Works surprisingly well on recessed flood lights. Reverse the process to install new bulbs. Just press and twist.
Use a Light Bulb Changer Pole for High Ceilings
For ceilings 8 to 16 feet high, a telescoping bulb changer pole with a suction cup or gripper is ideal. Extend it, press the cup to the bulb, twist, and remove. No ladder needed.
Remove the Trim for Better Access to the Bulb
Sometimes the fixture trim blocks access to the bulb sides.
Unscrew or Release the Trim Carefully
- Screw-on trim: Grip the inner edge and turn counter-clockwise.
- Spring-loaded trim: Slide a butter knife or old credit card between the trim and ceiling. Gently pry to release the springs, then pull the trim straight down.
Once removed, you can grip the bulb’s sides directly with rubber gloves or pliers.
Caution With Painted or Sealed Trims
If the trim is painted over, don’t force it. Use a utility knife to slice the paint seal before prying. Forcing a stuck trim can crack drywall or damage ceiling texture.
Apply Mechanical Tools as a Last Resort
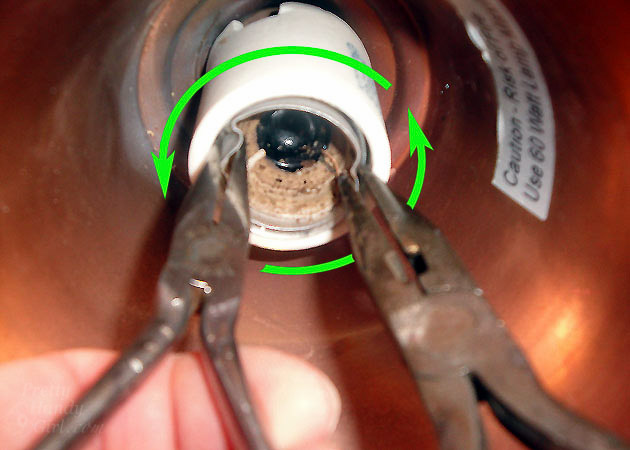
When grip methods fail, use tools, but with caution.
Use Rubber-Coated Needle-Nose Pliers on the Metal Base
Grip the metal base (not the glass) with insulated, rubber-coated pliers. Apply steady, gentle pressure to turn counter-clockwise. Avoid squeezing too hard. This is a last resort for intact bulbs.
Try Grilling Tongs Cushioned With a Towel
Slide tongs around the bulb, cushioned with a cloth. The long handles offer leverage. Works well for large or oddly shaped flood bulbs.
Avoid Prying With a Screwdriver Unless Necessary
Never force a flat-blade screwdriver between the bulb and socket. It can gouge the socket threads or short internal wiring. Only consider this if the bulb is already broken and other methods fail.
Remove a Broken Bulb Safely With Pliers or a Potato
If the glass shattered but the metal base remains, switch tactics.
Use Needle-Nose Pliers on the Broken Base
- Confirm power is still off.
- Clear large glass pieces.
- Insert plier tips into the base.
- Open the pliers slightly to grip the inner thread.
- Turn counter-clockwise slowly.
This method gives precise control and avoids socket damage.
Try the Potato Trick for Broken Bases Only
- Cut a raw potato in half.
- Press the cut side firmly into the broken base.
- Twist counter-clockwise. The flesh grips jagged edges and metal.
- Pull out the base with the potato.
Note: Only use this on broken bulbs where the glass is gone. It’s messy and ineffective on intact ones.
When to Call a Professional Electrician
Stop and call a licensed electrician if:
- The base is stuck deep and pliers won’t grip.
- The socket looks melted, warped, or corroded.
- You’ve tried multiple methods with no success.
- The fixture is in a tight, high, or dangerous location.
Professionals have bulb extractor tools, dielectric grease, and socket replacement kits. They can clean corrosion, inspect wiring, and prevent future issues.
Prevent Future Stuck Bulbs With Smart Habits
Avoid repeat problems with smart installation habits.
Don’t Over-Tighten New Bulbs During Installation
Tighten only until the bulb lights. Excessive force is a top cause of seized bulbs. For LED flood lights, which generate less heat, this is even more critical. Over-tightening does more harm than good.
Choose LED Bulbs to Reduce Heat Buildup
LEDs run cooler than halogen or incandescent bulbs. Less heat means less thermal expansion and lower seizure risk. They also last longer, reducing replacement frequency.
Apply Dielectric Grease Carefully to Threads
Some electricians apply a tiny amount of dielectric grease to the threads, never the electrical contacts, to prevent corrosion. Use sparingly. Too much can attract dust or degrade at high temperatures.
Frequently Asked Questions About Removing Stuck Flood Light Bulbs
What causes a flood light bulb to get stuck?
Thermal expansion from repeated heating and cooling cycles causes the metal base to seize in the socket. Corrosion from moisture infiltration and over-tightening during installation are also common culprits.
Can I use WD-40 to loosen a stuck light bulb?
No. Never spray WD-40 or any lubricant into the socket. It damages electrical components and creates a fire hazard. Professionals may apply penetrating oil externally around the seam, but DIY users should avoid this entirely.
How do I remove a twist-and-lock GU10 bulb?
Push the bulb up into the ceiling, twist one-quarter turn counter-clockwise, then pull the assembly down. Look for three small dots on the bulb face to confirm it’s a twist-lock type.
Is the potato trick safe for removing broken bulbs?
Yes, but only for broken bulbs where the glass is already gone. Cut a raw potato in half, press the cut side into the broken base, and twist counter-clockwise. The potato grips the jagged metal and extracts the base.
When should I call an electrician for a stuck bulb?
Call a professional if the base is shattered deep in the socket, the socket looks melted or corroded, multiple DIY attempts have failed, or the fixture is in a high or hard-to-reach location.
How can I prevent bulbs from getting stuck in the future?
Avoid over-tightening during installation, switch to LED bulbs to reduce heat, and consider applying a tiny amount of dielectric grease to the threads. Periodically inspect fixtures for moisture or corrosion.
Key Takeaways for Removing a Stuck Flood Light Bulb
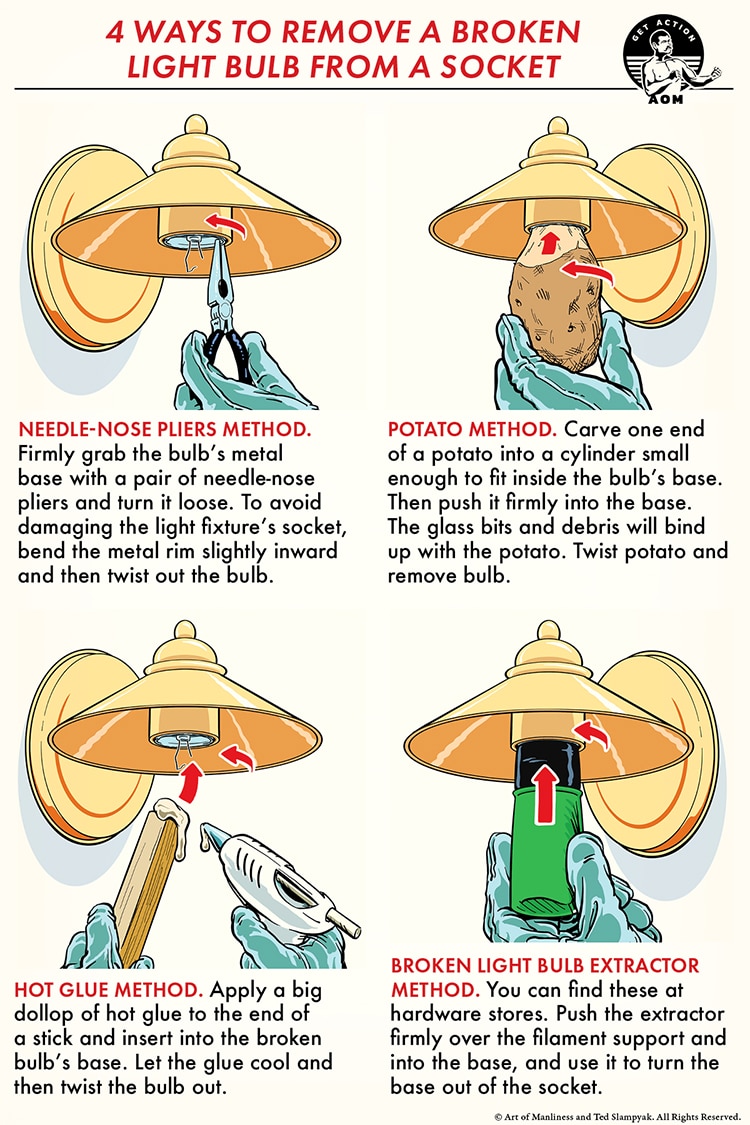
Start with safety: power off at the breaker, cool the bulb for 10 to 15 minutes, and wear safety glasses and gloves. Identify the bulb type before applying force. Screw-base bulbs turn counter-clockwise, while twist-lock GU10 bulbs push up and quarter-turn.
Use grip aids like duct tape loops, silicone oven mitts, or rubber bands first. For flat-faced bulbs, try suction methods using a small suction cup or vacuum hose. Remove the trim if access is blocked. For broken bulbs, use needle-nose pliers or the potato trick. And never use oil in the socket.
When in doubt, call a licensed electrician. Keep this guide handy for your next lighting emergency, and consider upgrading to LED bulbs for fewer future hassles.