
You flip the switch and your outdoor flood light stays dark. A burned-out bulb can leave your driveway, backyard, or garage in total darkness, and that is more than just an inconvenience. Knowing how to change a flood light bulb the right way saves you time, money, and the frustration of guessing what went wrong. The catch is that not every flood light uses a replaceable bulb, and the wrong move can damage your fixture or put you at risk.
This guide breaks down everything you need to know about how to change a flood light bulb in any common setup. You will learn how to identify your fixture type, follow proper safety steps, select the correct replacement, and troubleshoot issues when the light still does not work. Whether you are dealing with a simple screw-in bulb or a sealed LED unit, you will walk away with a clear action plan.
Identify Your Flood Light Fixture Type

The first step in learning how to change a flood light bulb is figuring out what kind of fixture you actually have. The repair path changes completely based on this single factor.
Replaceable Bulb Fixtures
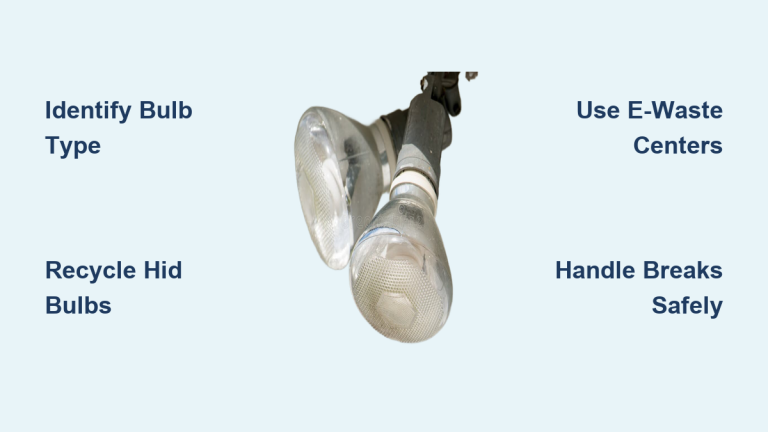
These fixtures accept standard bulbs that you can swap out by hand. You will usually see a visible bulb sitting behind a glass or plastic lens.
Common base types include:
– E26 or E27 screw bases (the standard household socket)
– GU10 bi-pin bases (twist-and-lock style)
You will often find these in older security lights, garage fixtures, and halogen conversions. Replacing the bulb is straightforward and inexpensive.
Integrated LED Fixtures
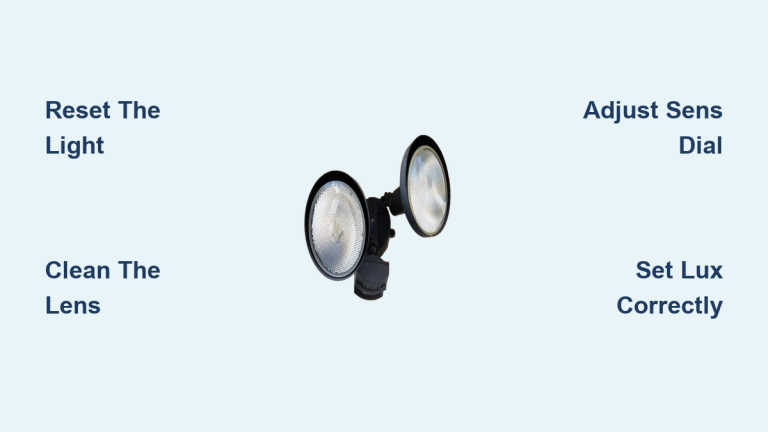
Modern flood lights often use integrated LED modules, where the LED chips are built directly into the housing. There is no socket and no removable bulb. When these units fail, you replace the entire fixture, not a component inside it.
Signs you have an integrated unit:
– No visible bulb, just a flat panel or sealed lens
– Labels showing lumens instead of watts
– Markings like “non-serviceable” or “no user-replaceable parts”
Follow These Safety Steps Before You Start
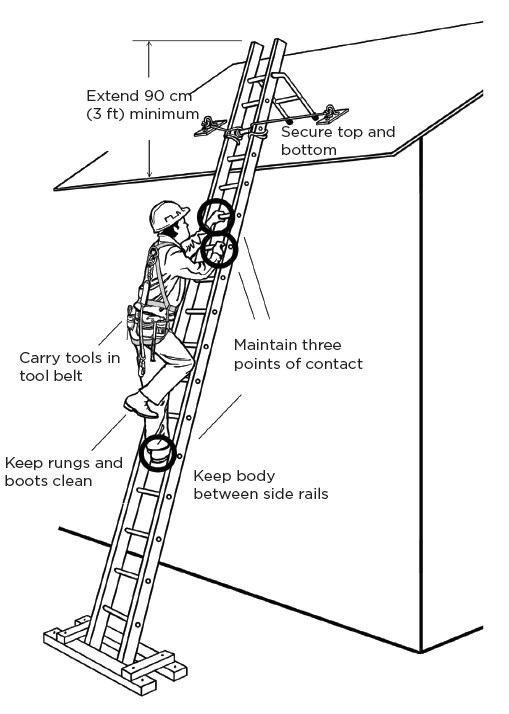
Working with electricity at height is risky. Skipping safety prep is the fastest way to turn a simple bulb swap into an emergency room visit.
Cut the Power Completely
Turn off the wall switch, then flip the circuit breaker that controls the fixture. Use a non-contact voltage tester on the wires to confirm there is no current. Never trust the switch alone, because wiring errors can leave the fixture live even when the switch is off.
Let the Bulb Cool Down
Halogen and high-wattage LED bulbs get extremely hot during use. Wait at least 10 to 15 minutes after switching off the power before touching the bulb or housing. You can hover your hand near the fixture to feel for residual heat.
Set Up a Stable Ladder
Most flood lights are mounted high on walls or eaves. A wobbly ladder is one of the leading causes of DIY injuries.
Best practices include:
– Place the ladder on level, solid ground (avoid grass or gravel)
– Extend the ladder so the top sits about 3 feet above the work area
– Maintain three points of contact at all times (two feet and one hand)
– Ask someone to spot you if possible
Remove the Old Flood Light Bulb
Once the power is off and the fixture is cool, you are ready to access the bulb.
Take Off the Protective Cover
Most flood lights have a glass or plastic lens held in place by spring clips, screws, or a twist-lock ring. Gently pry off stubborn covers with a flathead screwdriver, and set the lens aside where you will not step on it.
Unscrew or Unclip the Bulb
The exact method depends on your bulb base:
For E26 or E27 screw bases:
– Grasp the bulb firmly
– Turn counter-clockwise to loosen
– Pull straight out without twisting the socket
For GU10 bi-pin bases:
– Push the bulb in slightly
– Twist counter-clockwise about 45 degrees
– Pull straight out
If the bulb refuses to budge, do not force it. Heat can fuse the metal base to the socket over time.
Choose the Correct Replacement Bulb
Picking the wrong bulb can lead to flickering, early burnout, or even fire risk. Match these specifications exactly:
- Base type (E26, E27, GU10, etc.)
- Voltage (typically 120V for residential)
- Wattage (never exceed the fixture’s maximum)
- Beam angle (wide flood for general coverage, narrow spot for focused light)
- Color temperature (3000K warm, 4000K neutral, 5000K+ daylight)
Pro Tip: Swap halogen bulbs for LED equivalents. A 50W LED can replace a 400W halogen while using about 85% less energy and lasting 20 times longer.
Install the New Bulb
Follow these steps for a clean installation:
- Hold the new bulb by the base only to avoid getting skin oils on the glass
- Insert it into the socket:
– Screw base: turn clockwise until snug
– GU10: align the pins, push in, then twist clockwise to lock - Do not overtighten, because this can crack the bulb or damage the socket
Reassemble the Fixture and Test the Light
Snap or screw the lens cover back into place. Restore power at the breaker, then flip the wall switch.
- If the light comes on, you are done
- If nothing happens, head to the troubleshooting section below
Pro Tip: Have a helper flip the breaker while you stay on the ladder. You will know immediately if the new bulb works without climbing down and back up again.
Troubleshoot Common Problems After Replacement
Even with a brand-new bulb, things can still go wrong. Here is how to diagnose the most frequent issues.
The Light Still Does Not Turn On
- Confirm the breaker is on and the switch is functional
- Test the socket with a voltage tester or try a known-good bulb
- Inspect for moisture or corrosion inside the lens, which signals a broken seal
The Bulb Flickers
Flickering usually points to:
– A loose connection in the socket
– A failing LED driver
– Moisture inside the junction box
Try reseating the bulb first. If flickering continues, inspect the wiring or consider replacing the fixture.
The Old Bulb Will Not Unscrew
Heat can weld the metal base to the socket. Try these solutions in order:
- Put on gloves and safety glasses
- Wrap a rubber jar gripper or thick rubber band around the base for extra traction
- Twist gently counter-clockwise
- Use a bulb extractor tool if the rubber grip does not work
- As a last resort, break the glass with a cloth and use needle-nose pliers on the base edge
Handle Integrated LED Fixtures Differently
If your flood light has no replaceable bulb, the entire fixture must be swapped when it fails. Here is the basic process:
- Turn off power at the breaker
- Remove the mounting screws or bolts
- Disconnect the wires (black to black, white to white, green or bare to ground)
- Mount the new fixture and reconnect wires using wire nuts
- Seal outdoor connections with silicone to keep moisture out
Warning: Never drill into or pry open a sealed LED unit to “replace the bulb.” This voids the safety rating, breaks the moisture seal, and can create a fire hazard.
Special Considerations for RV Flood Lights
RV and coach flood lights present unique challenges because they often use proprietary parts.
Common Issues With RV Fixtures
- Covers may be sealed with caulk instead of clips
- The “bulb” is often a custom LED bar with no standard socket
- OEM parts can be expensive and slow to ship
What to Do When an RV Light Fails
- Contact the manufacturer (such as Heartland) with your VIN to identify the part
- Check your warranty, since RV components are often covered for 1 to 2 years
- Consider an aftermarket replacement if OEM costs are too high
– Choose a unit that covers the existing mounting holes to avoid repainting
– Look for an IP65 or higher rating for weather resistance
Prevent Future Flood Light Failures
A little routine maintenance goes a long way toward avoiding repeat repairs.
- Clean the lens every 6 months to remove dirt and debris
- Inspect seals for cracks or fogging, which signal moisture intrusion
- Keep spare bulbs on hand so you are never stuck waiting for a replacement
- Upgrade to LED whenever possible for longer life and lower energy costs
Repair or Replace: Quick Decision Guide
| Situation | Best Action |
|---|---|
| Screw-in bulb burned out | Replace the bulb |
| Integrated LED failed | Replace the entire fixture |
| Frequent bulb burnouts | Upgrade to LED |
| Fogging inside the lens | Replace the fixture (seal is broken) |
| RV proprietary light failed | Use an aftermarket replacement |
| Fixture still under warranty | Contact the manufacturer first |
Frequently Asked Questions About Changing a Flood Light Bulb
Can I replace a flood light bulb with any standard bulb?
No. You must match the base type, voltage, wattage, and beam angle of your original bulb. Using the wrong specifications can cause overheating, early failure, or fire risk.
How do I know if my flood light has a replaceable bulb?
Look for a visible bulb behind a removable lens. If you see a flat panel with no socket and labels showing lumens instead of watts, your fixture is integrated and the entire unit must be replaced.
Why does my new flood light bulb flicker?
Flickering usually means a loose socket connection, a failing LED driver, or moisture inside the fixture. Reseat the bulb first, then inspect the wiring if the problem continues.
Is it safe to change a flood light bulb myself?
Yes, as long as you turn off power at the breaker, let the bulb cool, use a stable ladder, and verify there is no voltage before touching the wiring. If you are uncomfortable with any step, hire a licensed electrician.
How long do flood light bulbs typically last?
Halogen bulbs last about 2,000 hours, CFLs around 8,000 to 10,000 hours, and integrated LEDs can run 30,000 to 50,000 hours. A 50,000-hour LED used 6 hours per night can last over 20 years.
What should I do if my flood light fixture is integrated and out of warranty?
Replace the entire fixture. Repairing internal LED drivers or modules is rarely cost-effective compared to buying a new unit, and modern replacements often include upgrades like motion sensors or dusk-to-dawn controls.
Key Takeaways for Changing a Flood Light Bulb Successfully
Learning how to change a flood light bulb comes down to three core principles. First, always identify your fixture type before buying parts, because integrated LEDs require full replacement rather than a simple bulb swap. Second, prioritize safety by cutting power at the breaker, letting the bulb cool, and using a stable ladder with three points of contact. Third, match every specification on the replacement bulb, including base type, voltage, wattage, and beam angle, to avoid early failure or safety hazards.
Your next step is simple: grab a flashlight, inspect your flood light fixture, and confirm whether you have a replaceable bulb or an integrated unit. From there, you can gather the right tools and replacement parts and finish the job in under 20 minutes.