
A dark driveway or unlit backyard can feel like an open invitation to trespassers, yet many homeowners hesitate to add outdoor lighting because the project sounds complicated. Hiring an electrician, pulling permits, and routing cables through finished walls can quickly turn a simple security upgrade into a major renovation. The cost alone often pushes the project to the bottom of the to-do list.
The good news is that you can install flood lights without wiring using solar, battery, or plug-in systems. These modern options deliver bright, motion-activated illumination with zero electrical work, making them perfect for renters, DIYers, and budget-conscious homeowners. You’ll get reliable security lighting in a single afternoon, with no special skills required.
In this guide, you’ll learn which non-wired flood light types work best, how to install them on wood, brick, vinyl, or metal surfaces, and pro tips to keep them running for years. By the end, you’ll be ready to light up your property confidently and safely.
Choose the Right Non-Wired Flood Light
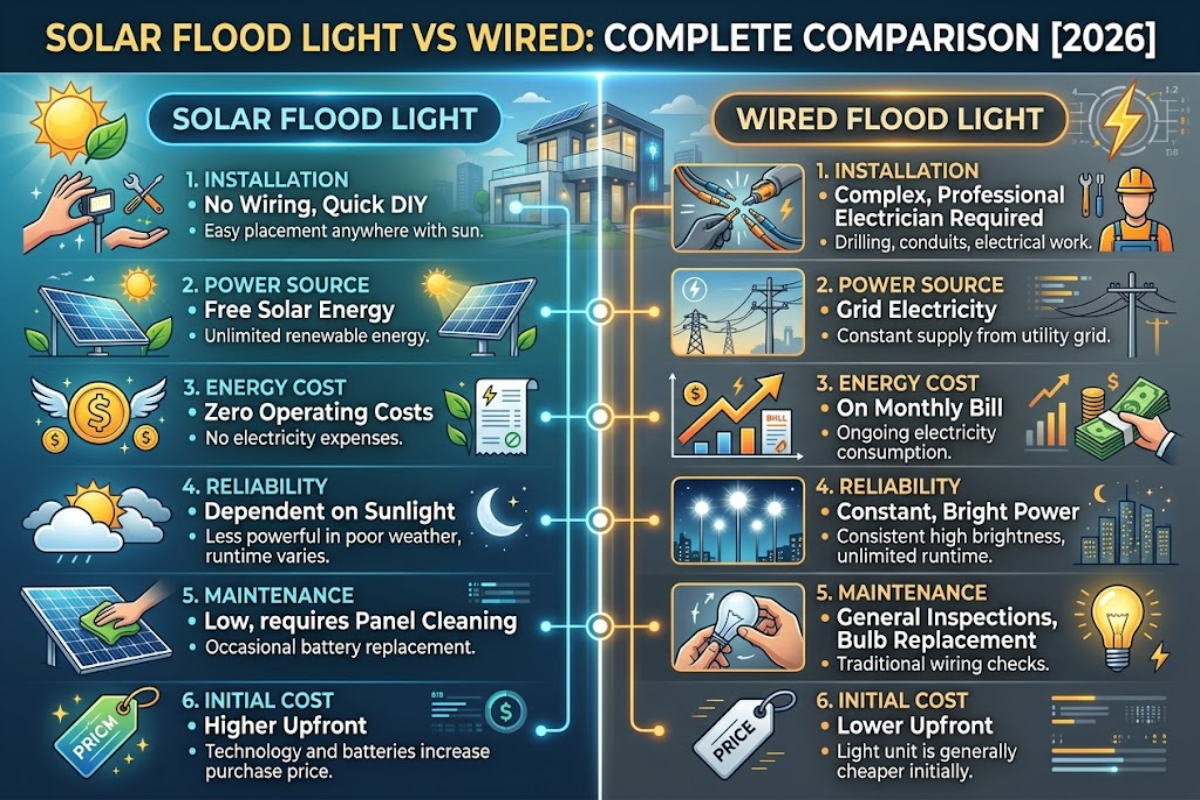
Not all wireless flood lights perform the same. Your choice depends on sun exposure, runtime needs, and mounting location. Picking the right type upfront saves time and frustration later.
Solar-Powered Flood Lights
Solar flood lights charge during the day and turn on automatically at night. Modern units use lithium iron phosphate (LiFePO4) batteries that last 5–7 years and deliver 8–12 hours of light after 6–8 hours of direct sun. They work best on south-facing roofs, eaves, or poles with clear sky exposure.
Look for models with at least 1,000 lumens output, IP65 weather resistance, and 40-foot motion detection. Avoid shaded areas, since panels need 4–6 hours of direct sunlight to charge fully. Clean the panel monthly with a soft cloth to prevent dust buildup.
Battery-Operated LED Flood Lights
Battery-powered flood lights offer consistent performance in any weather. Rechargeable lithium-ion models provide 6–10 hours of light per charge and recharge easily via USB. Disposable D-cell versions run 30–50 hours, making them ideal for emergency backup or remote sheds.
Efficient 800-lumen LEDs draw only 8–12 watts. Motion sensors dramatically extend battery life by activating lights only when needed. Store spare batteries indoors at around 50% charge to maximize shelf life.
Plug-In Flood Lights with Extension Cords
Plug-in models deliver unlimited runtime when a GFCI-protected outdoor outlet is nearby. They work well for covered patios, garages, and workshops. Use only weatherproof LED fixtures rated for outdoor use.
Choose 12-gauge SJTW or SJTOW cords for runs up to 100 feet, or 14-gauge cords for distances under 50 feet. Never daisy-chain multiple cords. Create drip loops at every connection point so water runs off instead of seeping into plugs. If your outlet lacks GFCI protection, add a portable GFCI adapter for around $20.
Gather Tools and Safety Gear
The right equipment makes installation faster, safer, and longer-lasting. You likely own most of these items already.
Essential Tools
- Cordless drill with variable speed
- Drill bit set for wood, masonry, and metal
- Digital level
- Stud finder
- Measuring tape
Mounting Hardware
- Stainless steel or galvanized screws
- Toggle bolts for hollow surfaces
- Masonry anchors for brick
- Neoprene washers for vinyl siding
Safety Equipment
- Extension ladder
- Safety glasses
- Work gloves
- Non-slip footwear
Weatherproofing Supplies
- Marine-grade silicone sealant
- Foam gaskets
- UV-resistant cable clips
- Optional conduit for cord protection
Plan Your Flood Light Layout
A thoughtful layout ensures even coverage without dark zones or glare. Spend a few minutes planning before drilling.
Determine Mounting Height and Angles
Mount security lights 8–10 feet high to discourage tampering. Pathway lighting works well at 6–8 feet. Angle fixtures downward to reduce glare and light pollution. Most LED flood lights have a 100–120° beam angle, so space them 15–25 feet apart for full coverage.
Avoid Obstacles and Shadows
Walk the area and note downspouts, utility meters, overhanging branches, and fences. These can block light or cast unwanted shadows. Sketch your layout and measure distances between fixtures to avoid overlap and blind spots.
Check Local Rules
Some HOAs and municipalities regulate fixture height, brightness, and operating hours. Dark-sky compliance rules may also apply. Take photos and notes in case you need approval before installation.
Mount Flood Lights on Any Surface
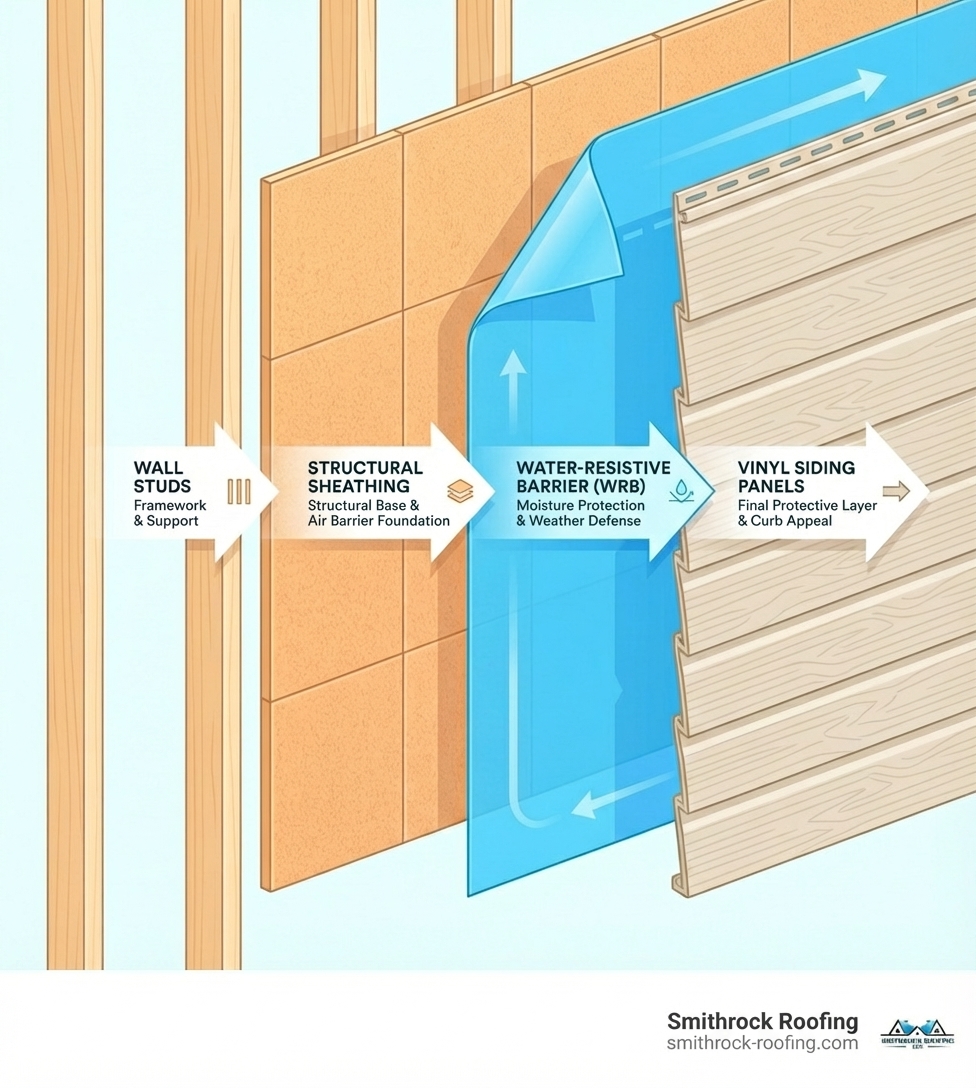
Installation steps vary by material. Follow these surface-specific techniques for a secure, leak-proof mount.
Install on Wood Siding
Wood offers strong support when you anchor into studs. Use a stud finder or tap the wall to locate framing; a dull thud signals a stud. Standard spacing is 16 or 24 inches on center.
Drill pilot holes slightly smaller than your screw diameter to prevent splitting. Drive 2.5–3 inch stainless steel deck screws into the stud, penetrating at least 1.5 inches. Apply silicone sealant around each screw head to block moisture. Avoid over-tightening, which can crack wood or strip screws.
Mount on Brick or Masonry
Brick is strong but requires the right tools. Use carbide-tipped masonry bits matched to your anchor size. A hammer drill makes clean holes in hard brick, while standard rotation works for softer mortar.
Choose sleeve anchors for solid brick, penetrating 2–3 inches. Chemical anchors work best for cracked or soft masonry but need 24 hours to cure. Drill into mortar joints whenever possible, since they’re easier to repair than brick if you need to relocate the fixture.
Secure on Vinyl or Metal Siding
Vinyl and metal expand and contract with temperature, so mounting requires flexibility. Drill slightly oversized holes to allow movement, and use neoprene washers to cushion fasteners and seal out water.
Hollow vinyl lacks strength, so use backing plates or long screws that reach the studs behind. Span multiple panels for extra support. Avoid installing in extreme heat or cold, when siding is at its largest or most brittle. Match fastener metal to siding type to prevent galvanic corrosion.
Connect Power Without Wiring
Once mounted, set up the power source for your chosen flood light type.
Position Solar Panels for Full Sun
Face panels true south in the Northern Hemisphere. Adjust tilt by season: 45–60° in winter, 15–25° in summer. Use an online solar calculator for your exact latitude. If the mounting location is shaded, consider a separate panel mounted in a sunny spot.
Route Extension Cords Safely
Use 12-gauge outdoor-rated cords and secure them every 3–4 feet with cable clips. Avoid sharp bends or pinch points, and create drip loops before each plug-in connection. Never run cords under doors or through windows where they can be damaged.
Install and Maintain Batteries
Insert batteries with correct polarity and apply dielectric grease to terminals to prevent corrosion. Track installation dates so you know when to replace them. Lithium-ion batteries typically last 5–7 years, while lead-acid lasts 2–3 years.
Optimize Performance and Longevity

A few simple habits keep your flood lights bright and reliable for years.
Adjust Solar Panel Angles Seasonally
Re-angle panels in spring and fall to match the sun’s path. Many mounts allow quick adjustments without tools.
Calibrate Motion Sensors
Start at medium sensitivity and test at night with walking passes. Avoid aiming at tree branches, HVAC units, or busy sidewalks. Dual-tech sensors that combine PIR and microwave detection reduce false triggers from small animals.
Reduce Light Pollution
Use downward-facing shields or fixtures with built-in cutoffs. Choose 3000K warm white LEDs, which are less disruptive to wildlife and neighbors. Add timers to dim lights after midnight when full brightness isn’t needed.
Protect Against Weather
Reapply silicone sealant every 2–3 years. Clean lenses and solar panels monthly. In sunny climates, consider UV-resistant covers to prevent plastic from becoming brittle.
Troubleshoot Common Problems

Quick fixes keep your lights working without calling a professional.
Fix Dim or Flickering Lights
Weak batteries, loose connections, or dirty terminals are the usual culprits. Test the battery under load, clean contacts with dielectric spray, and retighten all connections.
Stop False Motion Detection
Wind-blown plants, animals, or spider webs on the lens often cause false triggers. Lower sensitivity, reposition the sensor, and clean the lens regularly.
Prevent Water Damage
Inspect gaskets and seals each season. Reapply sealant around mounts and ensure drip loops on all cord connections.
Secure Loose Fixtures
Upgrade to toggle bolts or sleeve anchors if the original hardware loosens. In windy areas, add guy wires for extra stability. Check and retighten connections annually.
Follow Safety Best Practices
A few precautions prevent accidents during and after installation.
Use Ladders Correctly
Maintain a 4-to-1 angle (1 foot out for every 4 feet up). Have a spotter, keep three points of contact, and never use aluminum ladders near power lines.
Ensure GFCI Protection
Test GFCI outlets monthly using the test and reset buttons. Replace any that fail to trip. Portable GFCI adapters work well for outlets without built-in protection.
Work in Safe Weather
Avoid rain, high winds, and extreme heat. Wait for dry, calm conditions and have a shelter plan in case weather shifts.
Know When to Call a Pro
If your project involves structural modifications, high-voltage circuits, or complex smart lighting integration, consider professional help even for non-wired systems.
Maintain for Years of Reliable Use
A little routine care extends the life of your flood lights significantly.
Clean and Inspect Seasonally
Wipe solar panels and lenses monthly. After storms, check for debris or damage. Every six months, test motion sensors and battery levels.
Replace Batteries on Schedule
Lithium-ion batteries last 5–7 years; lead-acid lasts 2–3 years. Track performance decline to time replacements before failures occur.
Perform Annual Inspections
Check for loose screws, corrosion, or sealant cracks. Test GFCI outlets and connections. Photograph your setup for future reference.
Upgrade When Technology Improves
Newer LEDs offer more lumens per watt, and smart features like app control and scheduling add convenience. Modern lights often integrate with Alexa or Google Home for hands-free control.
Frequently Asked Questions About Installing Flood Lights Without Wiring
Do solar flood lights work on cloudy days?
Yes, but with reduced runtime. Most solar lights need 4–6 hours of direct sunlight for a full charge. On cloudy days, they may run for fewer hours or at reduced brightness. Premium models with larger battery banks can store 2–3 days of backup power.
How bright should outdoor flood lights be?
For security purposes, look for at least 1,000 lumens. Pathway and accent lighting can use 300–700 lumens. Higher lumens cover larger areas but may create glare if not properly shielded.
Can renters install flood lights without damaging the property?
Yes. Battery-powered and plug-in flood lights mount with minimal hardware and leave little trace when removed. Solar models with adhesive mounts or clamp brackets are also renter-friendly. Always check your lease agreement before drilling.
How long do battery-powered flood lights last per charge?
Rechargeable lithium-ion models typically run 6–10 hours per charge, depending on brightness and motion sensor activity. Disposable D-cell versions can last 30–50 hours of intermittent use.
Are non-wired flood lights weatherproof?
Most quality models carry an IP65 rating or higher, meaning they withstand rain, snow, and temperatures from -20°F to 140°F. Always check the manufacturer’s specifications for your climate.
Do I need a permit to install wireless flood lights?
In most areas, no permit is required for solar, battery, or plug-in flood lights since they don’t involve hardwiring. However, some HOAs regulate fixture height, brightness, and operating hours, so check local rules first.
Key Takeaways for Installing Flood Lights Without Wiring
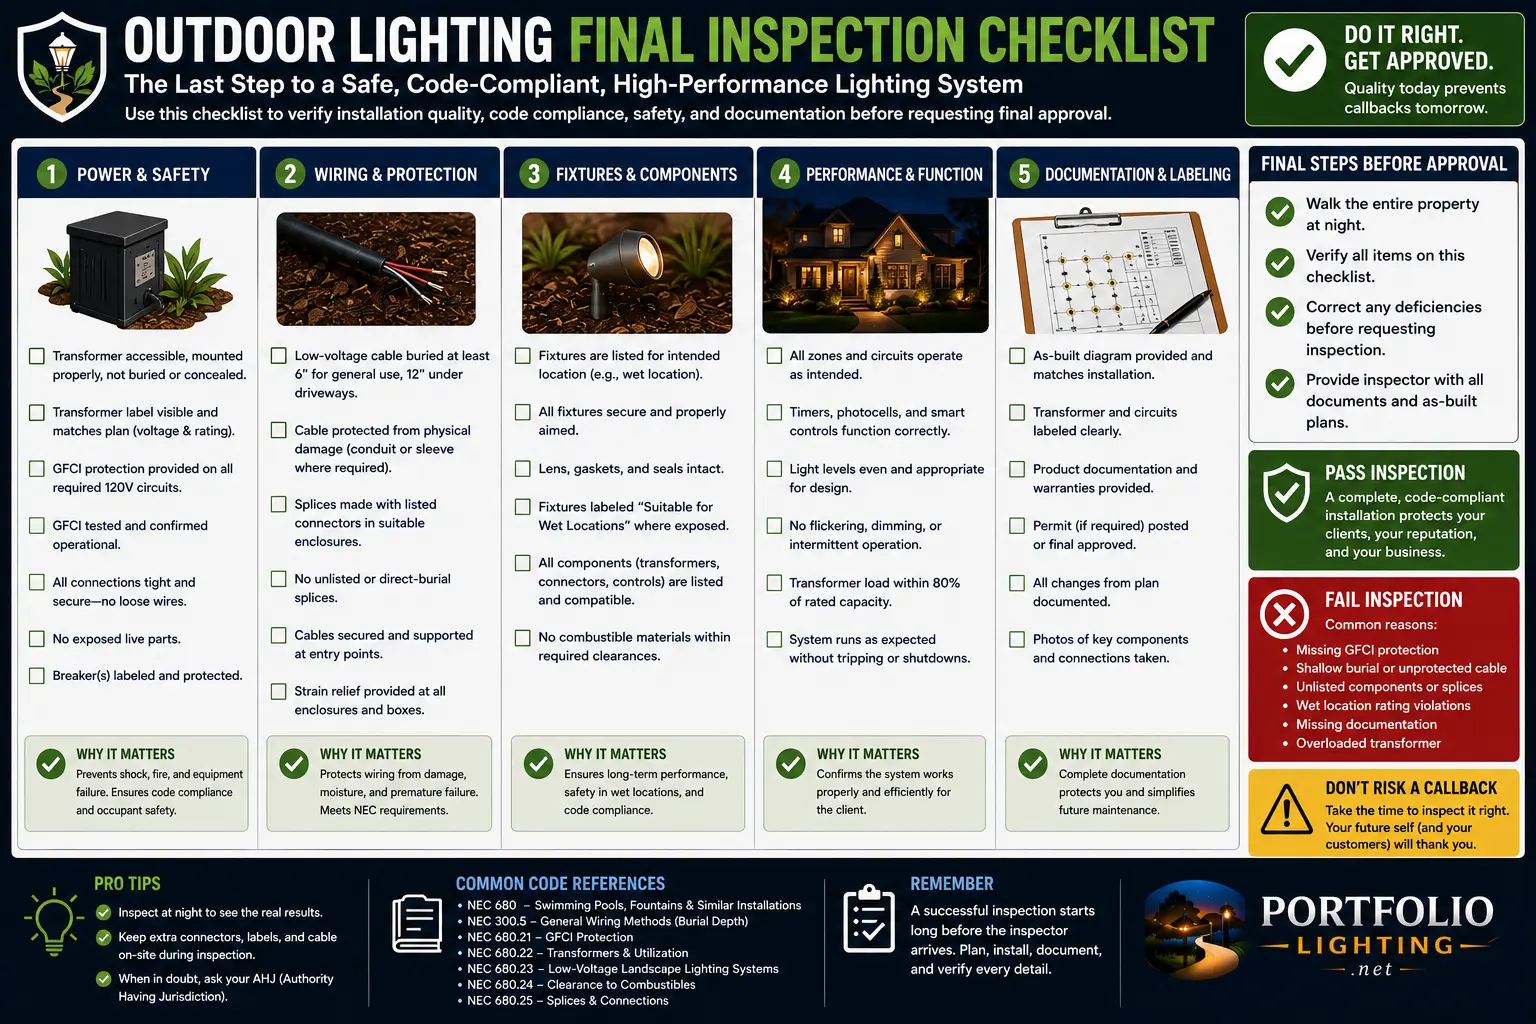
You don’t need electrical work or an electrician to get powerful outdoor security lighting. Solar, battery, and plug-in flood lights offer DIY-friendly installation, flexible placement, and reliable performance at a fraction of the cost of hardwired systems.
Start by choosing the right light type for your location and power needs. Plan your layout carefully, mount securely using surface-appropriate hardware, and weatherproof every connection. A few minutes of seasonal maintenance will keep your system running brightly for years.
Ready to get started? Walk your property tonight, identify the darkest spots, and choose a flood light type that fits your setup. With the right tools and a free afternoon, you’ll have professional-grade security lighting installed before dinner.