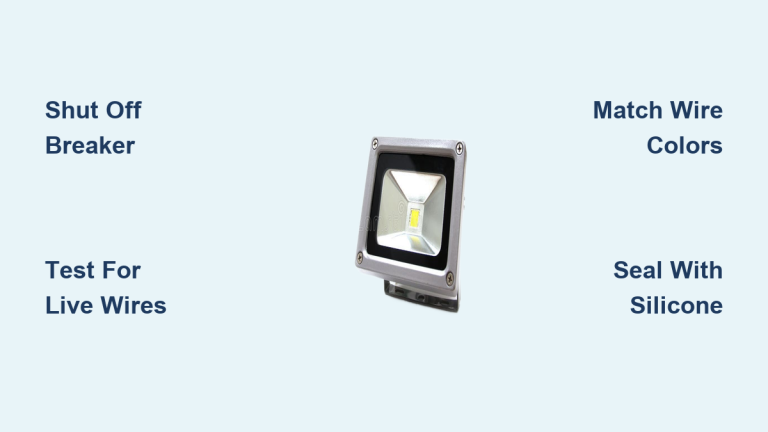

Hardwiring flood lights is one of the most effective upgrades you can make to boost home security and nighttime visibility. Unlike plug-in or solar alternatives, hardwired fixtures draw power directly from your home’s electrical system, delivering consistent, high-intensity illumination exactly where you need it. Whether you’re upgrading an old fixture or installing a brand-new system above your garage or driveway, this guide breaks down every step with clarity and safety in mind.
This project sits in the intermediate DIY range and typically takes 2 to 4 hours to complete. It involves working with electrical circuits, running wires through conduit or walls, and making secure, code-compliant connections. Below, you’ll learn three installation methods, weatherproofing techniques, motion sensor setup, and long-term maintenance tips to keep your flood lights performing for years.
Plan Location, Permits, and Project Scope
Smart planning prevents costly mistakes and keeps your installation code-compliant from day one.
Choose the Right Mounting Location
For replacement projects, your location is already set—just verify the existing mount is structurally sound. For new installations, prioritize areas above front doors, garage centers, or shed corners that border walkways. Always mount flood lights at least 9 feet off the ground for optimal coverage and reduced glare.
Check Permits and Local Codes
Contact your local permit office to confirm whether an electrical permit is required for your scope of work. All wiring must meet current local electrical codes, including proper wire gauge, conduit usage in exposed areas, and weatherproofing standards.
Assess Difficulty and Time
This project is rated intermediate. You’ll need comfort with electrical systems, the ability to run conduit or fish wires, and strict adherence to safety protocols. If your home’s wiring capacity is unknown or local codes feel overwhelming, consult a licensed electrician before starting.
Follow Critical Safety Protocols Before Touching Wires
Electrical work demands respect. These protocols protect you from serious injury.
Shut Off Power at the Breaker
Locate your main circuit breaker box, typically found in the basement, garage, or bottom floor. Flip the switch controlling the outdoor or garage circuit to the OFF position. Post a visible warning note so no one accidentally restores power while you work.
Verify the Circuit Is Dead
Never assume the power is off. Use a dedicated voltage tester on the wires inside the junction box to confirm zero current. Alternatively, plug a lamp or radio into an outlet on the same circuit—if it doesn’t turn on, the power is successfully cut.
Replace an Existing Flood Light Fixture

Upgrading an old fixture is the fastest path to better lighting because the junction box and wiring are already in place.
Remove the Old Fixture Safely
Unscrew the mounting bolts and carefully lower the old unit. Disconnect the wires by untwisting the wire nuts, noting the configuration: black to black, white to white, ground to ground. Take a photo before disconnecting to avoid confusion later. Inspect the junction box for corrosion or damage and replace it if compromised.
Connect and Mount the New Light
Strip about 1/2 inch of insulation from the wire ends if needed. Match colors carefully:
- Black (hot) to black
- White (neutral) to white
- Bare copper or green (ground) to ground
Twist each pair clockwise with pliers, cap with wire nuts, and wrap with electrical tape for moisture resistance. Tuck the wires neatly into the junction box so the fixture sits flush. Secure the new unit with the included machine screws, install bulbs, and attach the lens tightly to maintain weatherproofing.
Install a New Flood Light Using Conduit (Garage Method)

When no existing fixture exists, running protected wiring through conduit is the safest, code-compliant approach—especially for garage installations.
Mount the Extension Box at a Nearby Outlet
Choose an indoor outlet close to the garage door. Remove the faceplate and pull the outlet forward without disconnecting wires. Attach a metal extension box to the wall using a mounting plate. Pop out the top knock-out plug and install a 1/2-inch conduit connector. Secure the extension box to the plate with long screws, leaving the connector facing upward.
Run Conduit to the Mounting Location
Measure from the top of the extension box to the ceiling, subtract 1.5 inches, and cut EMT (Electrical Metallic Tubing) to length using a hacksaw. File sharp edges smooth. Attach a right-angle connector to the top of the vertical tube and slide it onto the extension box’s connector.
Secure the vertical tube with a conduit hanger halfway up, fastened with a #10 screw. Continue horizontally along the ceiling using elbow connectors at corners, supporting every 12 inches with hangers. Run the conduit to the center point above the garage door.
Drill Through the Wall and Install Boxes
Inside the garage, measure from the top of the door frame to the ceiling and subtract 1 inch. Outside, measure up the same distance and drill a 7/8-inch hole through the wall with a spade bit.
Fit a junction box over the end of the conduit inside the garage and fasten it to the ceiling with #6 screws. Feed a 14/2 Romex cable through the box and out the drilled hole, leaving several feet hanging outside.
On the exterior, attach a plastic cable connector to a round outdoor outlet box. Feed the Romex through, tighten the clamp, seal the wall hole with silicone caulk, and secure the box with 2-inch decking screws.
Pull and Connect Wires Through the Conduit
With the conduit path complete, it’s time to run the actual circuit wires through the metal tubing.
Fish Wires Through the Conduit System
At the right-angle connector near the extension box, remove the cover plate. Drop an electrician’s fish tape down the vertical conduit until it exits the extension box. Inside the box, bind the ends of three 14-gauge stranded wires (black, white, green) with electrical tape and attach them to the fish hook.
Pull the fish tape back up, drawing the wires into the vertical conduit. Leave enough slack at the top so they won’t fall back. Then feed the fish tape through the junction box and down the conduit system. Reattach the wires at the top and pull them through the horizontal runs until they emerge inside the junction box.
Connect the Flood Light and Power Source
At the exterior outlet box, strip 6 inches of Romex sheathing and 1/2 inch of insulation from the black and white wires. Connect matching colors to the fixture wires, secure with wire nuts, wrap with tape, and mount the fixture to the outlet box.
Inside the junction box, connect the pulled wires to the Romex cable (black to black, white to white, ground to ground). Back at the extension box, install a GFCI receptacle switch, connecting black to the hot terminal, white to neutral, and ground to the ground screw. Mount the switch, attach the faceplate, and restore power at the breaker.
Wire Directly to a Switch or Breaker Panel

For dedicated control or higher loads, connect your flood light directly to a new switch or the breaker panel.
Tap Power at the Nearest Outlet
Cut power and remove the outlet. Feed a new 14/2 Romex cable into the back of the electrical box. Connect black to black, white to white, and ground to ground, using pigtails if terminals are full. Reinstall the outlet and run the new cable to the switch location.
Wire the Light to a Dedicated Switch
Cut a hole for the switch box at the desired location. Run the cable from the outlet to the switch and connect:
- Black (from power) to the bottom screw
- Black (to light) to the top screw
- Ground to the green screw
Mount the switch, install the faceplate, and run wiring to the flood light. Strip and connect matching wires in the exterior junction box, then secure the fixture.
Connect Directly to the Breaker Panel
For a full dedicated circuit, run 14/2 cable from the flood light location to the breaker box. Connect the black wire to a new 15-amp breaker, the white wire to the neutral bar, and the ground wire to the ground bar. Label the breaker clearly. Remember the 80% load rule: total connected load should not exceed 1440 watts on a 15-amp circuit.
Seal and Weatherproof Every Connection

Moisture is the enemy of outdoor electrical systems. Even small leaks can cause shorts, corrosion, or fire hazards.
Seal Wall Penetrations
Before mounting the exterior outlet box, fill the drilled hole with silicone caulk or weather-resistant putty. Press the box firmly into place so the seal forms a watertight barrier. Smooth excess caulk with a damp finger.
Protect Junction Boxes
Apply a bead of silicone around the perimeter of the indoor junction box where it meets the ceiling. For outdoor connections, ensure the outlet box has a rubber gasket. Wrap all wire nuts with electrical tape, even indoors, as an extra moisture barrier. Use UV-resistant silicone for exterior applications since standard caulk degrades under sun exposure.
Test, Troubleshoot, and Optimize Performance
Once everything is wired and sealed, bring the system online and fine-tune the settings.
Restore Power and Test Operation
Turn on the breaker. Flip the switch or wait for motion activation. If the light doesn’t turn on, turn power off immediately and check all wire connections for loose or reversed wires, confirm the bulb is functional, and test the circuit with a voltage tester. For intermittent issues, inspect wire nuts and switch terminals for poor contact.
Adjust Motion Sensor Settings
Most modern flood lights include adjustable sensors. Use the settings dials to:
- Set duration: How long the light stays on (30 seconds to 10 minutes)
- Adjust sensitivity: Reduce false triggers from pets or wind-blown debris
- Enable dusk-to-dawn mode: Light stays on all night
- Fine-tune coverage: Aim the sensor head away from trees or roads
Walk through the detection zone at night to test coverage and adjust the fixture angle to illuminate walkways, not walls.
Configure Smart Features (If Applicable)
Some LED flood lights connect to Wi-Fi or Zigbee hubs. Follow the app instructions to receive motion alerts on your phone, schedule on/off times, and integrate with security cameras or voice assistants.
Maintain Long-Term Performance
Hardwired flood lights last for years with minimal upkeep, but regular checks prevent unexpected failures.
Inspect Seals and Fixtures
Twice a year, examine the silicone seals around boxes and fixtures. Reapply caulk if cracked. Clean the lens and sensor window with a soft cloth to remove dirt, spider webs, or ice buildup.
Replace Bulbs or Fixtures as Needed
LED units often have non-replaceable diodes. When brightness fades or the unit fails, replace the entire fixture. For traditional models, swap bulbs promptly when they burn out. Upgrading from halogen to LED equivalents cuts energy use by 75% and lasts 10 times longer.
Frequently Asked Questions About Hardwiring Flood Lights
Do I need a permit to hardwire flood lights?
It depends on your location and the scope of work. Many jurisdictions require an electrical permit for new circuit installations or significant wiring changes. Contact your local permit office to confirm requirements before starting.
Can I install flood lights without an existing junction box?
Yes, but you’ll need to install one. For surface-mounted installations on garages or exterior walls, running wires through conduit to a new junction box is the standard code-compliant method.
What wire gauge should I use for flood lights?
For most residential flood light circuits on a 15-amp breaker, 14-gauge wire is sufficient. If you’re running a 20-amp circuit or installing high-wattage fixtures, upgrade to 12-gauge wire to match.
How high should flood lights be mounted?
Mount flood lights at a minimum height of 9 feet off the ground. This height provides optimal light spread, reduces glare, and keeps fixtures out of easy reach.
What is the 80% load rule for circuits?
The National Electrical Code recommends that total connected load should not exceed 80% of a circuit’s capacity. On a 15-amp circuit, that means no more than 1440 watts of continuous load.
Can I tap into an existing outlet instead of running a new circuit?
Yes. Tapping into a nearby outlet is a common method for flood light installations. Just ensure the existing circuit has enough capacity to handle the additional load without exceeding the 80% rule.
Key Takeaways for a Safe, Long-Lasting Flood Light Installation
Hardwiring flood lights delivers unmatched reliability, security, and curb appeal compared to plug-in or solar alternatives. Start by choosing the right location at least 9 feet high, shut off power at the breaker, and verify the circuit is dead with a voltage tester. Match wire colors carefully (black to black, white to white, ground to ground), secure every connection with wire nuts, and wrap them with electrical tape for moisture protection. Finally, seal all wall penetrations with silicone caulk and test the system thoroughly before considering the job complete. When in doubt, hire a licensed electrician—your safety is always worth the investment.